21 Irresistible Summer Desserts Perfect for a Crowd
Summer is all about lounging in the sun and enjoying delicious treats, and what better way to celebrate than with some crowd-pleasing desserts? Whether it’s a backyard BBQ, a picnic in the park, or a friendly gathering, these sweet recipes are tailored to satisfy your guests with refreshing flavors and satisfying portions. Dive into this collection of summertime favorites that are easy to whip up and sure to bring smiles all around.
Berry Trifle With Fresh Summer Fruits
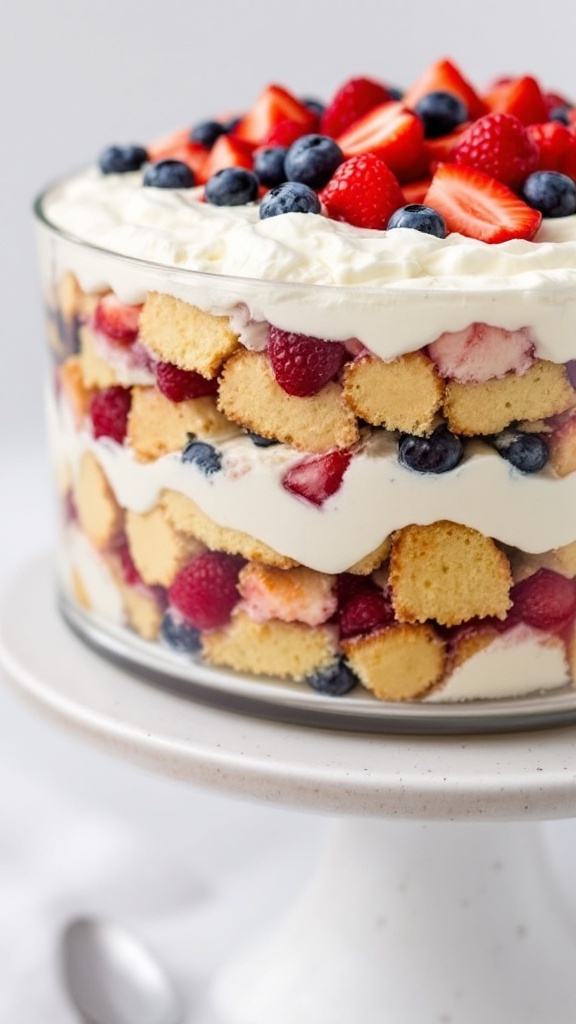
This berry trifle is a delightful and colorful dessert that captures the essence of summer. Layers of light sponge cake, creamy vanilla custard, and a medley of fresh berries create a refreshing treat that everyone will love. It’s easy to assemble, making it a perfect choice for gatherings or potlucks.
The combination of sweet strawberries, tart raspberries, and juicy blueberries provides a burst of flavor, while the creamy layer adds richness that complements the fruit perfectly. Whether you’re a novice baker or a seasoned pro, this recipe is simple and fun to make!
Ingredients
- 1 pound of fresh strawberries, hulled and sliced
- 1 cup of blueberries
- 1 cup of raspberries
- 1 package (10 ounces) of sponge cake, cut into cubes
- 2 cups of vanilla pudding or custard
- 1 cup of whipped cream
- 2 tablespoons of sugar (optional)
- Mint leaves for garnish (optional)
Instructions
- Layer the Cake: In a large trifle dish or bowl, start by placing a layer of sponge cake cubes at the bottom.
- Add Fruit: Spread a layer of sliced strawberries, blueberries, and raspberries over the sponge cake.
- Spread the Custard: Pour a layer of vanilla pudding or custard over the fruit, smoothing it out gently.
- Repeat Layers: Continue layering with sponge cake, fruit, and custard until the dish is full, finishing with a layer of custard.
- Top with Whipped Cream: Spread whipped cream on the top layer and decorate with remaining berries. You can sprinkle with sugar if desired.
- Chill: Refrigerate the trifle for at least an hour before serving to allow the flavors to meld. Garnish with mint leaves if you like.
Strawberry Sheet Cake With Cream Cheese Frosting
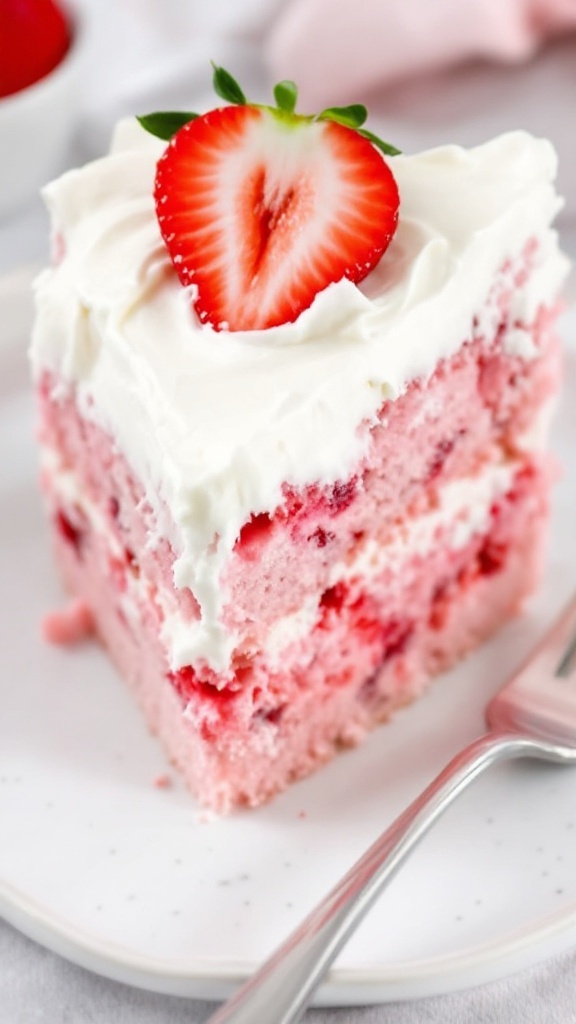
Strawberry Sheet Cake is a delightful treat perfect for summer gatherings. This light and fluffy cake bursts with fresh strawberry flavor, making it a refreshing choice on warm days. Topped with a creamy cream cheese frosting, it’s both indulgent and satisfying without being overly heavy.
Making this cake is simple and straightforward, even for novice bakers. With just a few ingredients and easy steps, you can whip up a delightful dessert that will impress your family and friends. Serve it at picnics, barbecues, or any summer celebration, and watch it disappear!
Ingredients
- 2 cups all-purpose flour
- 2 teaspoons baking powder
- 1/2 teaspoon salt
- 3/4 cup unsalted butter, softened
- 2 cups granulated sugar
- 4 large eggs
- 1 teaspoon vanilla extract
- 1 cup milk
- 1 cup fresh strawberries, pureed
- 1 package (8 oz) cream cheese, softened
- 4 cups powdered sugar
- 1 teaspoon vanilla extract (for frosting)
- Fresh strawberries for garnish
Instructions
- Preheat your oven to 350°F (175°C) and grease a sheet cake pan.
- In a bowl, whisk together flour, baking powder, and salt. Set aside.
- In a large bowl, cream the softened butter and sugar until light and fluffy. Add eggs one at a time, mixing well after each addition. Stir in vanilla extract.
- Gradually add the dry ingredients to the creamed mixture, alternating with milk and strawberry puree. Mix until just combined.
- Pour the batter into the prepared pan and smooth the top. Bake for 25-30 minutes, or until a toothpick inserted in the center comes out clean.
- Let the cake cool completely in the pan before frosting.
- In a bowl, beat together cream cheese, powdered sugar, and vanilla extract until smooth. Spread the frosting over the cooled cake.
- Garnish with fresh strawberries before serving.
Peach Cobbler Slab Pie
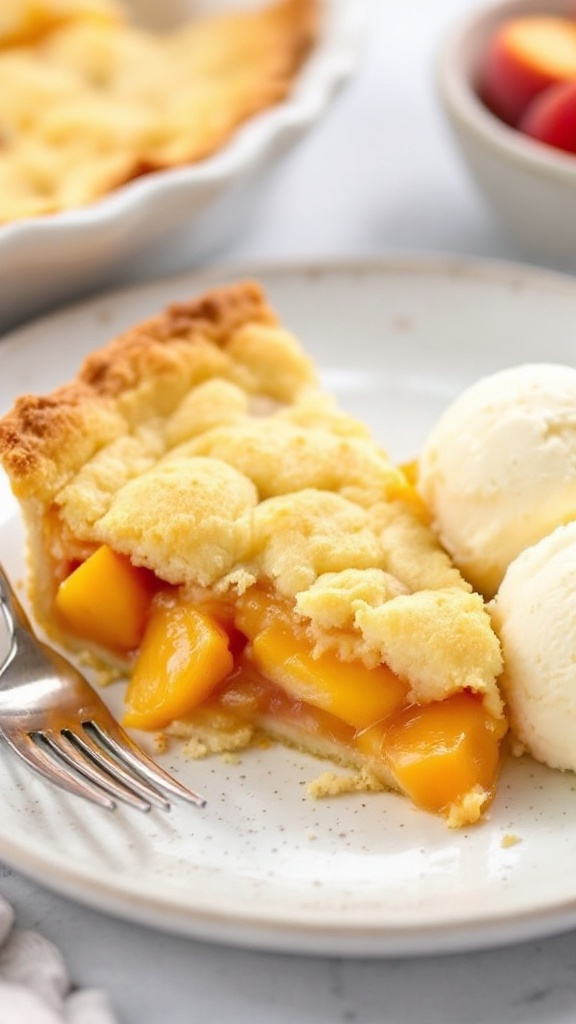
Peach Cobbler Slab Pie is a delightful dessert that’s perfect for summer gatherings. With sweet, juicy peaches nestled in a flaky crust, this dish not only pleases the palate but also offers a generous serving size. It’s surprisingly simple to make, requiring just a few ingredients and minimal effort, making it an ideal choice when you’re hosting a crowd.
As the cobbler bakes, the aroma of fresh peaches fills the kitchen, creating an inviting atmosphere. Serve it warm, perhaps with a scoop of vanilla ice cream or a drizzle of cream, to take it to the next level. Whether it’s a picnic, barbecue, or family reunion, this peach cobbler slab pie will surely be a hit!
Ingredients
- 4 cups fresh peaches, sliced
- 1 cup granulated sugar, divided
- 2 tablespoons all-purpose flour
- 1 teaspoon vanilla extract
- 1 teaspoon ground cinnamon
- 2 tablespoons lemon juice
- 1 package refrigerated pie crusts (2 crusts)
- 1 egg (for egg wash)
Instructions
- Preheat the oven to 375°F (190°C). In a large bowl, combine sliced peaches, 3/4 cup sugar, flour, vanilla extract, cinnamon, and lemon juice. Toss until well combined.
- Roll out one pie crust and fit it into a greased 9×13-inch baking dish. Pour the peach mixture evenly over the crust.
- Roll out the second pie crust and place it over the peaches. Cut slits in the top crust for steam to escape. Brush the crust with a beaten egg and sprinkle the remaining sugar on top.
- Bake for 45-50 minutes or until the crust is golden brown and the filling is bubbly. Let it cool slightly before serving.
Watermelon Pizza With Yogurt Frosting And Berries
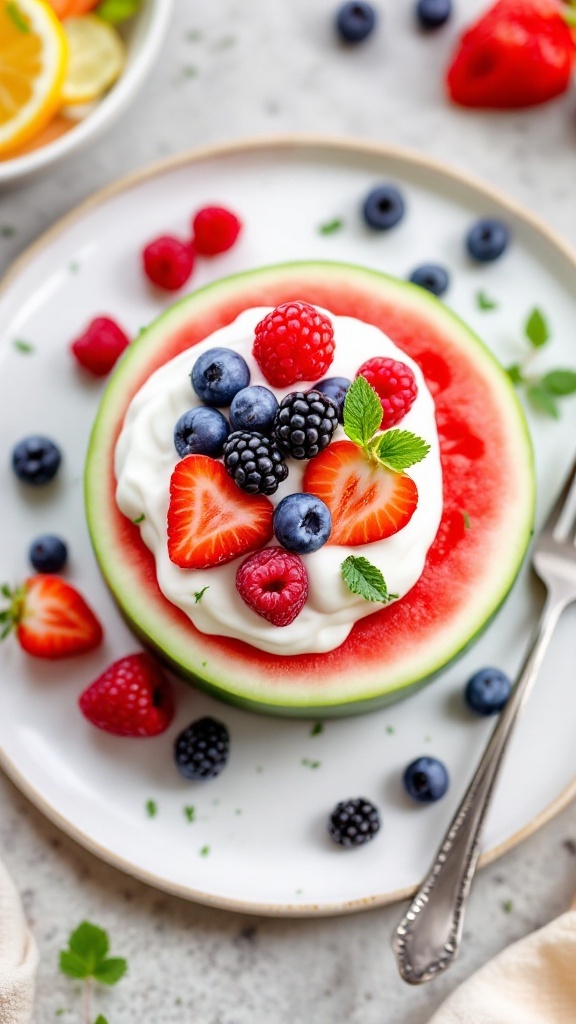
Watermelon pizza is a fun and refreshing dessert that’s perfect for summer gatherings. This light and fruity treat combines juicy watermelon slices with creamy yogurt frosting and a colorful array of berries. It’s easy to make and offers a delightful balance of sweetness and tang, making it a hit for both kids and adults.
Assembling this dessert is a breeze. Simply slice your watermelon, spread on the yogurt, and top it with your favorite berries. It’s a visually appealing dish that brings a burst of flavor and a splash of color to any table, making it a go-to choice for summer parties.
Ingredients
- 1 medium seedless watermelon
- 1 cup plain Greek yogurt
- 2 tablespoons honey or maple syrup
- 1 teaspoon vanilla extract
- 1 cup mixed berries (strawberries, blueberries, raspberries)
- Fresh mint leaves for garnish
Instructions
- Prepare the Watermelon: Slice the watermelon into thick rounds, about 1 inch in height. You can cut the rounds into pizza-like wedges if desired.
- Make the Yogurt Frosting: In a bowl, mix the Greek yogurt with honey and vanilla extract until smooth.
- Assemble the Pizza: Spread the yogurt frosting generously over the watermelon slices.
- Add the Toppings: Scatter mixed berries on top of the yogurt layer. Feel free to arrange them in a fun pattern!
- Garnish: Add fresh mint leaves for a pop of color and extra flavor.
- Serve: Slice and enjoy this refreshing dessert right away!
S’Mores Bars (No Campfire Needed)
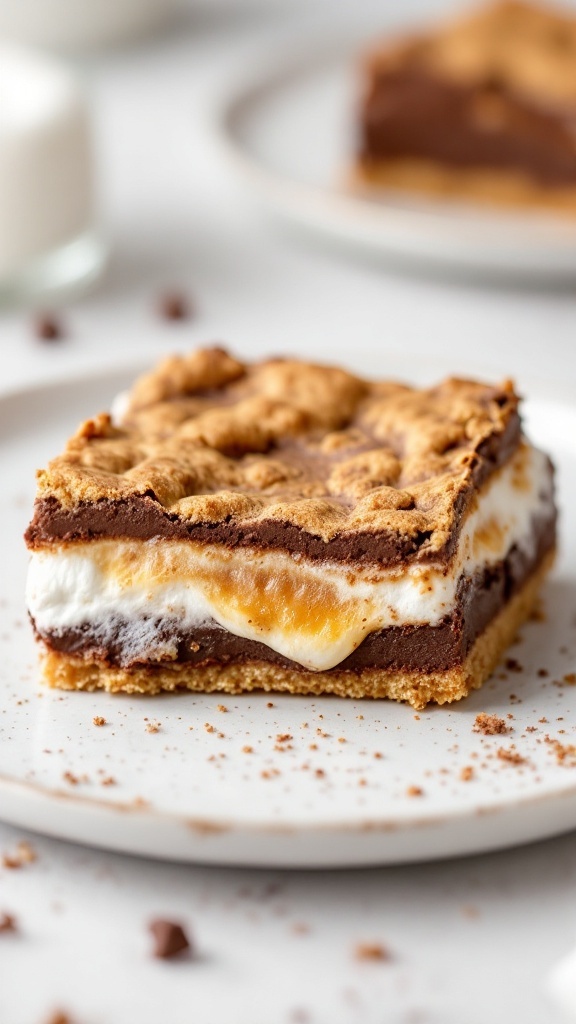
Summer gatherings are the perfect time to enjoy delicious desserts, and these S’mores Bars are an easy, crowd-pleasing treat. With layers of graham crackers, creamy marshmallow filling, and rich chocolate, they bring the classic campfire flavor without needing a fire pit. Plus, they only take a few simple steps to prepare!
These bars are sweet, chewy, and satisfying, making them a great option for any summer occasion. They are ideal for sharing at picnics, barbecues, or family get-togethers. With ingredients you likely have on hand, you can whip these up in no time!
Ingredients
- 1 cup graham cracker crumbs
- 1/2 cup unsalted butter, melted
- 1/3 cup sugar
- 2 cups mini marshmallows
- 1 cup milk chocolate chips
- 1/4 cup heavy cream
- 1/2 teaspoon vanilla extract
Instructions
- Preheat your oven to 350°F (175°C). Line an 8×8-inch baking pan with parchment paper.
- In a bowl, mix the graham cracker crumbs, melted butter, and sugar until combined. Press this mixture firmly into the bottom of the prepared baking pan.
- Bake the crust for 10 minutes, then remove from the oven and sprinkle the mini marshmallows evenly over the top.
- In a small saucepan, combine the chocolate chips and heavy cream over low heat, stirring until smooth. Remove from heat and stir in the vanilla extract.
- Pour the chocolate mixture over the marshmallow layer, spreading it evenly. Return the pan to the oven for an additional 5 minutes, or until the marshmallows are slightly toasted.
- Allow the bars to cool completely before slicing them into squares. Enjoy your delightful S’mores Bars!
Blackberry-Lemonade Sheet Cake
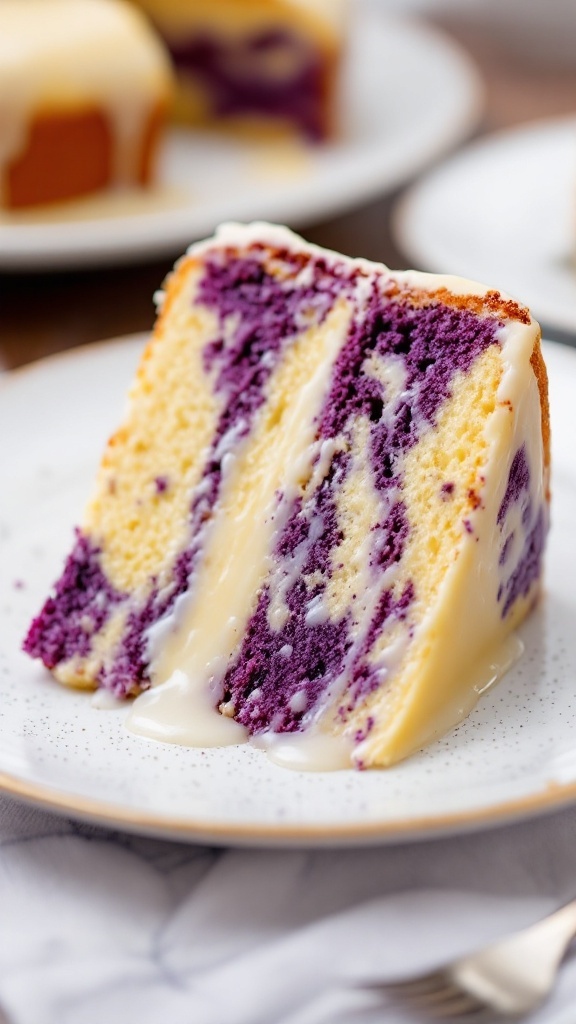
This Blackberry-Lemonade Sheet Cake is a delightful summer treat that perfectly balances tart and sweet flavors. The light lemon cake is infused with fresh blackberry puree, creating a lovely swirl that’s not just visually appealing but also bursting with flavor.
Simple to whip up, this cake is ideal for gatherings. Just mix your ingredients, pour them into a baking sheet, and let the oven do its magic. It’s a fantastic way to celebrate warm weather and share a slice of joy with friends and family.
Ingredients
- 2 cups all-purpose flour
- 1 ½ cups granulated sugar
- ½ cup unsalted butter, softened
- 1 cup whole milk
- 3 large eggs
- 2 teaspoons baking powder
- 1 teaspoon vanilla extract
- 1 cup blackberry puree
- 1 tablespoon lemon zest
- 1/4 cup fresh lemon juice
- Powdered sugar (for dusting)
Instructions
- Preheat your oven to 350°F (175°C) and grease a baking sheet.
- In a large bowl, cream together the softened butter and granulated sugar until light and fluffy. Add the eggs one at a time, mixing well after each addition.
- Stir in the milk, vanilla extract, lemon juice, and lemon zest until fully combined.
- In a separate bowl, whisk together the flour and baking powder. Gradually add the dry ingredients to the wet mixture until just combined.
- Divide the batter in half and mix one half with the blackberry puree, creating a vibrant purple batter.
- Scoop alternating spoonfuls of the lemon batter and blackberry batter onto the prepared baking sheet. Use a knife to swirl the two batters together gently.
- Bake for 25-30 minutes or until a toothpick comes out clean. Allow the cake to cool completely, then dust with powdered sugar before serving.
No-Bake Strawberry Icebox Cake
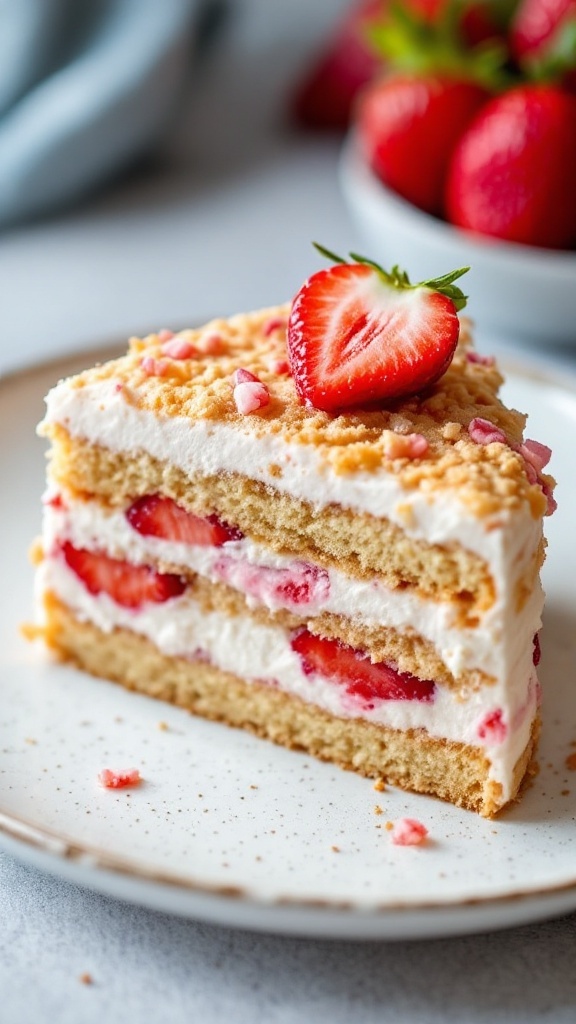
No-Bake Strawberry Icebox Cake is a delightful treat that perfectly captures the essence of summer. With layers of creamy filling and fresh strawberries, it’s both refreshing and satisfying. This dessert requires minimal effort and no baking, making it ideal for gatherings.
The combination of light whipped cream, sweet strawberries, and soft cake layers creates a balance that is both sweet and fruity. It’s a simple recipe that’s sure to impress your friends and family!
Ingredients
- 2 cups heavy whipping cream
- 1/2 cup powdered sugar
- 1 teaspoon vanilla extract
- 12 ounces of strawberries, sliced
- 1 package of ladyfinger cookies
- 1/2 cup strawberry jam
Instructions
- Whip the Cream: In a large bowl, beat the heavy whipping cream, powdered sugar, and vanilla extract until stiff peaks form.
- Layer the Ingredients: In a rectangular dish, spread a thin layer of whipped cream. Place a layer of ladyfinger cookies on top, followed by a layer of sliced strawberries. Repeat the layers until all ingredients are used, finishing with whipped cream on top.
- Add Strawberry Jam: Drizzle strawberry jam over the top layer of whipped cream.
- Chill: Cover the dish and refrigerate for at least 4 hours or overnight for best results.
- Serve: Slice and enjoy this refreshing dessert with family and friends!
Grilled Peach And Bourbon Bread Pudding
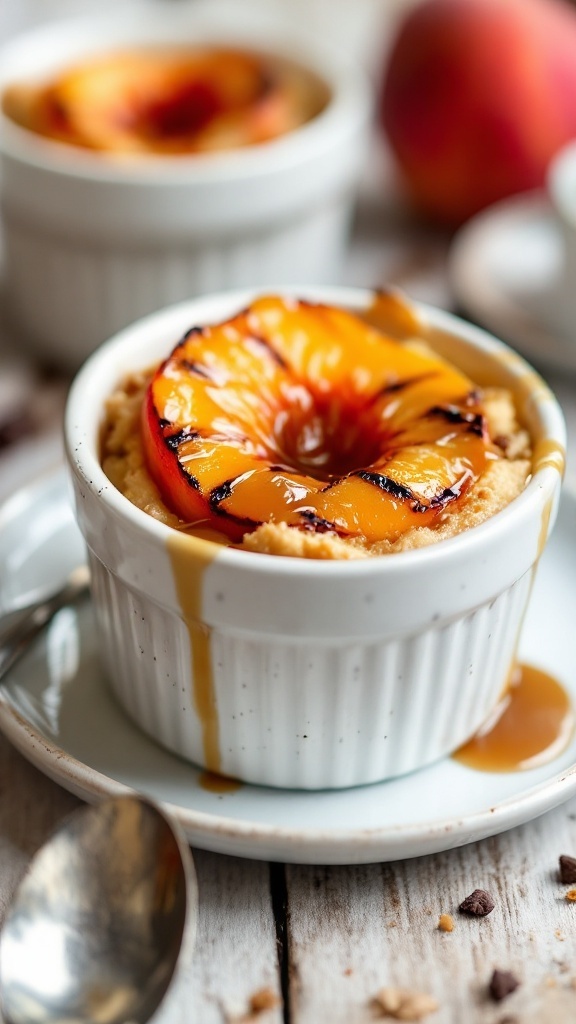
Grilled Peach and Bourbon Bread Pudding is a delightful twist on a classic dessert, combining the juicy sweetness of grilled peaches with the rich, comforting texture of bread pudding. The addition of bourbon brings a warm, inviting flavor that enhances the dish, making it a delicious choice for summer gatherings.
This recipe is quite simple to prepare, making it a great choice for entertaining a crowd. With just a few steps, you can have a comforting dessert that everyone will enjoy. Serve it warm with a scoop of vanilla ice cream for an extra treat!
Ingredients
- 4 cups of day-old bread, cubed
- 2 cups whole milk
- 1 cup heavy cream
- 3 large eggs
- 1 cup granulated sugar
- 1 teaspoon vanilla extract
- 1 teaspoon ground cinnamon
- 2-3 ripe peaches, halved and pitted
- 1/4 cup bourbon
- Butter for greasing the baking dish
Instructions
- Preheat the grill to medium heat. Brush the peach halves with a little butter and grill them cut side down for about 4-5 minutes, until they are tender and have nice grill marks. Remove and let cool, then chop into chunks.
- In a large bowl, whisk together the milk, cream, eggs, sugar, vanilla, and cinnamon until smooth. Add the cubed bread and grilled peaches, gently folding to combine.
- Pour the mixture into a greased baking dish and let it sit for about 30 minutes to soak.
- Preheat the oven to 350°F (175°C). Bake the bread pudding for 40-45 minutes, or until the top is golden and a knife inserted in the center comes out clean.
- Drizzle with bourbon before serving, and enjoy warm with your favorite ice cream!
Cherry Hand Pies
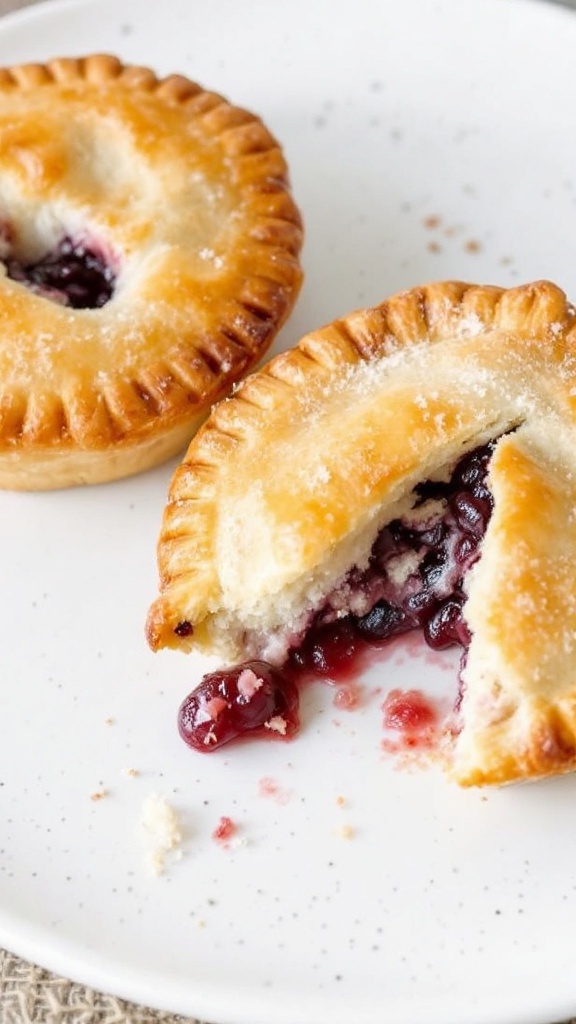
Cherry hand pies are a delightful summer treat that combine the tartness of fresh cherries with a flaky, buttery crust. These little pockets of goodness are easy to make, perfect for sharing with friends and family at gatherings.
Each bite offers a burst of sweet cherry filling, making them a refreshing dessert option. Whether served warm or at room temperature, these hand pies are sure to please any crowd looking for a light and fruity dessert.
Ingredients
- 2 cups fresh cherries, pitted and halved
- 3/4 cup granulated sugar
- 1 tablespoon cornstarch
- 1 teaspoon vanilla extract
- 1 tablespoon lemon juice
- 1 package refrigerated pie crusts (2 crusts)
- 1 egg, beaten (for egg wash)
- Powdered sugar, for dusting
Instructions
- Prepare the Filling: In a mixing bowl, combine the cherries, granulated sugar, cornstarch, vanilla extract, and lemon juice. Stir well and let it sit for about 10 minutes to allow the juices to develop.
- Preheat the Oven: Preheat your oven to 400°F (200°C) and line a baking sheet with parchment paper.
- Roll Out the Dough: On a floured surface, roll out the pie crusts. Use a round cutter or a glass to cut out circles, about 4 inches in diameter.
- Assemble the Pies: Place a tablespoon of the cherry filling in the center of each circle. Fold the dough over to create a half-moon shape and press the edges to seal. Use a fork to crimp the edges for a decorative touch.
- Brush and Bake: Place the hand pies on the prepared baking sheet. Brush the tops with the beaten egg for a golden finish. Bake for 20-25 minutes or until they are lightly browned.
- Cool and Serve: Let the hand pies cool on a wire rack. Dust with powdered sugar before serving for a sweet touch.
Blueberry Buckle With Streusel Topping
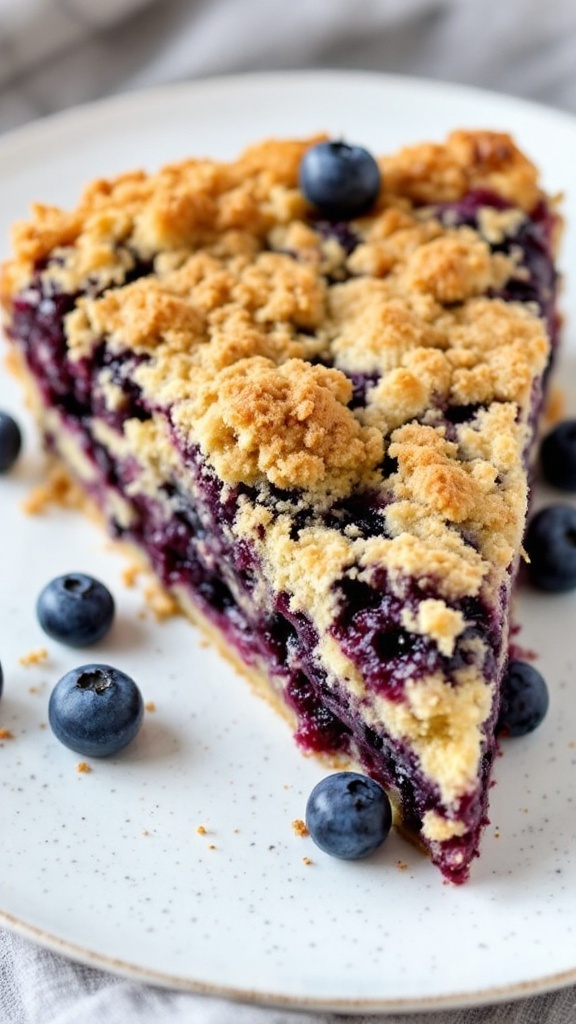
Blueberry buckle is a delightful dessert that combines a light, moist cake with a sweet and tangy blueberry filling, all topped with a crunchy streusel. The balance of flavors makes it a hit for summer gatherings. Plus, it’s simple to make, so you can whip it up without any stress!
This dish not only satisfies your sweet tooth but also celebrates the fresh blueberries of the season. The buttery streusel topping adds a delightful crunch to each bite, making it a go-to recipe for sharing with friends and family at summer events.
Ingredients
- 2 cups fresh blueberries
- 1 cup granulated sugar
- 1/2 cup unsalted butter, softened
- 1 cup all-purpose flour
- 2 teaspoons baking powder
- 1/2 teaspoon salt
- 2 large eggs
- 1 teaspoon vanilla extract
- 1/4 cup milk
- 1/2 cup brown sugar
- 1 cup rolled oats
- 1 teaspoon ground cinnamon
Instructions
- Preheat the oven to 350°F (175°C) and grease a 9-inch square baking dish.
- In a large bowl, cream together the softened butter and granulated sugar until light and fluffy. Beat in the eggs one at a time, then stir in the vanilla extract.
- In another bowl, combine the flour, baking powder, and salt. Gradually add this dry mixture to the wet ingredients, alternating with the milk, until just combined. Gently fold in the blueberries.
- Pour the batter into the prepared baking dish, spreading it evenly.
- In a separate bowl, mix together the brown sugar, rolled oats, and ground cinnamon. Sprinkle this mixture over the top of the batter.
- Bake for 40-45 minutes, or until a toothpick inserted into the center comes out clean. Allow to cool slightly before serving.
Raspberry Lemonade Bars
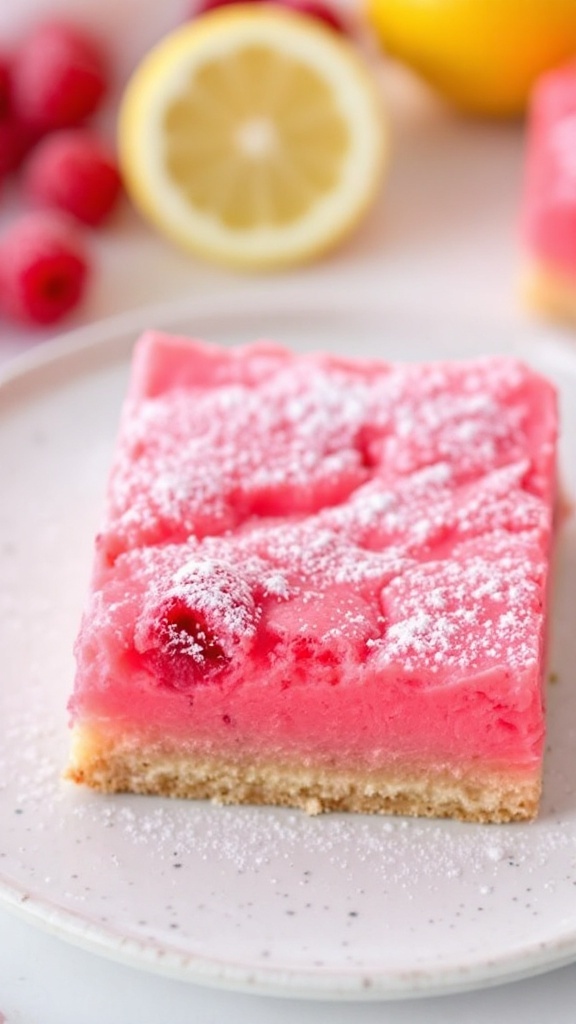
Raspberry Lemonade Bars are a delightful summer treat that perfectly balances sweet and tart flavors. These bars feature a buttery crust topped with a refreshing lemon filling, complemented by vibrant raspberry goodness. They’re not only tasty but also super easy to whip up, making them an ideal dessert for gatherings.
With their bright colors and zesty taste, these bars are sure to impress your guests. They can be made in advance and served chilled, which is perfect for those hot summer days. Enjoying the combination of raspberry and lemon will have everyone coming back for seconds!
Ingredients
- 1 cup all-purpose flour
- 1/4 cup powdered sugar
- 1/2 cup unsalted butter, softened
- 2 large eggs
- 1 cup granulated sugar
- 1/4 cup fresh lemon juice
- 1 teaspoon lemon zest
- 1 cup fresh raspberries
- 1 tablespoon cornstarch
- 1/4 teaspoon salt
- Powdered sugar for dusting
Instructions
- Preheat your oven to 350°F (175°C). Grease a 9×9 inch baking pan.
- Make the Crust: In a bowl, mix flour and powdered sugar. Cut in the butter until the mixture resembles coarse crumbs. Press it into the bottom of the prepared baking pan and bake for 15 minutes.
- Prepare the Filling: In another bowl, whisk together eggs, granulated sugar, lemon juice, lemon zest, and salt. Gently fold in the fresh raspberries after coating them with cornstarch.
- Pour the filling over the pre-baked crust and bake for an additional 20-25 minutes, or until the filling is set.
- Let the bars cool completely, then dust with powdered sugar before slicing into squares and serving.
Key Lime Pie Squares
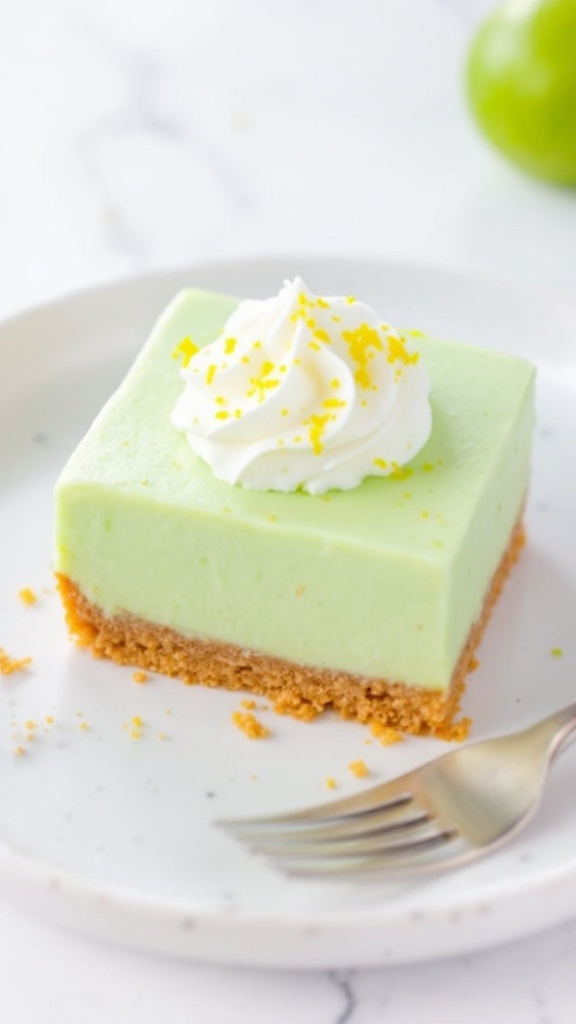
Key Lime Pie Squares are a delightful twist on the classic key lime pie, bringing a refreshing citrus flavor that’s perfect for summer gatherings. These squares offer a creamy, tangy filling atop a crisp graham cracker crust, making them both simple to prepare and enjoyable to eat. They’re a crowd-pleasing dessert that balances sweetness with a zesty kick, ideal for warm weather.
This recipe provides a great way to satisfy your sweet tooth without spending hours in the kitchen. With just a few ingredients and easy steps, you’ll have a delicious dessert ready to serve at your next barbecue or picnic.
Ingredients
- 1 ½ cups graham cracker crumbs
- ½ cup granulated sugar
- ⅓ cup unsalted butter, melted
- 1 cup sweetened condensed milk
- ½ cup key lime juice
- 3 large egg yolks
- 1 teaspoon lime zest
- Whipped cream for serving
Instructions
- Preheat the oven to 350°F (175°C). In a bowl, mix together the graham cracker crumbs, sugar, and melted butter until well combined.
- Press the mixture firmly into the bottom of a greased 9×9-inch baking pan to form the crust. Bake for about 8-10 minutes until golden brown.
- In a separate bowl, whisk together the sweetened condensed milk, key lime juice, egg yolks, and lime zest until smooth.
- Pour the filling over the baked crust and spread evenly. Bake for an additional 15-18 minutes until set.
- Allow to cool before refrigerating for at least 2 hours. Cut into squares and serve with whipped cream on top.
Mixed Berry Crumble Bars
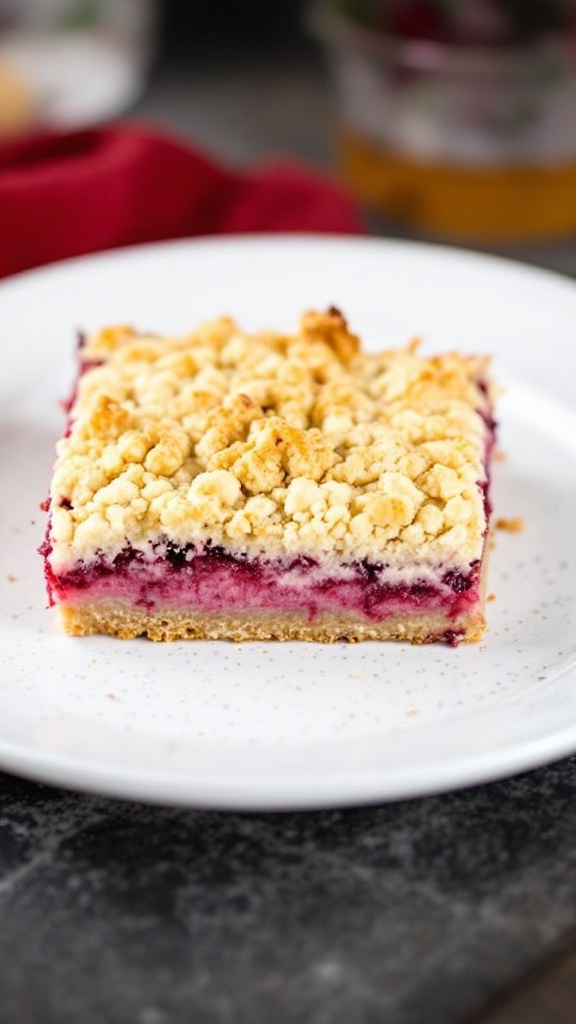
Mixed Berry Crumble Bars are a delightful summer treat that combines the juicy sweetness of berries with a buttery crumble topping. These bars are not only delicious but also incredibly easy to make, making them a perfect option for gatherings or picnics. The balance of tart and sweet flavors will leave everyone asking for seconds.
With a simple crust and a fruit filling, these bars are as comforting as they are refreshing. They can be made ahead of time and served chilled or at room temperature, making them a stress-free dessert choice for a crowd.
Ingredients
- 1 1/2 cups all-purpose flour
- 1/2 cup granulated sugar
- 1/2 cup unsalted butter, softened
- 1 cup mixed berries (strawberries, blueberries, raspberries)
- 1 tablespoon cornstarch
- 1 tablespoon lemon juice
- 1 teaspoon vanilla extract
- 1/4 teaspoon salt
- 1/2 cup rolled oats
- 1/4 cup brown sugar
Instructions
- Preheat the oven to 350°F (175°C). Grease an 8×8 inch baking dish.
- In a medium bowl, combine flour, granulated sugar, and salt. Mix in softened butter until crumbly.
- Press half of the mixture into the bottom of the prepared baking dish to form the crust.
- In another bowl, mix the berries with cornstarch, lemon juice, and vanilla extract. Pour this mixture over the crust.
- Sprinkle the remaining crumb mixture on top of the berries, followed by the rolled oats and brown sugar.
- Bake for 30-35 minutes, or until the top is golden and the berries are bubbling.
- Allow to cool before cutting into bars. Serve chilled or at room temperature.
Watermelon-Mint Sorbet Cups
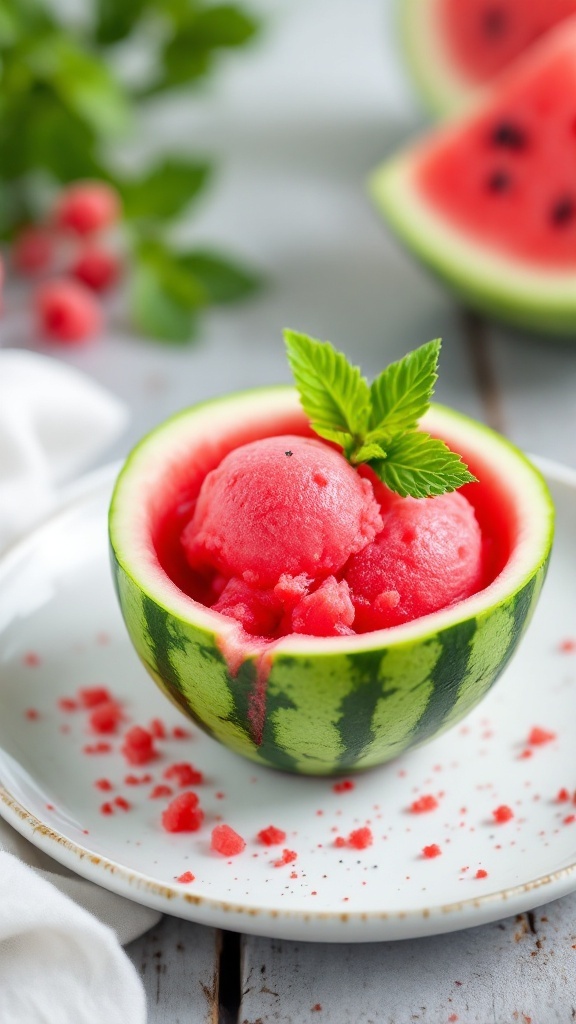
Watermelon-Mint Sorbet Cups are the perfect way to cool off during those hot summer days. With the refreshing taste of watermelon combined with a hint of mint, this dessert is light, fruity, and oh-so-delicious. Plus, it’s super easy to whip up, making it an excellent choice for gatherings.
This sorbet is not only pleasing to the palate but also visually appealing, especially when served in cups made from the watermelon rind. Your guests will appreciate the unique presentation as much as the refreshing flavor. It’s a delightful treat that everyone will enjoy!
Ingredients
- 4 cups watermelon, cubed and seedless
- 1/4 cup fresh mint leaves
- 1/4 cup lemon juice
- 2 tablespoons honey or agave syrup (optional, adjust for sweetness)
- 1 tablespoon vodka (optional, to keep it scoopable)
Instructions
- Blend the Watermelon: In a blender, combine the cubed watermelon, mint leaves, lemon juice, and honey/agave syrup. Blend until smooth.
- Strain (Optional): For a smoother texture, strain the mixture through a fine mesh sieve to remove any pulp.
- Chill: Pour the mixture into a shallow dish and place it in the freezer for about 1-2 hours until it starts to firm up.
- Whip: Once it’s partially frozen, use a fork to scrape and whip the mixture, breaking up any ice crystals. Return it to the freezer for another hour.
- Serve: Scoop the sorbet into cups made from the watermelon rind or any serving bowl. Garnish with extra mint leaves for a refreshing touch!
Fresh Corn And Blackberry Poke Cake
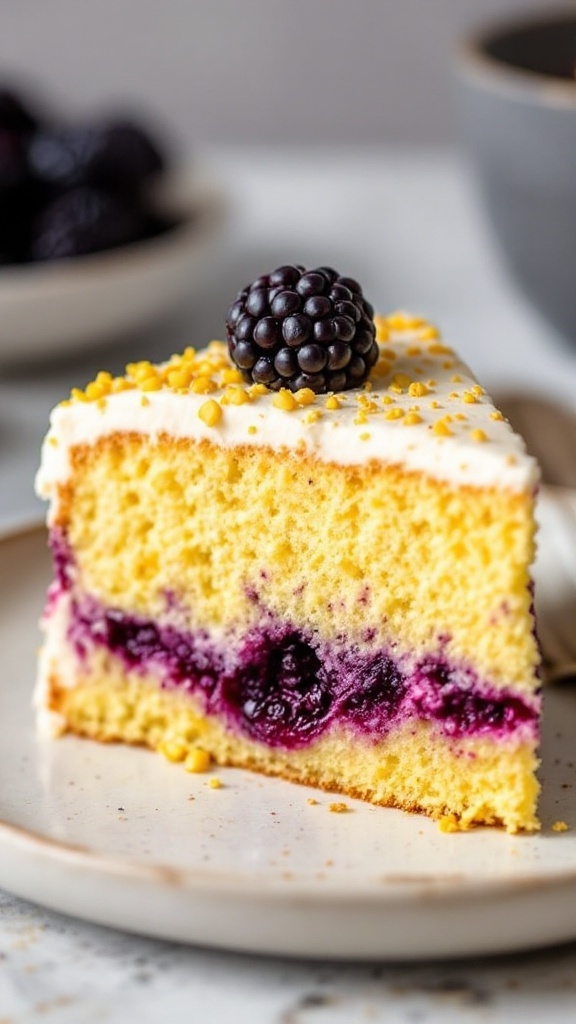
Fresh Corn and Blackberry Poke Cake is a delightful dessert that brings together sweet, juicy blackberries and the subtle sweetness of fresh corn. This cake is not only light and fluffy but also packed with flavor, making it a refreshing treat for warm summer gatherings. Its unique combination of ingredients is sure to surprise and delight your guests.
Making this poke cake is simple and requires minimal effort. The basic cake batter is enhanced by poking holes after baking, allowing the blackberry syrup to seep in and infuse the cake with vibrant flavor. Topped with a creamy frosting, this dessert is perfect for any summer occasion!
Ingredients
- 1 box yellow cake mix
- 1 cup sweet corn kernels (fresh or frozen)
- 1 cup blackberries
- 1 cup water
- 1 cup blackberry syrup (store-bought or homemade)
- 1 cup whipped topping
- 1/2 cup cream cheese, softened
- 1/2 cup powdered sugar
- 1 teaspoon vanilla extract
Instructions
- Preheat your oven to 350°F (175°C) and grease a 9×13 inch baking pan.
- Prepare the cake mix according to package instructions, adding sweet corn kernels to the batter.
- Pour the batter into the prepared pan and bake for 30-35 minutes, or until a toothpick inserted into the center comes out clean.
- Once the cake has cooled for about 10 minutes, poke holes all over the top using a fork.
- Pour the blackberry syrup over the cake, allowing it to seep into the holes.
- In a medium bowl, beat together the cream cheese, powdered sugar, and vanilla until smooth. Fold in the whipped topping until well combined.
- Spread the cream cheese mixture over the cake and top with fresh blackberries. Chill in the refrigerator for at least 1 hour before serving.
Peach Sweet Tea Popsicles (Batch Frozen)
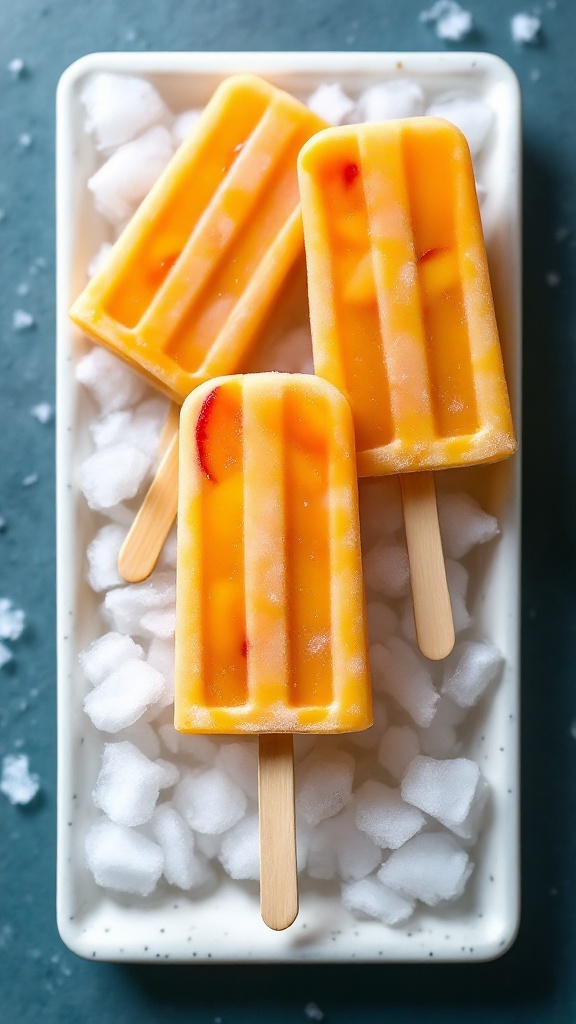
Peach Sweet Tea Popsicles are a refreshing treat that perfectly captures the essence of summer. With the sweet taste of ripe peaches blended into classic sweet tea, these popsicles are not only delicious but also simple to whip up. They are sure to impress a crowd, making them a go-to dessert for warm afternoons.
The combination of sweet tea and juicy peaches creates a delightful flavor balance that is both soothing and invigorating. Plus, making a large batch means you’ll have plenty to share with friends and family, keeping everyone cool and satisfied!
Ingredients
- 2 cups brewed sweet tea (cooled)
- 2 cups fresh peaches, pureed
- 1/4 cup honey or sugar (adjust to taste)
- 1 tablespoon lemon juice
- Peach slices for garnish (optional)
Instructions
- In a blender, combine the pureed peaches, cooled sweet tea, honey (or sugar), and lemon juice. Blend until smooth.
- Taste the mixture and adjust the sweetness if needed.
- Pour the mixture into popsicle molds, leaving a little space at the top for expansion.
- If desired, add a slice of peach to each mold for garnish.
- Insert the popsicle sticks and freeze for at least 6 hours or until fully set.
- To release the popsicles, run warm water over the outside of the molds for a few seconds. Enjoy your Peach Sweet Tea Popsicles!
Cherry Cheesecake Dip With Graham Crackers
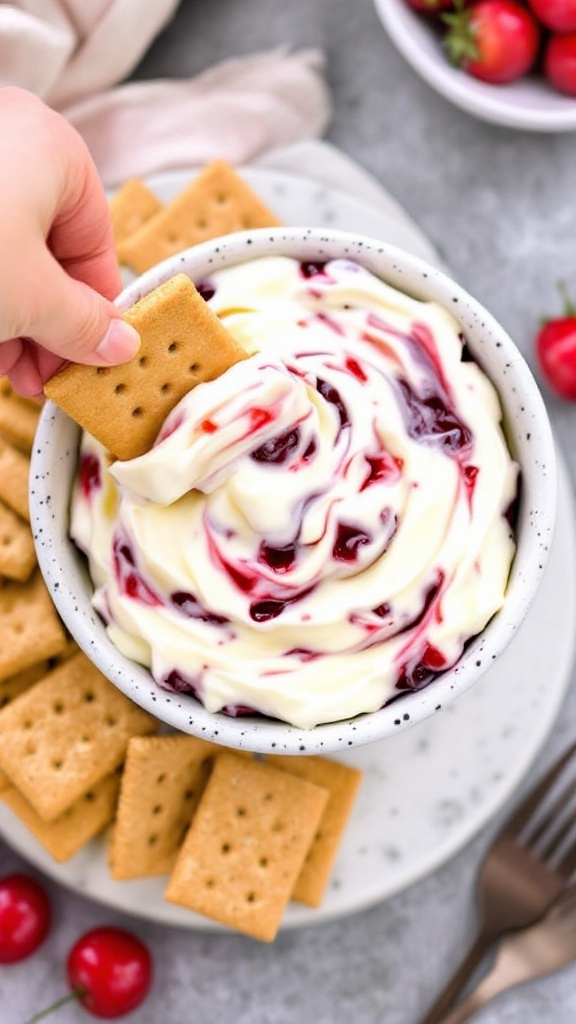
Cherry cheesecake dip is a delightful treat that captures the classic flavors of a cheesecake in a fun and shareable way. Creamy, sweet, and tangy, this dip pairs perfectly with crunchy graham crackers, making it an enjoyable dessert option for gatherings. Plus, it’s easy to whip up, making it a go-to recipe for those hot summer days.
The combination of cream cheese, whipped topping, and cherry pie filling creates a smooth and decadent dip that everyone will love. Serve it at your next barbecue or picnic, and watch it disappear in no time!
Ingredients
- 8 oz cream cheese, softened
- 1 cup powdered sugar
- 1 cup whipped topping
- 1 teaspoon vanilla extract
- 1 cup cherry pie filling
- Graham crackers for dipping
Instructions
- In a medium bowl, beat the softened cream cheese with an electric mixer until smooth.
- Add in the powdered sugar and vanilla extract, mixing until well combined.
- Gently fold in the whipped topping until the mixture is creamy and fluffy.
- Transfer the dip to a serving bowl and swirl the cherry pie filling on top.
- Serve immediately with graham crackers for dipping or chill in the refrigerator until ready to serve.
Summer Berry Pudding
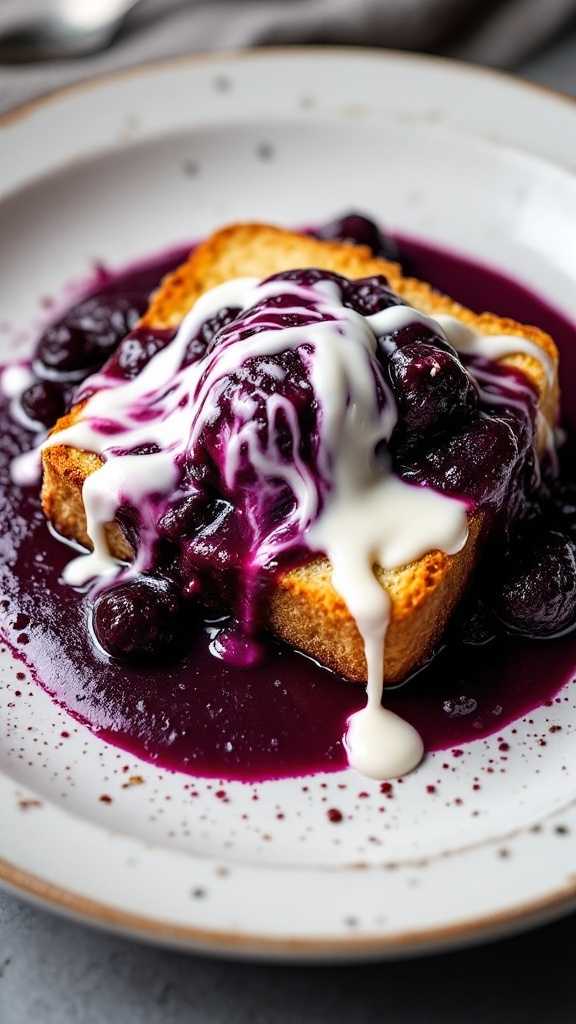
Summer Berry Pudding is a delightful dessert that captures the essence of fresh summer fruits. This colorful dish combines layers of soft bread with a medley of juicy berries, creating a sweet and vibrant treat that’s perfect for warm days. It’s easy to whip up, making it an excellent choice for gatherings or picnics.
The flavors of strawberries, raspberries, and blackberries meld together beautifully, offering a refreshing taste with each bite. Topped with a dollop of cream or yogurt, this pudding not only looks appealing but also satisfies your sweet cravings without being overly indulgent. It’s a fun and simple way to showcase seasonal berries!
Ingredients
- 4 cups mixed berries (strawberries, raspberries, blackberries)
- 1/2 cup granulated sugar
- 1 cup water
- 8 slices of white bread, crusts removed
- 1 cup heavy cream (or yogurt) for serving
Instructions
- Prepare the Berries: In a saucepan, combine the mixed berries, sugar, and water. Cook over medium heat until the berries soften and release their juices, about 5-7 minutes. Remove from heat and let it cool slightly.
- Assemble the Pudding: Line a bowl with plastic wrap and layer the bread slices around the sides and bottom. Pour half of the berry mixture into the bowl, then add another layer of bread on top, followed by the remaining berry mixture. Top with more bread, pressing down gently to compact the layers.
- Chill: Cover the pudding with plastic wrap and place a weight on top to help it set. Refrigerate for at least 4 hours or overnight.
- Serve: When ready to serve, invert the pudding onto a serving plate. Remove the plastic wrap and cut into slices. Serve with whipped cream or yogurt on the side.
Grilled Pineapple And Pound Cake Skewers
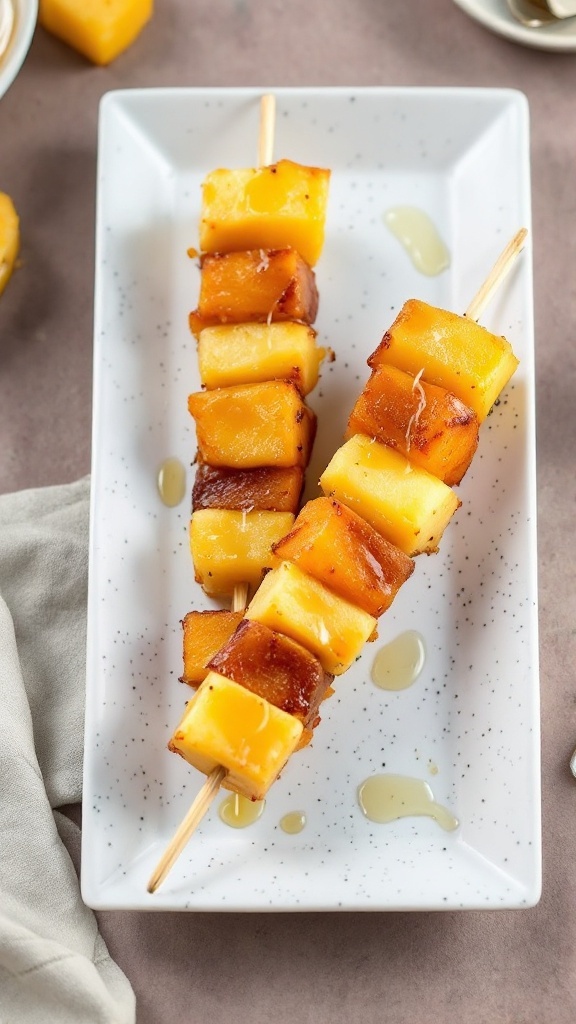
Grilled pineapple and pound cake skewers are a delightful summer treat that combines the sweetness of caramelized fruit with the richness of buttery cake. They’re easy to prepare, making them perfect for gatherings or backyard barbecues. The smoky flavor from the grill enhances the natural sweetness of the pineapple, while the cake adds a comforting texture that everyone will love.
These skewers are not only visually appealing but also incredibly versatile. You can drizzle them with a simple syrup, add a scoop of ice cream, or even serve them with a dollop of whipped cream. In just a few steps, you can create a dessert that will bring smiles to your guests’ faces.
Ingredients
- 1 fresh pineapple, peeled and cut into cubes
- 1 pound cake, cut into cubes
- 1/4 cup brown sugar
- 1 tablespoon cinnamon
- Wooden skewers (soaked in water for at least 30 minutes)
- Honey or caramel sauce for drizzling
Instructions
- Prepare the Skewers: Thread alternating pieces of pineapple and pound cake onto the soaked wooden skewers. Aim for 3-4 pieces of each on every skewer.
- Mix the Topping: In a small bowl, combine brown sugar and cinnamon. Sprinkle this mixture over the skewers to add flavor.
- Grill the Skewers: Preheat your grill to medium heat. Place the skewers on the grill, cooking for about 2-3 minutes on each side or until the pineapple is caramelized and the pound cake is lightly toasted.
- Serve: Once cooked, remove the skewers from the grill and drizzle with honey or caramel sauce before serving. Enjoy!
Sweet Corn Ice Cream Sundae Bar
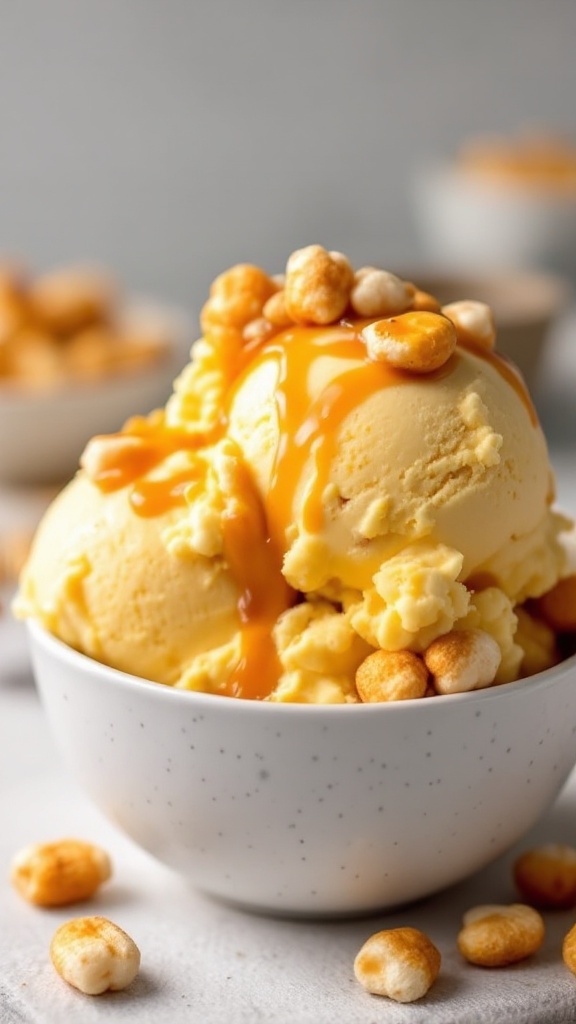
Summer is the perfect time to get creative with desserts, and a Sweet Corn Ice Cream Sundae Bar is a delightful way to do just that. This recipe highlights the natural sweetness of corn, blended into a creamy ice cream that’s unique yet approachable. The taste is a wonderful balance of sweet and creamy, making it a refreshing treat for hot days.
Setting up a sundae bar is also a fun experience for guests. You can create a build-your-own sundae station, allowing everyone to customize their dessert with toppings like caramel sauce, marshmallows, and more. It’s simple to prepare and sure to be a hit at any gathering!
Ingredients
- 2 cups fresh sweet corn kernels (about 4 ears)
- 1 cup heavy cream
- 1 cup whole milk
- 3/4 cup granulated sugar
- 1 teaspoon vanilla extract
- 1/4 teaspoon salt
- Your favorite sundae toppings (e.g., caramel sauce, mini marshmallows, crushed nuts, whipped cream)
Instructions
- Prepare the Corn: In a medium saucepan, combine the sweet corn, heavy cream, and milk. Cook over medium heat until the mixture is warm and the flavors begin to meld, about 5 minutes.
- Blend the Mixture: Remove the saucepan from heat and let it cool slightly. Then, blend the mixture using an immersion blender or a regular blender until smooth. Strain through a fine mesh sieve to remove any solids.
- Chill: Stir in the sugar, vanilla extract, and salt. Refrigerate the mixture for at least 2 hours or until thoroughly chilled.
- Churn: Once chilled, churn the mixture in an ice cream maker according to the manufacturer’s instructions until it reaches a soft-serve consistency.
- Freeze: Transfer the ice cream to an airtight container and freeze for at least 4 hours or until firm.
- Serve: Set up your sundae bar with the sweet corn ice cream and a variety of toppings. Invite guests to create their own sundaes!
Plum And Nectarine Upside-Down Sheet Cake
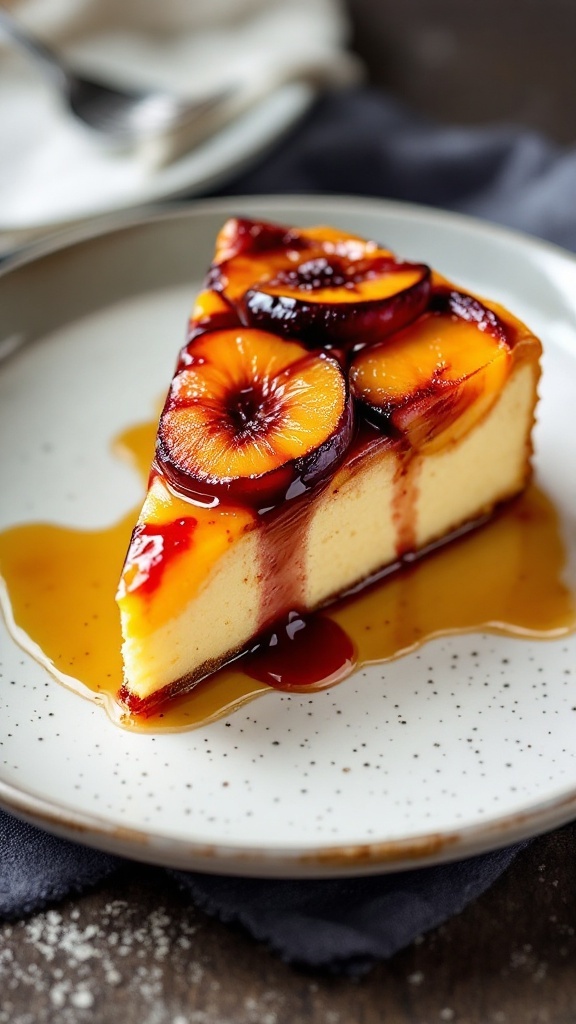
This Plum and Nectarine Upside-Down Sheet Cake is a delightful way to celebrate summer’s fresh fruits. With a moist, tender cake base and sweet, caramelized stone fruits on top, it brings a burst of flavor to any gathering. Plus, it’s simple to whip up, making it perfect for both novice and experienced bakers alike.
The juicy plums and nectarines create a beautiful contrast against the light cake, while their natural sweetness shines through. This dessert is not only visually appealing but also easy to cut and serve, making it ideal for parties or family get-togethers.
Ingredients
- 4 ripe nectarines, sliced
- 4 ripe plums, sliced
- 1/2 cup unsalted butter
- 1 cup brown sugar
- 2 cups all-purpose flour
- 1 tablespoon baking powder
- 1/2 teaspoon salt
- 1 cup granulated sugar
- 2 large eggs
- 1 teaspoon vanilla extract
- 1 cup milk
Instructions
- Preheat your oven to 350°F (175°C) and grease a sheet pan.
- In a skillet, melt butter over medium heat, then stir in brown sugar until dissolved. Remove from heat and pour into the prepared sheet pan.
- Arrange the sliced nectarines and plums on top of the sugar mixture.
- In a bowl, whisk together flour, baking powder, and salt. In another bowl, cream together granulated sugar and eggs until fluffy, then mix in vanilla and milk.
- Gradually add the dry ingredients to the wet ingredients, mixing until just combined. Pour the batter over the fruit in the sheet pan.
- Bake for 30-35 minutes or until a toothpick inserted in the center comes out clean. Let cool for a few minutes before inverting onto a serving platter.