
Crispy BBQ Chicken Wraps
These BBQ chicken wraps have become my go-to when I need something that feels like takeout but won’t leave me with regrets. The chicken gets properly crispy thanks to a quick pan-fry, and tossing it in BBQ sauce while it’s still hot means the sauce actually sticks instead of making the whole thing soggy.
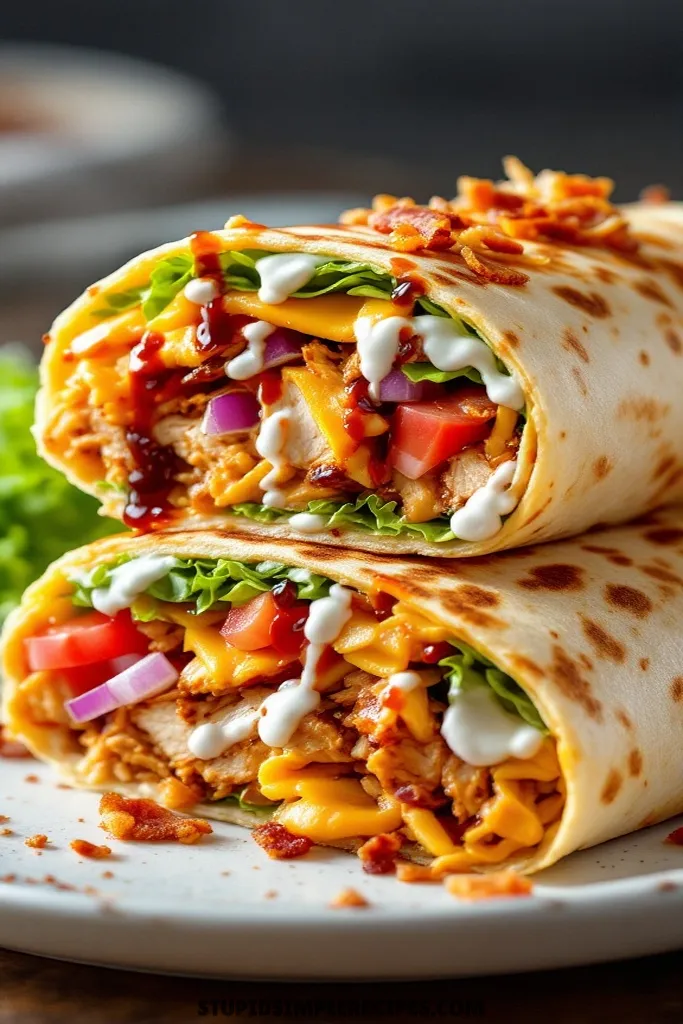
I usually make these on busy weeknights, but they’re also great for casual get-togethers since you can prep everything ahead and just assemble when needed. The cold, crunchy slaw balances out the warm chicken, and the whole thing stays tight and neat if you wrap it properly. Much less messy than traditional BBQ chicken, and you still get all those satisfying flavors.
What you need for Crispy BBQ Chicken Wraps
Ingredients You’ll Need For This Recipe
- Large flour tortillas
- Cooked, shredded chicken
- BBQ sauce
- Ranch dressing
- Shredded cheddar cheese
- Shredded lettuce
- Diced tomatoes
- Red onion, thinly sliced
- Crispy fried onions
- Bacon bits
- Vegetable oil (for crisping tortillas)
- Salt and pepper to taste
How to Make Crispy BBQ Chicken Wraps
1. Start by warming the tortillas slightly – about 15-20 seconds in the microwave wrapped in slightly damp paper towels. This makes them more pliable and less likely to crack when we fold them.
2. In a small bowl, mix your shredded chicken with enough BBQ sauce to coat it well – I usually use about 1/3 cup for 2 cups of chicken. You want it moist but not swimming in sauce, or your wrap will get soggy.
3. Lay out your warmed tortillas and spread about 1 tablespoon of ranch dressing in the center of each, leaving a 2-inch border around the edges. The ranch acts like glue and adds amazing flavor.
4. Layer the ingredients in this order (trust me, it matters for the best texture):
– BBQ chicken mixture
– Shredded cheese
– Diced tomatoes
– Red onion slices
– Shredded lettuce
– Crispy fried onions
– Bacon bits
Keep everything about 2 inches from the edges.
5. To fold: First fold the sides in about 2 inches over the filling. Then, holding those sides in place, fold the bottom up and over the filling, tucking it under slightly to make it tight. Roll forward, keeping it snug but not so tight that ingredients squeeze out.
6. Heat about 2 tablespoons of oil in a large skillet over medium heat until it shimmers. Place your wraps seam-side down first – this seals them shut. Cook for about 2-3 minutes until golden brown and crispy (peek underneath to check).
7. Carefully flip and cook another 2 minutes on the other side. You’ll hear a gentle sizzle – that’s how you know the heat is right. If it’s too loud, turn it down a bit.
8. Remove from the pan and let rest for 1-2 minutes on paper towels. This keeps the bottom crispy instead of steamy. Cut diagonally and serve while still warm and crunchy.
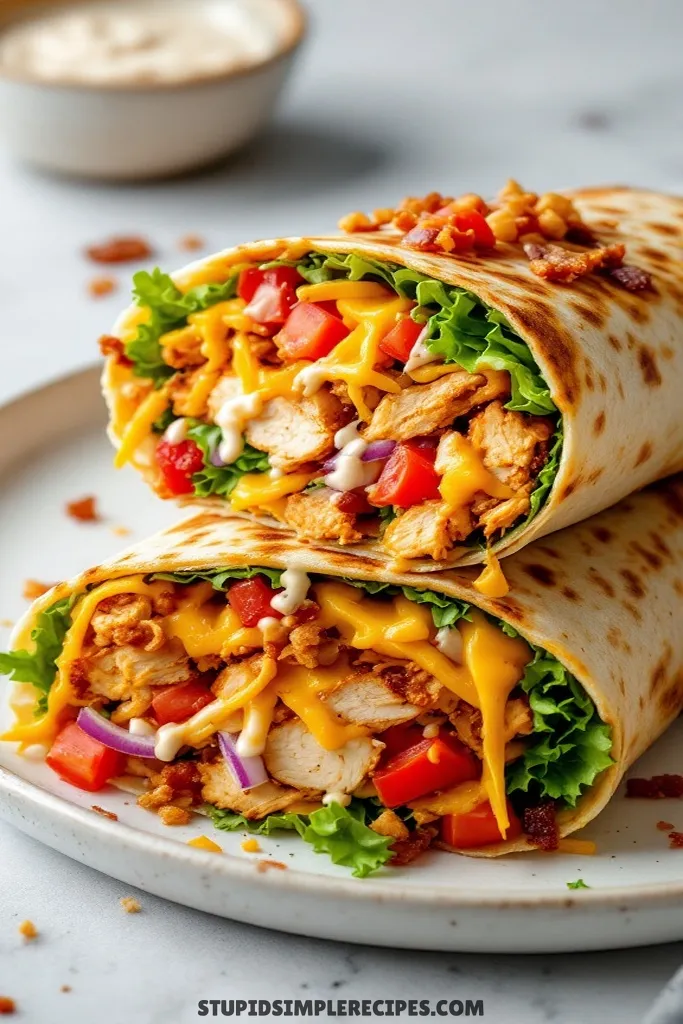
The wrap is done when the tortilla is golden brown and crispy on the outside, but still soft enough to bite through easily. The cheese inside should be melty when you cut it open.
🔍 Recipe Notes & Tips
- Pre-shred chicken when it’s still warm – it pulls apart easier
- Pat tomatoes dry with paper towels to prevent soggy wraps
- Room temp ranch spreads easier than cold
- Double the recipe and freeze assembled (but uncooked) wraps
- Short on time? Use rotisserie chicken
- Want it spicier? Mix hot sauce into your ranch
🍽️ Serving Suggestions
- Ice cold beer or Mexican Coke hits different with these
- Serve with sweet potato fries or corn chips
- Quick slaw on the side cuts the richness
- Ranch or extra BBQ sauce for dipping
- Pickles on the side add nice tang
🎯 Make it Work for
- Game Day: Cut into smaller portions (pinwheels). Set up DIY wrap station
- Lunch boxes: Skip tomatoes to prevent sogginess and pack crispy elements separately
- Party Platter: Make mini versions using small tortillas and secure with toothpicks
📦 Storage & Leftovers
- Best eaten fresh while crispy
- Can store assembled (uncooked) wraps 24hrs
- Wrap individually in foil, plastic wrap = enemy
- Reheat in dry skillet or air fryer
- Don’t microwave – gets soggy
- Freezer-friendly up to 1 month (uncooked only)
Crispy BBQ Chicken Wraps
Ingredients
- Large flour tortillas
- Cooked shredded chicken
- BBQ sauce
- Ranch dressing
- Shredded cheddar cheese
- Shredded lettuce
- Diced tomatoes
- Red onion thinly sliced
- Crispy fried onions
- Bacon bits
- Vegetable oil for crisping tortillas
- Salt and pepper to taste
Instructions
- Start by warming the tortillas slightly – about 15-20 seconds in the microwave wrapped in slightly damp paper towels. This makes them more pliable and less likely to crack when we fold them.
- In a small bowl, mix your shredded chicken with enough BBQ sauce to coat it well – I usually use about 1/3 cup for 2 cups of chicken. You want it moist but not swimming in sauce, or your wrap will get soggy.
- Lay out your warmed tortillas and spread about 1 tablespoon of ranch dressing in the center of each, leaving a 2-inch border around the edges. The ranch acts like glue and adds amazing flavor.
- Layer the ingredients in this order (trust me, it matters for the best texture):– BBQ chicken mixture– Shredded cheese– Diced tomatoes– Red onion slices– Shredded lettuce– Crispy fried onions– Bacon bitsKeep everything about 2 inches from the edges.
- To fold: First fold the sides in about 2 inches over the filling. Then, holding those sides in place, fold the bottom up and over the filling, tucking it under slightly to make it tight. Roll forward, keeping it snug but not so tight that ingredients squeeze out.
- Heat about 2 tablespoons of oil in a large skillet over medium heat until it shimmers. Place your wraps seam-side down first – this seals them shut. Cook for about 2-3 minutes until golden brown and crispy (peek underneath to check).
- Carefully flip and cook another 2 minutes on the other side. You’ll hear a gentle sizzle – that’s how you know the heat is right. If it’s too loud, turn it down a bit.
- Remove from the pan and let rest for 1-2 minutes on paper towels. This keeps the bottom crispy instead of steamy. Cut diagonally and serve while still warm and crunchy.