15 Spooktacular Halloween Sugar Cookie Recipes to Try
Halloween sugar cookies are the ultimate treat to get your spooky celebrations started! With their soft, buttery texture and endless possibilities for fun decorations, these cookies are perfect for sharing with friends and family or just enjoying by yourself. Get ready to whip up a batch that everyone will love!
Spooky Ghost Cutouts
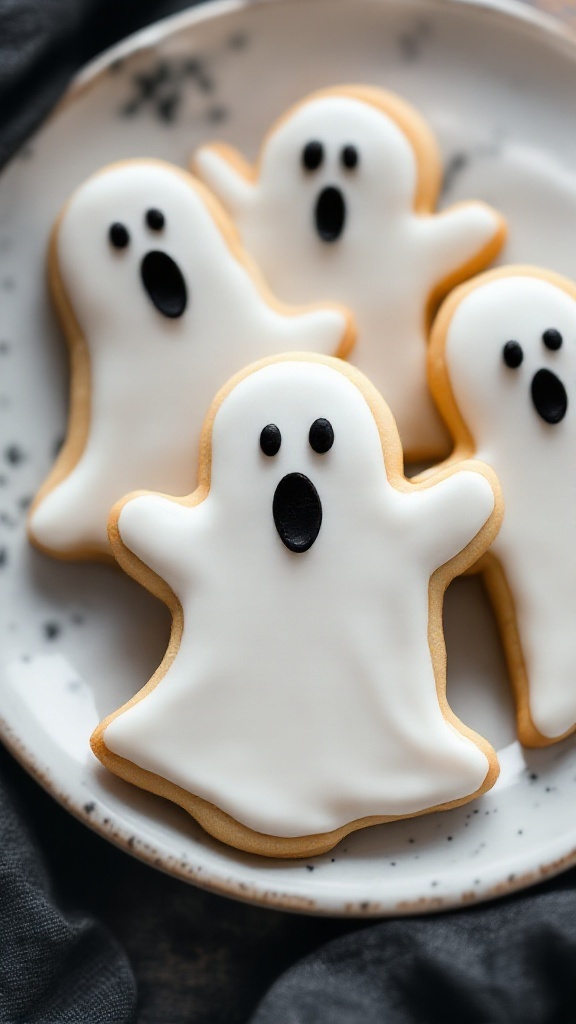
These spooky ghost cookies are a festive treat perfect for Halloween gatherings or just for fun! With a soft, buttery taste and sweet icing, they are sure to delight everyone, from kids to adults. Plus, they are simple to make, making them a great project for a cozy evening in.
Decorating these ghost cutouts is part of the fun, so grab your favorite icing colors and sprinkles. Let your creativity shine as you bring these ghostly delights to life!
Ingredients
- 2 3/4 cups all-purpose flour
- 1 teaspoon baking powder
- 1/2 teaspoon baking soda
- 1/4 teaspoon salt
- 1 cup unsalted butter, softened
- 1 1/2 cups granulated sugar
- 1 large egg
- 1 teaspoon vanilla extract
- 2 cups royal icing (for decoration)
- Black food coloring (for details)
Instructions
- Make the Dough: In a bowl, whisk together the flour, baking powder, baking soda, and salt. In a separate large bowl, cream the softened butter and sugar until light and fluffy. Beat in the egg and vanilla, then gradually add the dry ingredients until well combined.
- Chill the Dough: Divide the dough into two discs, wrap them in plastic wrap, and chill in the refrigerator for at least 1 hour.
- Roll and Cut: Preheat your oven to 350°F (175°C). On a floured surface, roll out one disc of dough to about 1/4 inch thick. Use a ghost-shaped cookie cutter to cut out shapes and place them on a lined baking sheet.
- Bake the Cookies: Bake for 8-10 minutes until the edges are lightly golden. Let them cool completely on a wire rack.
- Decorate: Once the cookies are cool, use royal icing to cover them in a smooth white layer. Add black food coloring to create eyes and mouths for each ghost. Let the icing set before serving.
Black Cat Silhouettes
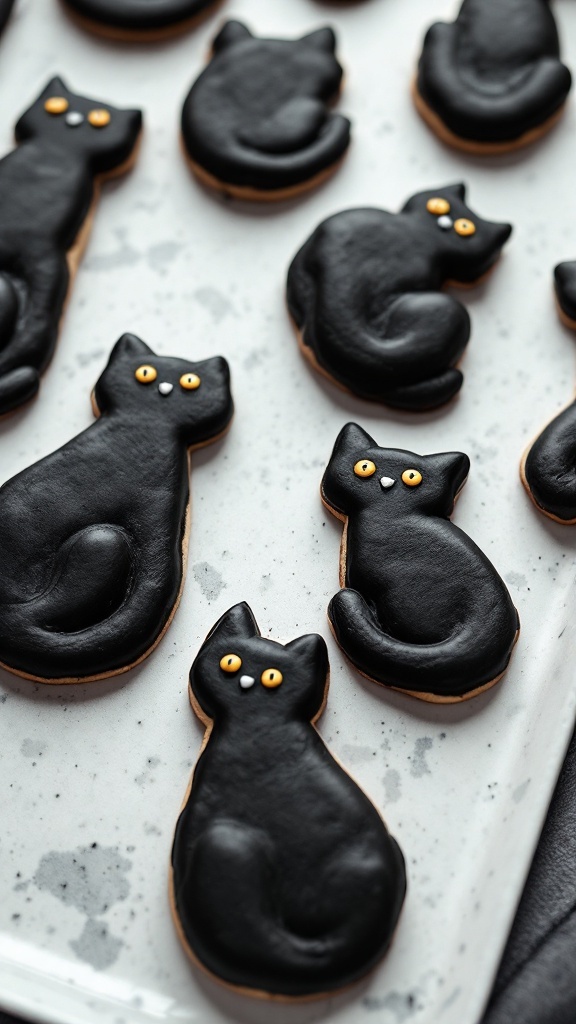
These Halloween sugar cookies are a delightful treat that tempt your taste buds with a buttery sweetness and a soft texture. The black cat silhouettes add a fun and whimsical twist, perfect for spooky celebrations. Not only are they simple to make, but they also provide a great opportunity to get creative with decorating!
With a rich chocolate flavor and a cute design, these cookies are sure to be a hit at any Halloween gathering. Plus, they can be made ahead of time, making them a stress-free addition to your festivities!
Ingredients
- 2 3/4 cups all-purpose flour
- 1 teaspoon baking soda
- 1 teaspoon baking powder
- 1 cup unsalted butter, softened
- 1 1/2 cups white sugar
- 1 egg
- 1 teaspoon vanilla extract
- 1/2 teaspoon almond extract
- 1/4 cup cocoa powder
- Black food coloring
- Yellow and white candy for eyes
Instructions
- Prepare the Dough: In a bowl, combine flour, baking soda, baking powder, and cocoa powder. In another bowl, cream together the butter and sugar until smooth. Beat in the egg, vanilla extract, and almond extract. Gradually blend in the dry ingredients.
- Shape and Chill: Divide the dough into two, adding black food coloring to one half until desired color is achieved. Shape each part into discs, wrap in plastic, and chill in the refrigerator for at least 2 hours.
- Cut Out Shapes: Preheat the oven to 375°F (190°C). Roll out the dough to about 1/4 inch thick and cut out cat shapes using a cookie cutter. Place them on a baking sheet lined with parchment paper.
- Bake: Bake for 8-10 minutes or until the edges are lightly golden. Allow them to cool on a wire rack.
- Decorate: Once cooled, decorate the cookies with black icing and use candy for the eyes. Let the icing set before serving.
Spider Web Iced Cookies
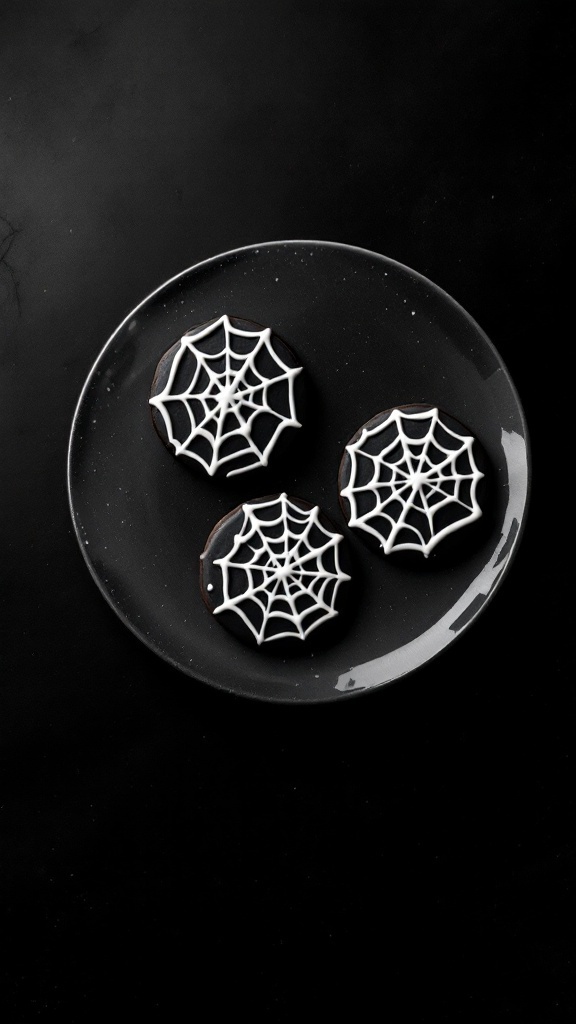
These Spider Web Iced Cookies are a fun and festive treat for Halloween. With a buttery sweetness and a soft texture, they perfectly combine sugar and vanilla flavors, making them a delightful snack for both kids and adults. Decorating them with a simple spider web design adds a playful touch, perfect for any spooky celebration!
Making these cookies is straightforward and can be a fun activity to do with family or friends. The icing requires just a few ingredients and can be applied creatively. Get ready to impress your guests with these deliciously spooky treats!
Ingredients
- 2 3/4 cups all-purpose flour
- 1 cup unsalted butter, softened
- 1 1/2 cups granulated sugar
- 1 large egg
- 1 teaspoon vanilla extract
- 1 teaspoon baking powder
- 1/2 teaspoon salt
- 1 cup powdered sugar
- 1 tablespoon milk
- Black food coloring (optional)
Instructions
- Preheat the oven to 350°F (175°C). In a large bowl, cream together the softened butter and sugar until light and fluffy. Add in the egg and vanilla, mixing well.
- In another bowl, whisk together the flour, baking powder, and salt. Gradually add the dry ingredients to the wet mixture, stirring until a dough forms.
- Roll out the dough on a floured surface to about 1/4 inch thick. Use cookie cutters to cut out desired shapes and place them on a baking sheet lined with parchment paper.
- Bake for 8-10 minutes, or until the edges are lightly golden. Allow the cookies to cool completely on a wire rack.
- To make the icing, mix the powdered sugar and milk until smooth. If desired, add black food coloring to create a spider web effect. Use a piping bag to draw the web design on top of the cooled cookies.
Witch Hat Designs
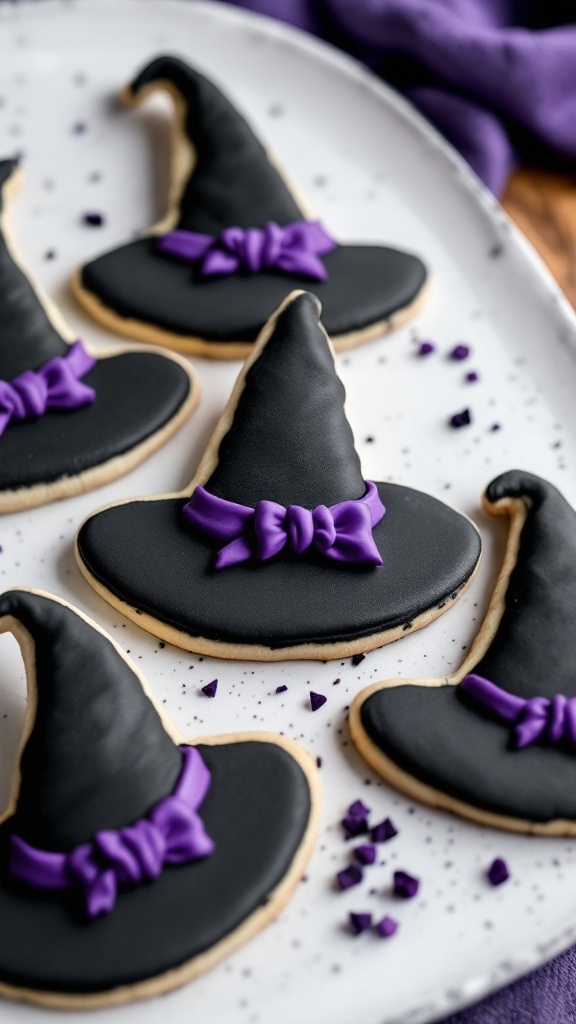
Halloween sugar cookies can be a delightful treat, especially when they are shaped like witch hats! These cookies are not only tasty but also visually captivating, making them a perfect addition to your Halloween festivities. The combination of soft, buttery flavor and sweet icing creates a delightful contrast that everyone will enjoy.
Making these witch hat cookies is surprisingly simple. With a few basic ingredients and some creativity, you can whip up a batch that looks just like those spooky hats. It’s a fun project for both kids and adults, and they’ll surely be a hit at any Halloween gathering!
Ingredients
- 2 ¾ cups all-purpose flour
- 1 teaspoon baking powder
- ½ teaspoon salt
- 1 cup unsalted butter, softened
- 1 ½ cups granulated sugar
- 1 large egg
- 1 teaspoon vanilla extract
- Black and purple icing (for decorating)
Instructions
- Preheat the Oven: Start by preheating your oven to 350°F (175°C).
- Mix the Dry Ingredients: In a bowl, whisk together flour, baking powder, and salt. Set aside.
- Prepare the Dough: In a large bowl, cream together the softened butter and granulated sugar until light and fluffy. Beat in the egg and vanilla extract. Gradually add the dry ingredients until fully combined.
- Shape and Bake: Roll out the dough on a floured surface to about ¼ inch thick. Use a witch hat cookie cutter to cut out shapes and place them on a baking sheet lined with parchment paper. Bake for 8-10 minutes or until the edges are lightly golden.
- Decorate: Let the cookies cool completely before decorating. Use black icing to cover the cookies, and add purple bows or other details as desired.
Frankenstein’S Monster Squares
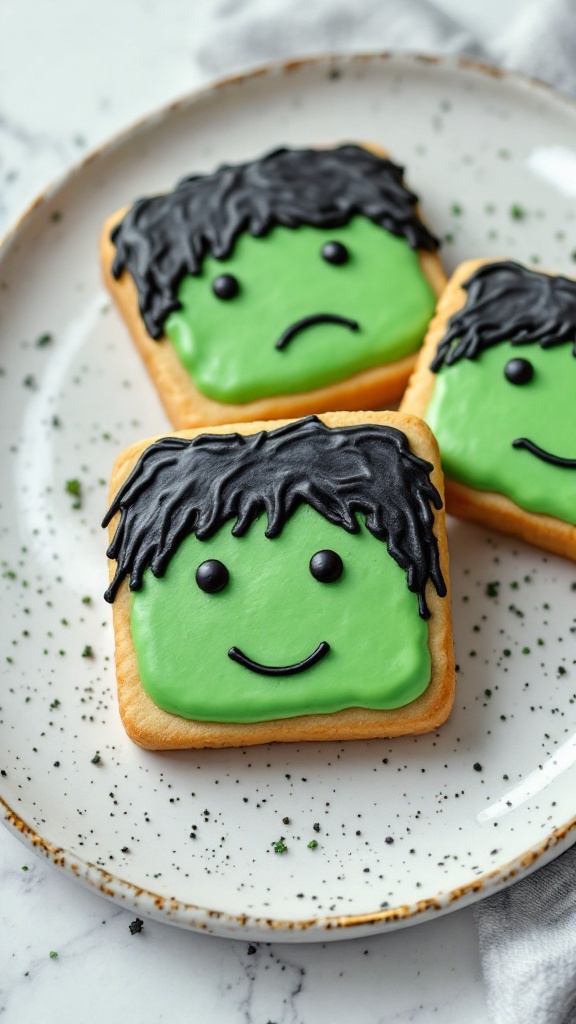
Halloween isn’t just about spooky decorations and costumes; it’s also a time for festive treats! These Frankenstein’s Monster Squares are not only fun to make, but they also bring a delightful twist to traditional sugar cookies. With a light and buttery texture, these cookies are topped with vibrant green icing and cute decorations that will bring a smile to anyone’s face.
Making these cookies is a great activity for the whole family. The process is straightforward and allows for creativity with the decorations. Perfect for parties or just a fun baking session at home, these cookies will surely be a hit this Halloween!
Ingredients
- 2 ¾ cups all-purpose flour
- 1 teaspoon baking powder
- ½ teaspoon baking soda
- ¼ teaspoon salt
- 1 cup unsalted butter, softened
- 1 ½ cups granulated sugar
- 1 large egg
- 1 teaspoon vanilla extract
- Green icing (for decorating)
- Black icing (for detailing)
- Edible eyes (for decorating)
Instructions
- Preheat the Oven: Start by preheating your oven to 350°F (175°C) and line baking sheets with parchment paper.
- Make the Dough: In a bowl, whisk together flour, baking powder, baking soda, and salt. In another bowl, beat the butter and sugar until fluffy. Add the egg and vanilla, mixing until smooth. Gradually incorporate the dry ingredients until a dough forms.
- Shape the Cookies: Roll the dough into small squares, about 2 inches each. Place them on the prepared baking sheets, making sure to leave space between them.
- Bake: Bake for 10-12 minutes, or until the edges are lightly golden. Let them cool on the baking sheet for a few minutes before transferring to a wire rack to cool completely.
- Decorate: Once cool, spread a layer of green icing on each cookie. Use black icing to create hair, stitches, and other details. Finally, add edible eyes to bring your monsters to life!
Skeleton Bone Cookies

Skeleton bone cookies are a delightful treat for Halloween, combining a simple sugar cookie base with festive icing that looks eerily fun! These cookies are sweet and buttery, making them a hit among kids and adults alike. They’re easy to make, allowing everyone to join in the fun of decorating.
The cookie dough comes together quickly, and the icing adds a personal touch. With just a few ingredients, you can create a spooky addition to your Halloween festivities!
Ingredients
- 2 3/4 cups all-purpose flour
- 1 teaspoon baking powder
- 1/2 teaspoon salt
- 1 cup unsalted butter, softened
- 1 1/2 cups granulated sugar
- 1 large egg
- 1 teaspoon vanilla extract
- 3 cups powdered sugar
- 2 tablespoons meringue powder
- Water (as needed for icing consistency)
Instructions
- Make the Dough: In a bowl, whisk together flour, baking powder, and salt. In another bowl, cream the softened butter and sugar until light and fluffy. Beat in the egg and vanilla. Gradually add the dry ingredients until combined.
- Chill the Dough: Divide the dough into two discs, wrap in plastic wrap, and chill in the refrigerator for at least 1 hour.
- Roll and Cut: Preheat your oven to 350°F (175°C). Roll out the chilled dough on a floured surface to about 1/4 inch thick. Use a bone-shaped cookie cutter to cut out shapes and place them on a lined baking sheet.
- Bake the Cookies: Bake for 8-10 minutes, or until lightly golden around the edges. Let cool completely on a wire rack.
- Prepare the Icing: In a mixing bowl, combine powdered sugar and meringue powder. Add water gradually until the desired piping consistency is achieved. Color the icing as desired.
- Decorate: Use the icing to decorate the cooled cookies, creating bone shapes. Allow the icing to dry completely before serving.
Vampire Fang Crescents
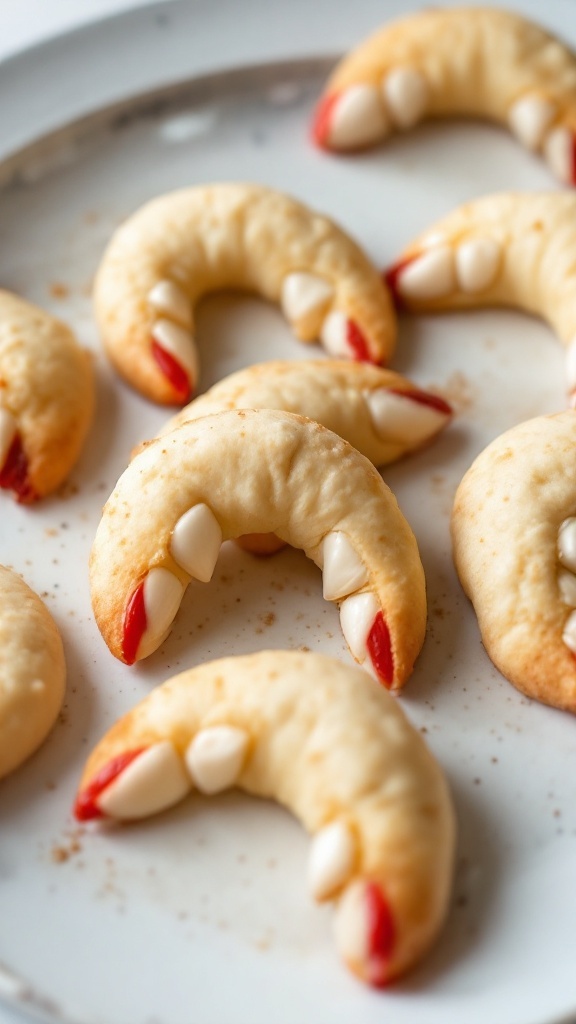
These Vampire Fang Crescents are a fun and spooky treat for Halloween. With their unique crescent shape and fang-like decorations, they’re sure to delight kids and adults alike. The cookies have a buttery, melt-in-your-mouth texture that pairs perfectly with the sweet decorations, making them a tasty addition to your Halloween festivities.
Making these cookies is a breeze, so even beginners can whip them up with confidence. Just roll, shape, and decorate to create these creepy yet cute treats that will be a hit at any Halloween gathering!
Ingredients
- 2 ½ cups all-purpose flour
- 1 cup unsalted butter, softened
- ½ cup granulated sugar
- 1 teaspoon vanilla extract
- ⅓ cup powdered sugar
- ½ teaspoon salt
- 1 cup almond slivers (for fangs)
- Red food coloring (for the tips of the fangs)
Instructions
- Prepare the Dough: In a mixing bowl, cream together the softened butter and granulated sugar until smooth. Add the vanilla extract and mix well. Gradually add the flour and salt, mixing until a soft dough forms.
- Shape the Cookies: Preheat your oven to 350°F (175°C). Take small portions of dough and roll them into crescent shapes. Place them on a baking sheet lined with parchment paper.
- Add the Fangs: Press almond slivers into the dough to resemble vampire fangs. Use red food coloring to dab at the tips of the slivers to create a bloody effect.
- Bake: Bake for 12-15 minutes or until the edges are lightly golden. Remove from the oven and let cool on a wire rack.
- Finish and Serve: Once cooled, you can add a little more red food coloring if desired. Enjoy your spooky Vampire Fang Crescents!
Gravestone Markers
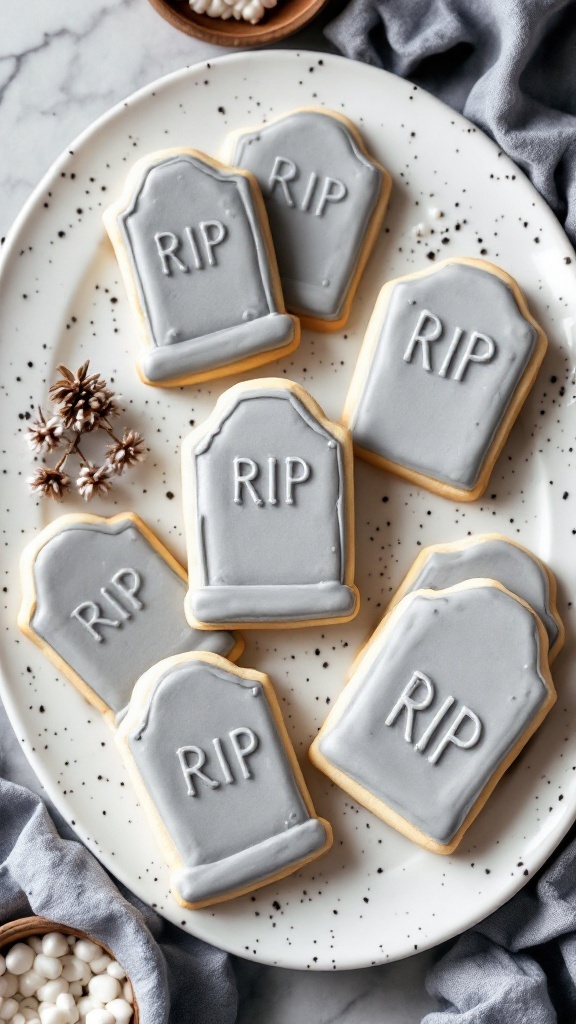
These gravestone sugar cookies are a fun and festive treat for Halloween gatherings. They offer a delightful blend of sweet vanilla flavor with a soft, chewy texture that makes them irresistible. Simple to make and easy to decorate, these cookies are not only a tasty snack but also a charming addition to any spooky decor.
With their gray icing and tombstone shapes, they add a playful element to your Halloween celebrations. Perfect for kids and adults alike, these cookies can be customized with names or messages for a personal touch, making them a hit at any Halloween party.
Ingredients
- 2 ¾ cups all-purpose flour
- 1 teaspoon baking powder
- ½ teaspoon salt
- 1 cup unsalted butter, softened
- 1 ½ cups granulated sugar
- 1 large egg
- 1 teaspoon vanilla extract
- 1 teaspoon almond extract
- 2 cups gray royal icing (or any desired color)
Instructions
- Prepare the Dough: In a bowl, whisk together flour, baking powder, and salt. In a separate bowl, cream together the butter and sugar until light and fluffy. Add the egg, vanilla, and almond extract, mixing well. Gradually add the flour mixture until combined.
- Chill the Dough: Divide the dough in half, flatten into disks, wrap in plastic, and chill in the fridge for at least 1 hour.
- Shape the Cookies: Preheat the oven to 350°F (175°C). Roll out one disk of dough on a floured surface to about ¼ inch thick. Use a tombstone-shaped cookie cutter to cut out cookies and place them on a baking sheet lined with parchment paper.
- Bake the Cookies: Bake for 8-10 minutes, or until the edges are lightly golden. Let them cool completely on a wire rack.
- Decorate: Once cooled, pipe the gray royal icing onto the cookies to create the gravestone effect. Add any desired text or decorations and let the icing set before serving.
Mummy Wrapped Rectangles
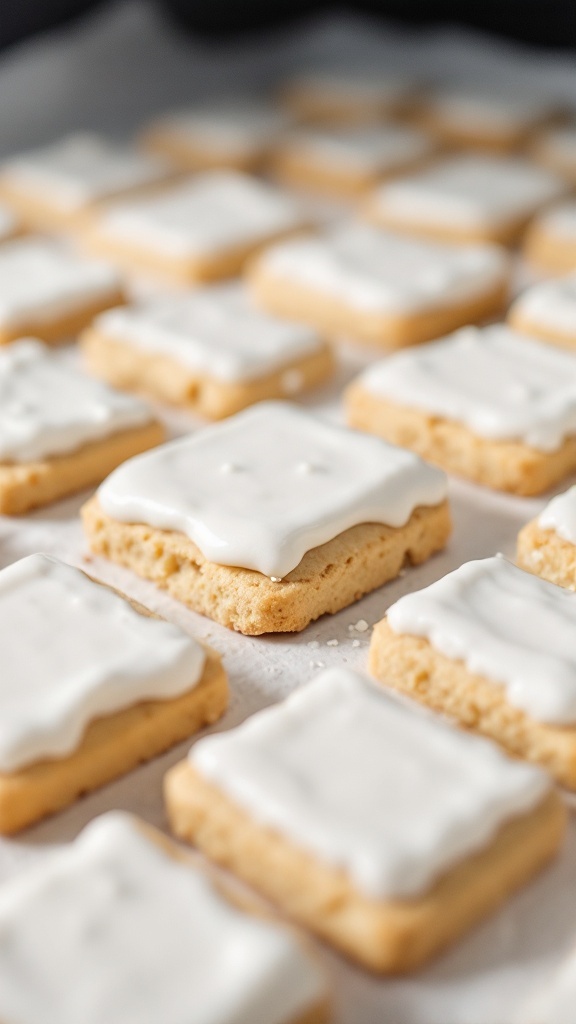
Mummy Wrapped Rectangles are a fun twist on classic sugar cookies, perfect for Halloween gatherings. These delicious treats are both soft and chewy, with a subtle sweetness that pairs beautifully with a smooth icing. They bring a festive flair, making them a hit among kids and adults alike.
Making these cookies is quite simple, which is great for both beginner and experienced bakers. With just a few ingredients, you can create a batch that will impress your friends and family. Let’s dive into the recipe!
Ingredients
- 2 3/4 cups all-purpose flour
- 1 teaspoon baking soda
- 1/2 teaspoon baking powder
- 1 cup unsalted butter, softened
- 1 1/2 cups granulated sugar
- 1 egg
- 1 teaspoon vanilla extract
- 1/2 teaspoon almond extract (optional)
- 1/4 teaspoon salt
- 2 cups white icing
- Black decorating gel for detailing
Instructions
- Preheat the oven to 375°F (190°C). In a bowl, whisk together flour, baking soda, baking powder, and salt. Set aside.
- In a large bowl, cream together the softened butter and granulated sugar until light and fluffy. Beat in the egg, vanilla extract, and almond extract until well combined.
- Gradually mix in the dry ingredients until just combined, being careful not to overmix.
- Roll the dough on a floured surface and cut into rectangles. Place them on a parchment-lined baking sheet.
- Bake for about 8-10 minutes, or until the edges are lightly golden. Allow the cookies to cool on a wire rack.
- Once cooled, spread a layer of white icing over each cookie. Use the black decorating gel to create mummy eyes and any other details you like.
Poison Apple Shapes
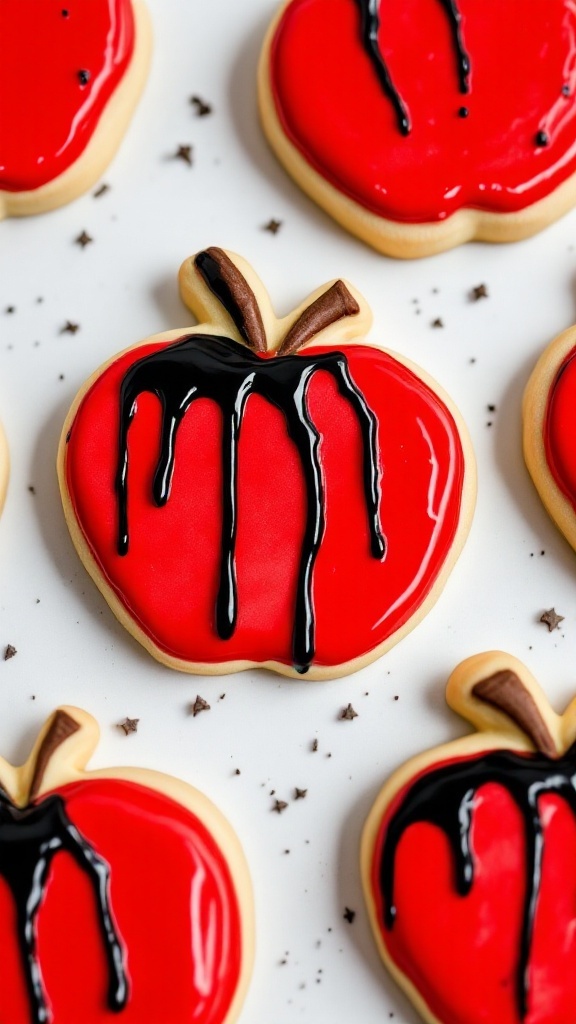
Halloween is the perfect time to get creative in the kitchen, and these Poison Apple Shapes are a delightful way to celebrate. With their sweet, buttery flavor and eye-catching design, these cookies are sure to impress friends and family. They are simple to make, making them a fun and festive treat to whip up for any Halloween gathering.
The cookies are soft with a hint of vanilla, and the bold red color adds a spooky twist. A drizzle of chocolate on top gives them a charming yet slightly sinister look, perfect for the Halloween season. Whether you’re hosting a costume party or just looking to enjoy some festive baking, these cookies are a sweet addition to your holiday treats.
Ingredients
- 2 3/4 cups all-purpose flour
- 1 teaspoon baking powder
- 1/2 teaspoon baking soda
- 1/4 teaspoon salt
- 1 cup unsalted butter, softened
- 1 1/2 cups granulated sugar
- 1 large egg
- 1 teaspoon vanilla extract
- 1/4 teaspoon almond extract
- 1 cup red candy melts
- 1/4 cup chocolate syrup
Instructions
- Make the Dough: In a bowl, whisk together flour, baking powder, baking soda, and salt. In another bowl, beat the softened butter and sugar until fluffy. Add the egg and extracts, mixing until well combined. Gradually add dry ingredients, mixing until a dough forms.
- Shape the Cookies: Preheat your oven to 350°F (175°C). Roll the dough into small balls and flatten them slightly. Use a cookie cutter to shape them into apples. Place on a lined baking sheet.
- Bake: Bake the cookies for 8-10 minutes or until the edges are set. Allow them to cool completely on a wire rack.
- Decorate: Melt the red candy melts according to package instructions and dip the tops of each cookie in the melted candy. Drizzle chocolate syrup over the top for a spooky touch. Let the chocolate set before serving.
Full Moon With Bats Cookies
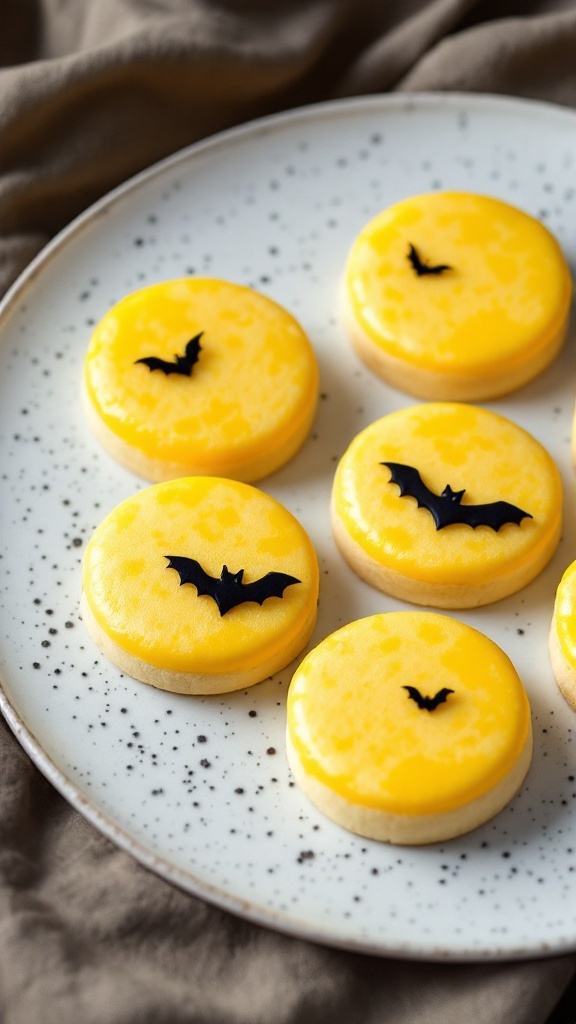
These Full Moon With Bats Cookies are a delightful treat for Halloween, bringing together the sweetness of sugar cookies and the charm of spooky decorations. The cookies are buttery, soft, and have a hint of vanilla that makes them irresistible. They are not only fun to make but also easy enough for kids to help out, turning cookie baking into a festive family activity.
The full moon design topped with playful bat decorations adds a bit of whimsy to your Halloween festivities. Imagine serving these adorable cookies at a Halloween party or enjoying them while watching a spooky movie. They’ll surely become a seasonal favorite in your household!
Ingredients
- 2 3/4 cups all-purpose flour
- 1 teaspoon baking soda
- 1/2 teaspoon baking powder
- 1 cup unsalted butter, softened
- 1 1/2 cups white sugar
- 1 egg
- 1 teaspoon vanilla extract
- 1/2 teaspoon almond extract
- 3 cups powdered sugar
- 2 tablespoons milk
- Black food coloring
- Edible glitter (optional)
Instructions
- Preheat the oven to 375°F (190°C). In a bowl, mix flour, baking soda, and baking powder; set aside.
- In a large bowl, cream together the butter and sugar until smooth. Beat in the egg, vanilla extract, and almond extract. Gradually blend in the dry ingredients.
- Roll rounded teaspoonfuls of dough into balls, and place them onto ungreased cookie sheets. Flatten each ball slightly.
- Bake for 8 to 10 minutes in the preheated oven, or until golden. Let cookies cool on the baking sheet for a few minutes before transferring to wire racks to cool completely.
- To decorate, mix powdered sugar and milk to create a glaze. Add black food coloring to make it dark and spooky. Drizzle the glaze over the cooled cookies. Use additional glaze to create bat shapes or sprinkle with edible glitter for a magical touch.
Haunted House Cutouts
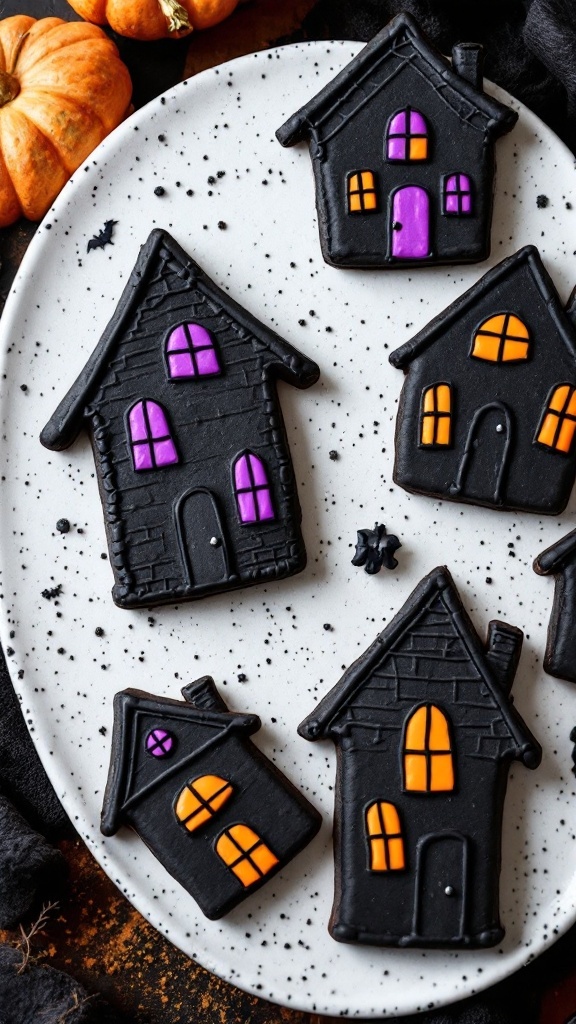
These haunted house cutouts are a fun and festive way to celebrate Halloween. With their sweet and buttery flavor, these sugar cookies are a treat everyone will enjoy. The process of decorating them with colorful icing makes it a great activity for both kids and adults!
Creating these spooky cookies is simple, and you can let your creativity run wild with the designs. From classic haunted houses to quirky shapes, they are sure to be a hit at any Halloween gathering. Get ready to bake and have some fun!
Ingredients
- 2 ¾ cups all-purpose flour
- 1 teaspoon baking powder
- ½ teaspoon salt
- 1 cup unsalted butter, softened
- 1 ½ cups granulated sugar
- 1 large egg
- 1 teaspoon vanilla extract
- Black food coloring
- Colored icing for decoration
Instructions
- Make the Dough: In a bowl, whisk together flour, baking powder, and salt. In a separate bowl, cream the softened butter and sugar until light and fluffy. Beat in the egg and vanilla, then gradually mix in the dry ingredients.
- Chill the Dough: Divide the dough into two portions, flatten them into discs, wrap in plastic, and refrigerate for at least 1 hour.
- Roll and Cut: Preheat your oven to 350°F (175°C). Roll out one disc of chilled dough on a floured surface to about ¼ inch thick. Use a haunted house-shaped cookie cutter to cut out shapes and place them on a baking sheet lined with parchment paper.
- Bake the Cookies: Bake for 8-10 minutes or until the edges are lightly golden. Allow them to cool completely on a wire rack.
- Decorate: Once cooled, mix black food coloring into your icing to create a spooky black icing. Decorate your cookies with colored icing to add windows and doors, making them as spooky or cute as you like!
Candy Corn Triangles
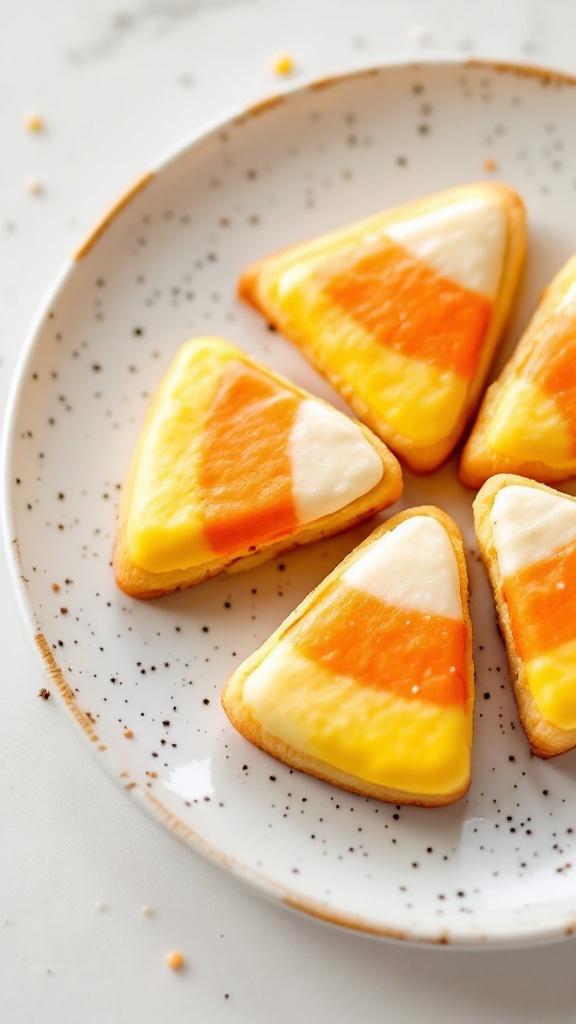
These Candy Corn Triangles are a sweet and festive twist on traditional sugar cookies, perfect for Halloween. Their bright colors and buttery flavor make them a delightful treat that everyone will love. Plus, they’re easy to make, so you can whip them up in no time!
With a rich vanilla base and a smooth frosting that mimics the classic candy corn look, these cookies are sure to bring a smile to your face. Whether you’re baking for a Halloween party or just for fun, this recipe is a hit with both kids and adults alike.
Ingredients
- 2 ¾ cups all-purpose flour
- 1 teaspoon baking powder
- ½ teaspoon salt
- 1 cup unsalted butter, softened
- 1 cup granulated sugar
- 1 large egg
- 1 teaspoon vanilla extract
- 1 cup powdered sugar
- 2 tablespoons milk
- Yellow and orange food coloring
Instructions
- Preheat the Oven: Preheat your oven to 350°F (175°C) and line a baking sheet with parchment paper.
- Make the Dough: In a bowl, whisk together flour, baking powder, and salt. In another bowl, beat the softened butter and sugar until fluffy. Add the egg and vanilla, then gradually mix in the dry ingredients until combined.
- Shape and Bake: Divide the dough into three portions. Color one third yellow and another third orange with food coloring, leaving the last portion uncolored. Roll each piece into a triangle shape on the baking sheet. Bake for 10-12 minutes until lightly golden.
- Prepare the Frosting: In a bowl, mix powdered sugar and milk until smooth. Divide the frosting into three bowls and color one yellow, one orange, and leave one white.
- Decorate the Cookies: Once the cookies have cooled, frost each cookie with the yellow, orange, and white frosting to mimic candy corn. Enjoy your delicious Halloween treat!
Zombie Hand Cookies
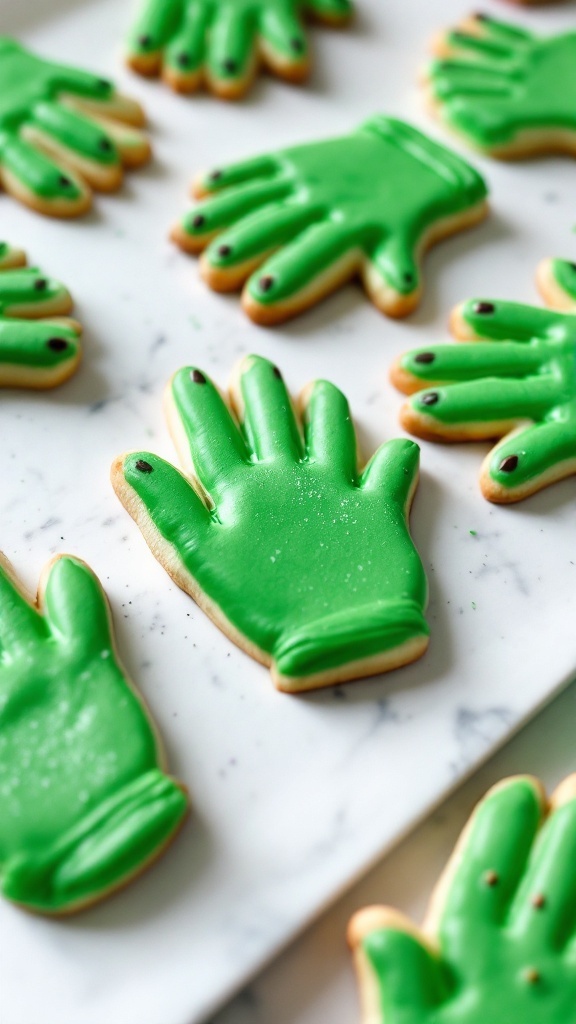
These Zombie Hand Cookies are a fun and spooky twist on traditional sugar cookies, perfect for Halloween festivities. With their vibrant green color and playful design, they are sure to delight both kids and adults alike. The cookies are soft, sweet, and slightly chewy, making them a treat that everyone will want to grab.
Making these cookies is fairly simple, even for beginners. All you need is some cookie dough, icing, and a bit of creativity. It’s a great way to get the whole family involved in the Halloween spirit!
Ingredients
- 2 ¾ cups all-purpose flour
- 1 teaspoon baking soda
- ½ teaspoon baking powder
- 1 cup unsalted butter, softened
- 1 ½ cups granulated sugar
- 1 egg
- 1 teaspoon vanilla extract
- 1 teaspoon almond extract
- 2-3 drops green food coloring
- Black icing for decorating
Instructions
- Preheat your oven to 350°F (175°C). In a bowl, mix together flour, baking soda, and baking powder.
- In a separate bowl, cream the softened butter and sugar until light and fluffy. Beat in the egg, vanilla extract, almond extract, and green food coloring until well combined.
- Gradually add the dry ingredients to the wet mixture, mixing until a dough forms. Wrap the dough in plastic wrap and chill in the fridge for at least 30 minutes.
- Roll out the dough on a floured surface and cut out hand shapes using a cookie cutter. Place the cutouts on a baking sheet lined with parchment paper.
- Bake for 8-10 minutes until the edges are lightly golden. Allow to cool completely on a wire rack.
- Once cooled, use black icing to add details such as fingernails and other spooky decorations.