31+ Spooktacular Halloween Party Food Ideas
Looking for fun and spooky food ideas to bring your Halloween party to life? From creepy snacks to eerie treats, there’s a ton of creative options to delight your guests and fit the Halloween theme. Whether you’re hosting a big bash or a cozy gathering, these simple and playful recipes will add a festive touch to your celebration!
Mummy Hot Dogs
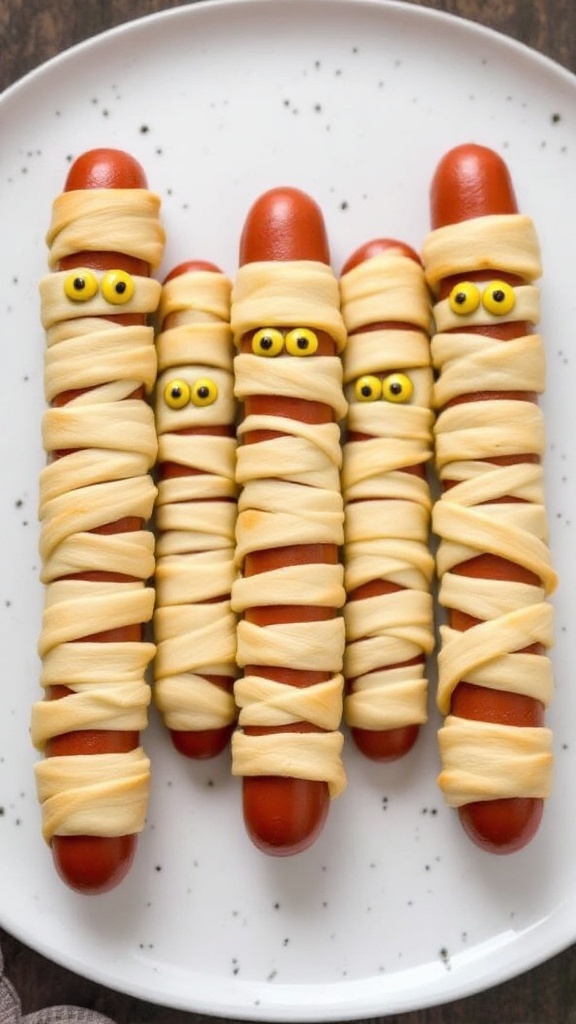
Mummy Hot Dogs are a playful twist on a classic treat, making them a fun addition to any Halloween gathering. These spooky snacks are made by wrapping hot dogs in strips of dough, giving them the look of adorable little mummies. With a savory flavor and a hint of crunch, they are sure to be a hit among both kids and adults.
Not only are they tasty, but they’re also super simple to whip up! Perfect for a last-minute party dish, these Mummy Hot Dogs can be baked to a golden perfection in no time. They’re not just delicious; they also add a festive flair to your Halloween spread!
Ingredients
- 8 hot dogs
- 1 can of crescent roll dough
- Mustard or ketchup for eyes
- Cooking spray (optional)
Instructions
- Preheat your oven to 375°F (190°C).
- Unroll the crescent roll dough and cut it into thin strips.
- Wrap each hot dog with the strips, leaving a small gap for the “face” at the top.
- Place the wrapped hot dogs on a baking sheet lined with parchment paper.
- If desired, spray with cooking spray for a golden finish.
- Bake for 12-15 minutes, or until the dough is golden brown.
- Once cooled slightly, use mustard or ketchup to add eyes.
Spider Deviled Eggs
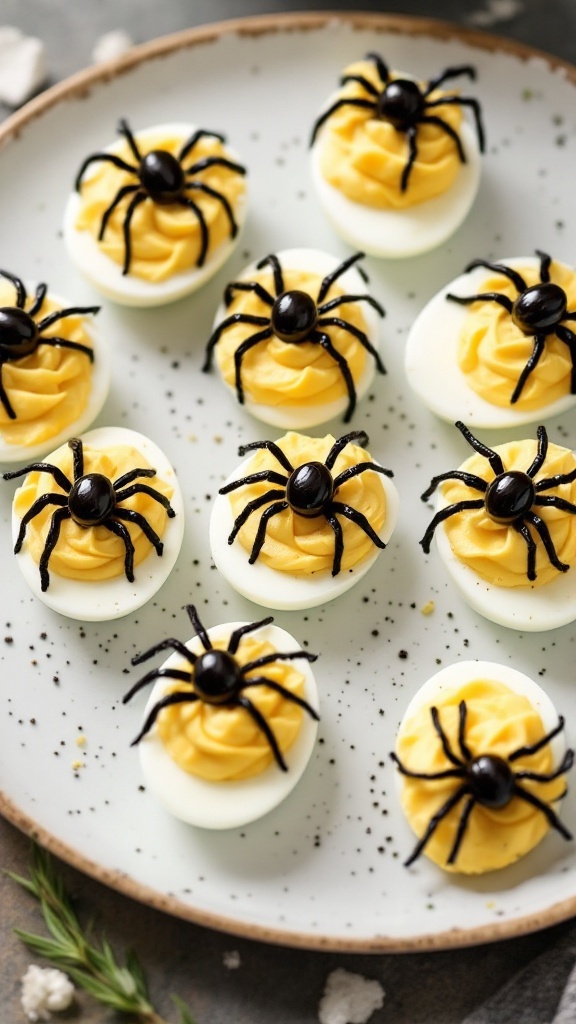
Spider deviled eggs are a fun twist on a classic appetizer that’s perfect for any Halloween gathering. They’re creamy and savory, with a hint of tanginess from the mustard and mayo, making them a delightful treat for the taste buds. Plus, they’re quite simple to whip up, allowing you to spend more time enjoying the party and less time in the kitchen.
These spooky snacks not only taste delicious but also add a playful element to your festive spread. With their creepy crawly spider decorations made from olives and black strings, they’re sure to be a talking point at your Halloween celebration!
Ingredients
- 6 large eggs
- 1/4 cup mayonnaise
- 1 teaspoon Dijon mustard
- Salt and pepper, to taste
- Black olives, for decoration
- Black string licorice, for spider legs
Instructions
- Boil the Eggs: Place the eggs in a pot and cover them with water. Bring to a boil, then cover and remove from heat. Let sit for 12 minutes. Transfer the eggs to an ice bath to cool.
- Prepare the Filling: Once cooled, peel the eggs and slice them in half. Remove the yolks and place them in a bowl. Mash the yolks with mayonnaise, Dijon mustard, salt, and pepper until smooth.
- Fill the Eggs: Spoon or pipe the mixture back into the egg whites, creating a nice mound.
- Create Spiders: Cut the black olives in half for the bodies. Use the licorice to cut small pieces for legs, inserting four for each olive half. Place the olive halves on top of the filled egg whites to resemble spiders.
- Serve: Chill the deviled eggs until ready to serve, and watch them disappear!
Jack-O’-Lantern Stuffed Bell Peppers
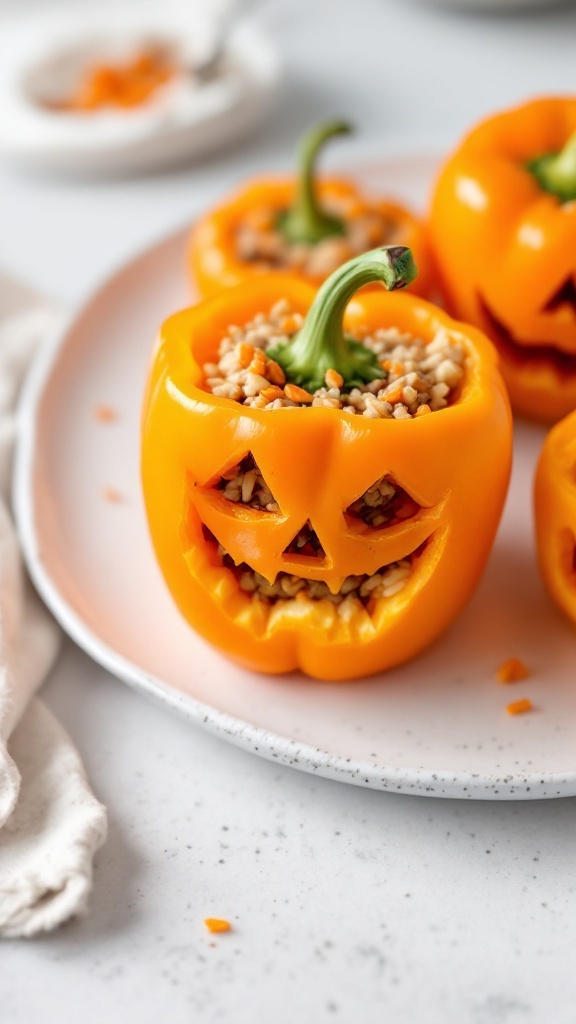
Jack-O’-Lantern Stuffed Bell Peppers are a fun and tasty dish that perfectly captures the spirit of Halloween. These vibrant orange peppers are carved to resemble traditional jack-o’-lanterns and are stuffed with a delicious combination of grains, beans, and spices. They offer a savory flavor profile that balances sweetness from the bell peppers with hearty fillings, making them a delightful addition to any Halloween gathering.
Not only are these stuffed peppers visually appealing, but they’re also quite simple to prepare. With minimal prep time, you can have these festive treats ready to impress your guests. Whether you serve them as a main dish or a side, they are sure to be a hit!
Ingredients
- 4 medium orange bell peppers
- 1 cup cooked rice or quinoa
- 1 can (15 oz) black beans, drained and rinsed
- 1 cup corn (fresh or frozen)
- 1 teaspoon chili powder
- 1 teaspoon cumin
- Salt and pepper to taste
- 1 cup diced tomatoes (canned or fresh)
- 1 cup shredded cheese (optional)
Instructions
- Prepare the Peppers: Preheat the oven to 375°F (190°C). Slice the tops off the bell peppers and remove the seeds. Use a knife to carve jack-o’-lantern faces into each pepper.
- Make the Filling: In a large bowl, combine cooked rice or quinoa, black beans, corn, chili powder, cumin, salt, pepper, and diced tomatoes. Mix well.
- Stuff the Peppers: Spoon the filling into each carved pepper until they are nicely packed. If desired, sprinkle cheese on top.
- Bake: Place the stuffed peppers in a baking dish and add a little water to the bottom of the dish to create steam. Cover with foil and bake for about 30 minutes. Remove the foil and bake for an additional 10-15 minutes, until the peppers are tender.
- Serve: Let the peppers cool slightly before serving. Enjoy your festive and flavorful Jack-O’-Lantern Stuffed Bell Peppers!
Witch’S Finger Cookies

Witch’s Finger Cookies are a delightfully spooky treat perfect for Halloween parties. These cookies are not only fun to look at but also tasty, making them a hit with both kids and adults. With a sweet almond flavor and a fun green frosting, they are simple to whip up, requiring just a few ingredients and minimal time to prepare.
Shaped like gnarled fingers, these cookies are sure to be a conversation starter at your Halloween gathering. The crunchy almond at the tip adds an interesting texture, while the sweet, soft cookie underneath keeps everyone coming back for more. Plus, they’re easy to make with little ones, allowing for some festive family fun in the kitchen!
Ingredients
- 1 cup unsalted butter, softened
- 1 cup powdered sugar
- 2 large eggs
- 1 teaspoon vanilla extract
- 2 1/2 cups all-purpose flour
- 1 teaspoon baking powder
- 1/2 teaspoon salt
- Green food coloring
- Whole almonds (for fingernails)
Instructions
- Preheat your oven to 350°F (175°C). Line a baking sheet with parchment paper.
- In a large bowl, cream together the softened butter and powdered sugar until smooth. Beat in the eggs and vanilla extract.
- In another bowl, whisk together the flour, baking powder, and salt. Gradually add the dry ingredients to the butter mixture until well combined.
- Divide the dough into two portions. Add green food coloring to one portion, mixing until you achieve your desired shade.
- Shape the green dough into finger-like shapes, tapering one end for the fingertip. Press an almond into the tip of each cookie to resemble a fingernail.
- Place the formed cookies onto the prepared baking sheet and bake for 12-15 minutes, or until the edges are lightly golden.
- Allow the cookies to cool on a wire rack before serving. Enjoy your spooky treats!
Ghostly Cheese Pizza Bites
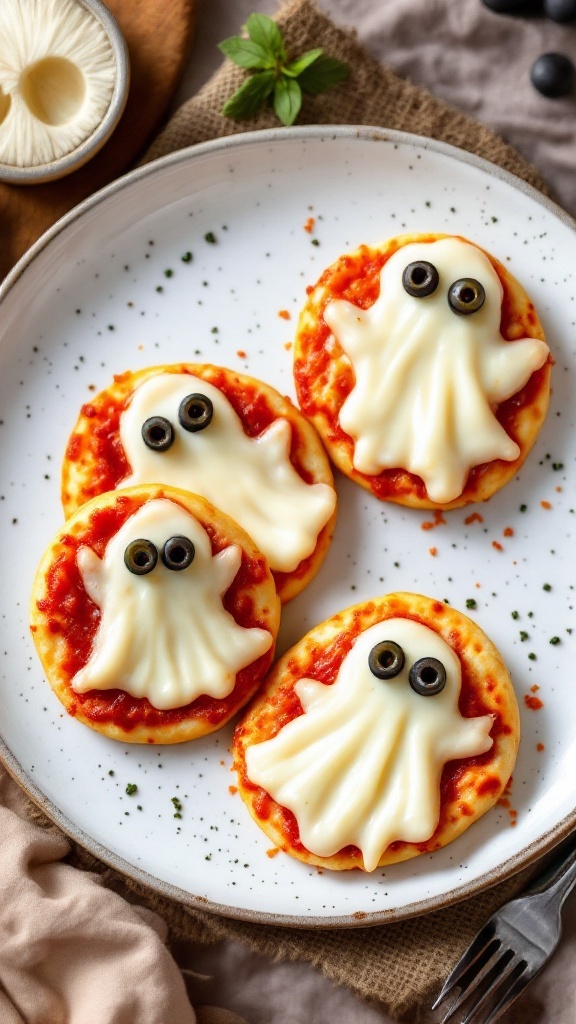
These Ghostly Cheese Pizza Bites are the perfect treat for your Halloween gathering. They combine the familiar flavors of cheesy pizza with a fun ghostly twist, making them a hit with kids and adults alike. With gooey mozzarella cheese, zesty tomato sauce, and playful black olive eyes, these bites are both delicious and visually appealing.
What’s more, they’re super easy to make! Whether you’re hosting a spooky party or looking for a fun snack, just a few simple steps will have you serving up these delightful pizza bites in no time. Get ready to impress your guests with these creative and tasty treats!
Ingredients
- 1 package of mini pizza crusts
- 1 cup pizza sauce
- 2 cups shredded mozzarella cheese
- Black olives, sliced (for eyes)
- Italian herbs (optional, for garnish)
Instructions
- Preheat your oven to 400°F (200°C).
- Place the mini pizza crusts on a baking sheet lined with parchment paper.
- Spread a spoonful of pizza sauce on each crust, leaving a little space at the edges.
- Using shredded mozzarella, create ghost shapes on top of the sauce, leaving space for the eyes.
- Add slices of black olives on top of the cheese for the ghostly eyes.
- Bake in the oven for about 10-12 minutes, or until the cheese is bubbly and slightly golden.
- Remove from the oven and sprinkle with Italian herbs if desired. Serve warm and enjoy your spooky snacks!
Graveyard Dirt Cups
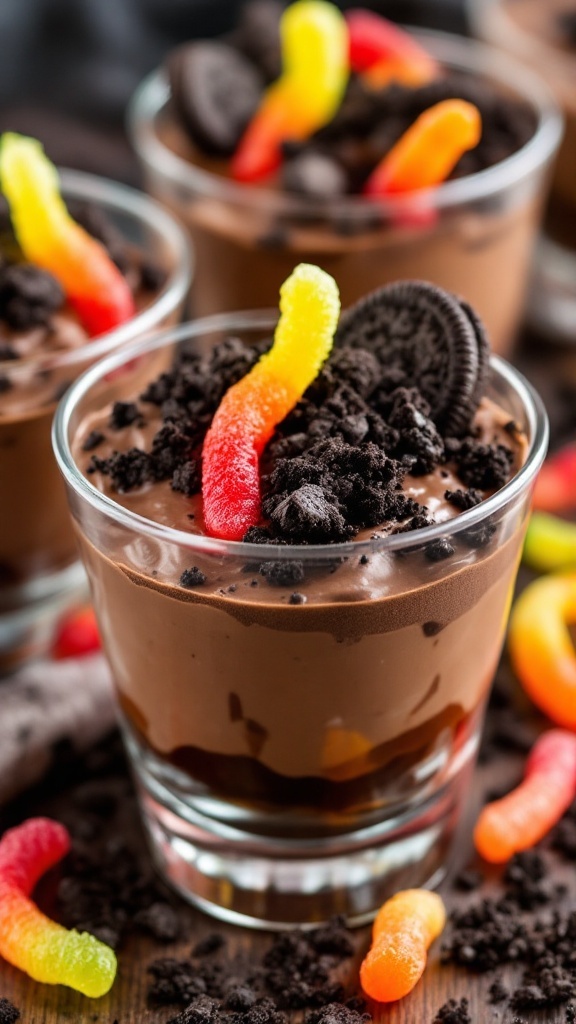
Graveyard Dirt Cups are a fun and playful dessert that’s perfect for any Halloween gathering. With layers of rich chocolate pudding, whipped cream, and crushed cookies, these treats are not only delicious but also easy to make. The combination of creamy and crunchy textures makes every spoonful a delight, while the spooky presentation adds to the festive atmosphere.
This recipe is simple enough for anyone to tackle, even if you’re not an experienced baker. Kids will love helping out, especially when it comes to crushing the cookies and layering the ingredients. These cups are sure to bring some sweetness to your Halloween party!
Ingredients
- 2 cups chocolate pudding
- 1 cup whipped cream
- 1 package of chocolate sandwich cookies
- Gummy worms (for garnish)
Instructions
- Prepare the Chocolate Pudding: Follow the instructions on the package to make your chocolate pudding. Chill it in the refrigerator for about 15 minutes.
- Crush the Cookies: Place the chocolate sandwich cookies in a zip-top bag and crush them into fine crumbs using a rolling pin or your hands.
- Layer the Cups: In small cups or glasses, layer the chocolate pudding and whipped cream. Start with a layer of pudding, followed by a layer of whipped cream, and then sprinkle some crushed cookies on top.
- Garnish: Add a few gummy worms on top of the crushed cookies for a spooky touch. Repeat the layers until the cups are filled.
- Chill and Serve: Refrigerate the cups for at least 30 minutes before serving to let the flavors meld together.
Monster Eye Meatballs
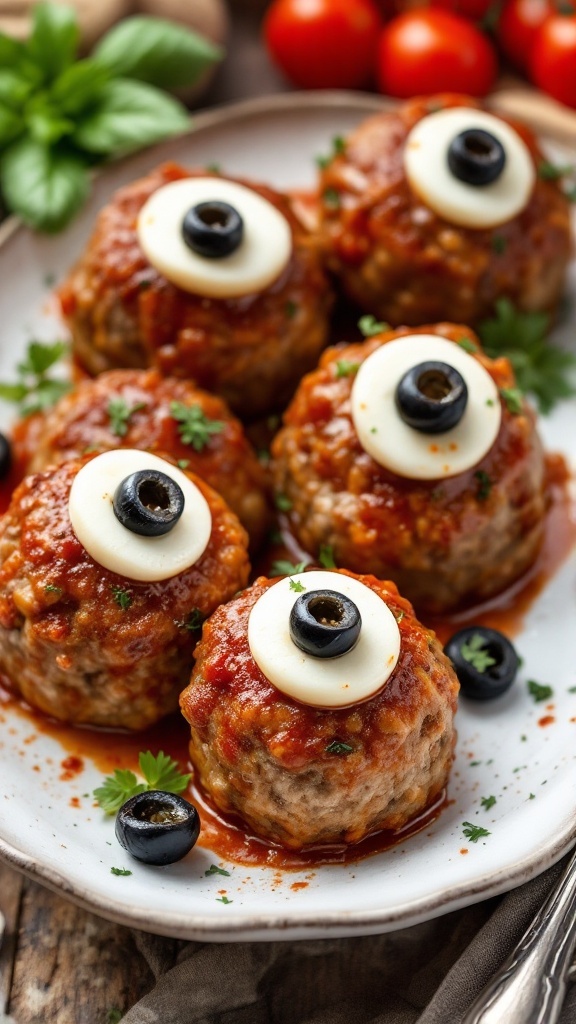
Monster Eye Meatballs are a playful twist on the classic meatball, perfect for your Halloween gathering. They feature a savory meatball base topped with mozzarella and olives that resemble creepy eyeballs. These meatballs are not only delicious but also visually fun, making them a hit with guests of all ages.
What’s great about this recipe is how simple it is to prepare. You can whip them up quickly, and they pair wonderfully with a variety of dipping sauces. Plus, the combination of flavors is sure to bring smiles and laughter to your party!
Ingredients
- 1 pound ground beef
- 1/2 cup breadcrumbs
- 1/4 cup grated Parmesan cheese
- 1/4 cup chopped fresh parsley
- 1 egg
- 2 cloves garlic, minced
- 1 teaspoon salt
- 1/2 teaspoon black pepper
- 1 cup marinara sauce
- 6 slices mozzarella cheese
- 6 black olives
Instructions
- Preheat your oven to 375°F (190°C).
- In a large bowl, combine ground beef, breadcrumbs, Parmesan cheese, parsley, egg, garlic, salt, and pepper. Mix until well combined.
- Form the mixture into golf ball-sized meatballs and place them on a baking sheet lined with parchment paper.
- Bake for 20-25 minutes until cooked through.
- Remove from the oven and top each meatball with a slice of mozzarella cheese and half a black olive to create the “eye.”
- Return to the oven for an additional 5 minutes, until the cheese is melted and bubbly.
- Serve hot, drizzled with marinara sauce for an extra treat!
Pumpkin Cheese Ball
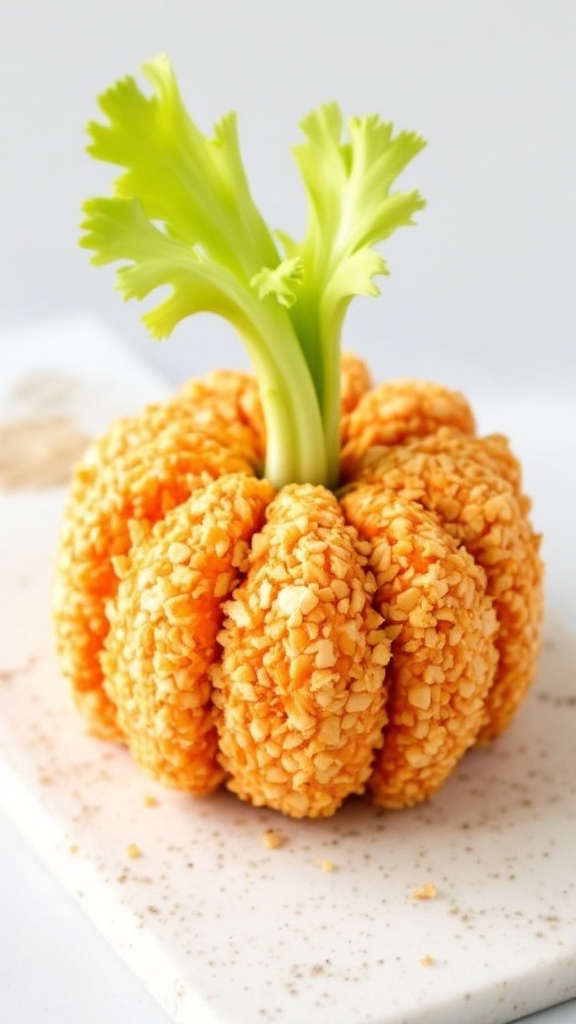
Get ready to add a fun and festive touch to your Halloween party with this Pumpkin Cheese Ball! It’s a delightful blend of cream cheese and cheddar, shaped into a cute pumpkin that adds both flavor and flair to your snack table. Rich and creamy, this cheese ball delivers a savory taste that pairs perfectly with crackers, veggies, or even pretzels.
Not only is it simple to make, but it’s also a great activity to involve the kids in. They’ll love helping roll the cheese into shape and adding the finishing touches. This Pumpkin Cheese Ball will impress your guests and keep them coming back for more.
Ingredients
- 2 (8 oz) packages cream cheese, softened
- 1 cup shredded sharp cheddar cheese
- 1/2 cup finely chopped green onions
- 1/2 cup finely chopped bell pepper (orange or yellow for color)
- 1 cup crushed tortilla chips
- Fresh parsley or celery for the stem
Instructions
- Mix the Cheeses: In a large mixing bowl, combine the softened cream cheese and shredded cheddar cheese. Use a hand mixer to blend until smooth.
- Add Veggies: Fold in the chopped green onions and bell pepper, mixing until evenly distributed.
- Shape the Cheese Ball: Transfer the cheese mixture onto a piece of plastic wrap. Use the wrap to form it into a pumpkin shape by twisting the ends tightly, then refrigerate for at least 2 hours to firm up.
- Coat with Chips: Once set, remove the cheese ball from the wrap and roll it in crushed tortilla chips to give it that pumpkin texture.
- Make the Stem: Insert a piece of fresh parsley or a celery stick into the top for the pumpkin stem. Serve with an assortment of crackers and veggies.
Blood Splatter Cookies
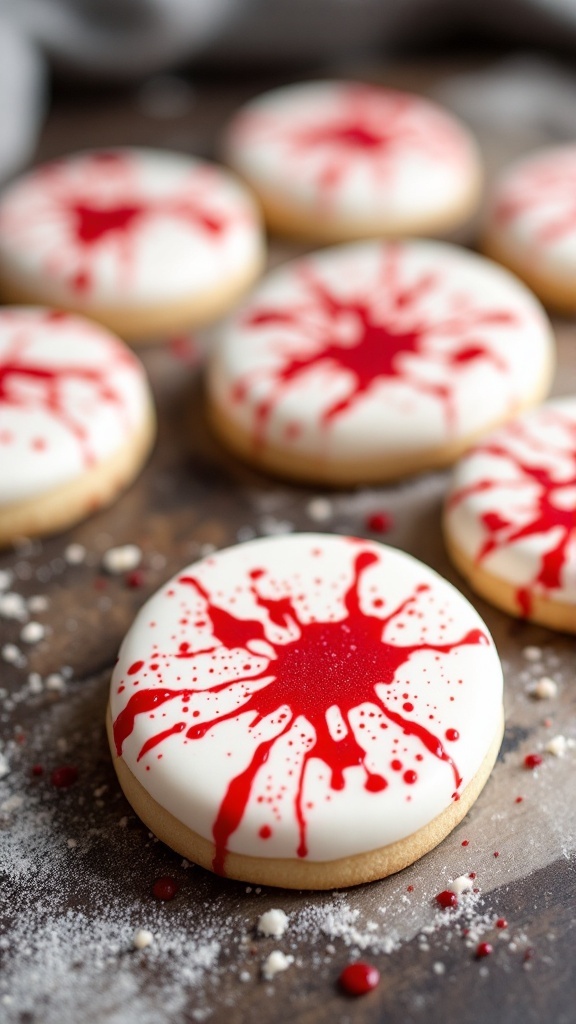
These Blood Splatter Cookies are a fun and spooky treat for your Halloween party. With a sugar cookie base and a striking red icing drizzle, they deliver a sweet flavor with a hint of vanilla that perfectly balances the festive theme. They’re simple enough for anyone to make, even if you’re not a baking expert!
The cookies are not just eye-catching but also delicious, making them a hit among guests of all ages. Whether you’re serving them at a Halloween gathering or just for fun, they’re sure to spark conversation and delight. Let’s dive into the recipe!
Ingredients
- 2 ¾ cups all-purpose flour
- 1 teaspoon baking powder
- ½ teaspoon salt
- 1 cup unsalted butter, softened
- 1 ½ cups granulated sugar
- 1 egg
- 1 teaspoon vanilla extract
- 1 cup powdered sugar
- 2 tablespoons milk
- Red food coloring
Instructions
- Prepare the Dough: In a bowl, mix flour, baking powder, and salt. In another bowl, cream together the softened butter and granulated sugar until fluffy. Add the egg and vanilla, mixing until combined. Gradually add the flour mixture, stirring until a dough forms.
- Shape the Cookies: Preheat the oven to 350°F (175°C). Roll the dough into 1-inch balls and place them on a baking sheet lined with parchment paper. Flatten each ball slightly.
- Bake: Bake for 10-12 minutes or until the edges are lightly golden. Allow the cookies to cool on the baking sheet for a few minutes before transferring them to a wire rack.
- Make the Icing: In a small bowl, combine powdered sugar and milk until smooth. Add red food coloring until you achieve a blood-like color.
- Create the Splatter Effect: Dip a fork into the red icing and flick it over the cooled cookies to create a splatter effect. Allow the icing to set before serving.
Witch’S Broomstick Pretzels

Witch’s Broomstick Pretzels are a fun and easy treat to whip up for your Halloween gathering. These delightful snacks combine the satisfying crunch of pretzels with a touch of sweetness, making them a delightful addition to any festive table. Kids and adults alike will love munching on these whimsical brooms, which are not only tasty but also visually appealing.
Making these pretzel broomsticks is simple and requires just a few ingredients. They are perfect for those who want to add a bit of creativity to their Halloween spread without spending hours in the kitchen. Gather your supplies and get ready to create a treat that will enchant your guests!
Ingredients
- 1 bag of pretzel rods
- 1 cup chocolate chips
- 1/2 cup Halloween sprinkles
- 1 cup candy corn (for broom bristles)
- Wax paper (for cooling)
Instructions
- Melt the Chocolate: In a microwave-safe bowl, melt the chocolate chips in 30-second intervals, stirring in between until smooth.
- Coat the Pretzels: Dip each pretzel rod into the melted chocolate, allowing any excess to drip off. Place them on a piece of wax paper.
- Add Sprinkles: While the chocolate is still wet, sprinkle Halloween-themed sprinkles over the coated pretzel rods to add a festive touch.
- Attach Broom Bristles: At the end of each pretzel rod, attach a small handful of candy corn to act as the bristles of the broom.
- Let Cool: Allow the chocolate to set completely before serving. This can be done by placing the pretzels in the refrigerator for about 15 minutes.
Candy Corn Fruit Cups
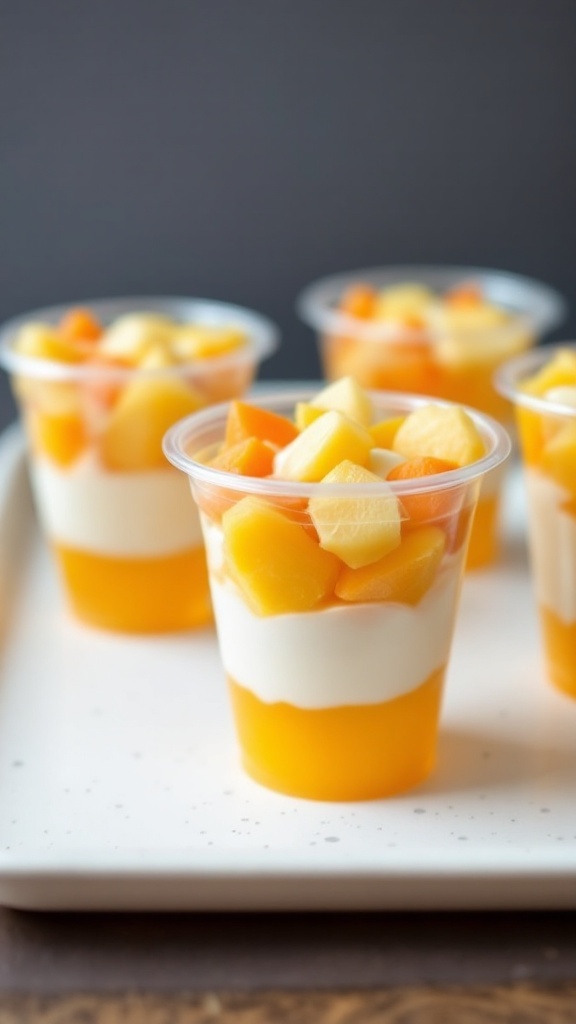
Candy Corn Fruit Cups are a fun and colorful treat that perfectly captures the spirit of Halloween. Layered with vibrant fruits, these cups not only look festive but also taste refreshing and sweet. They’re super simple to make and are sure to be a hit at your Halloween party!
This recipe uses just a few ingredients to create a visually appealing dessert that everyone will enjoy. The combination of sweet fruits with a creamy topping mimics the look of traditional candy corn, making it a delightful addition to your holiday spread.
Ingredients
- 1 cup diced pineapple
- 1 cup mandarin orange segments
- 1 cup whipped cream or Cool Whip
- 1 cup orange gelatin (prepared according to package instructions)
- Clear cups for serving
Instructions
- Prepare the Gelatin: Follow the package instructions for preparing the orange gelatin. Allow it to set in the refrigerator until firm.
- Layer the Fruits: Once the gelatin is set, start layering the ingredients in clear cups. Begin with a layer of pineapple at the bottom, followed by the orange gelatin.
- Add the Oranges: Next, add a layer of mandarin orange segments on top of the gelatin.
- Top with Whipped Cream: Finish off with a generous dollop of whipped cream to create the final layer.
- Serve: Chill the cups in the refrigerator for a little while before serving. Enjoy your festive Candy Corn Fruit Cups!
Toxic Waste Mac And Cheese
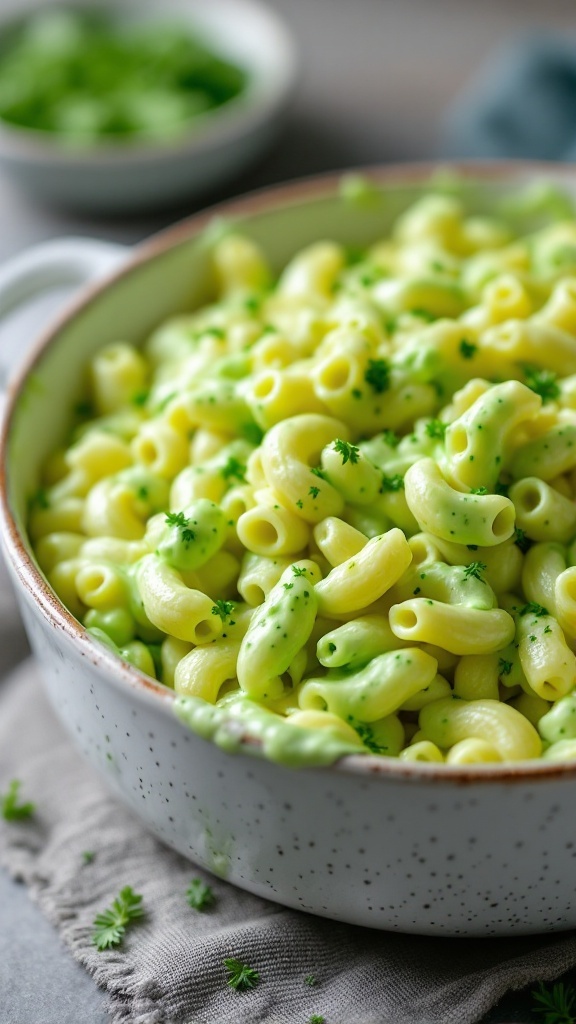
Ready to add a spooky twist to your Halloween gathering? Toxic Waste Mac and Cheese is a fun and vibrant dish that brings a hint of creepiness to your table. The bright green color and gooey cheese create a playful vibe that is sure to delight both kids and adults alike. Plus, it’s super easy to whip up, making it a perfect dish for a busy party planner.
This mac and cheese packs a cheesy punch with a creamy texture that pairs perfectly with the playful color. The addition of spinach or food coloring gives it that eerie green hue, making it an unforgettable centerpiece for any Halloween feast. Whether you’re serving it as a main dish or a side, Toxic Waste Mac and Cheese is bound to be a hit!
Ingredients
- 8 oz elbow macaroni
- 2 cups shredded cheddar cheese
- 1 cup milk
- 2 tablespoons butter
- 2 tablespoons all-purpose flour
- 1/2 teaspoon garlic powder
- 1/2 teaspoon onion powder
- 1 cup fresh spinach (blended for color)
- Salt and pepper to taste
Instructions
- Cook the Pasta: In a large pot of boiling salted water, cook the elbow macaroni according to package instructions until al dente. Drain and set aside.
- Make the Cheese Sauce: In the same pot, melt the butter over medium heat. Whisk in the flour and cook for about 1 minute to form a roux. Gradually whisk in the milk, stirring continuously until the mixture thickens.
- Add Cheese and Spinach: Remove from heat and stir in the shredded cheddar cheese, garlic powder, onion powder, and blended spinach until well combined. Season with salt and pepper to taste.
- Combine: Add the cooked macaroni to the cheese sauce, stirring to ensure all the pasta is coated.
- Serve: Transfer to a serving dish and enjoy your spooky Toxic Waste Mac and Cheese!
Brain Pasta Salad
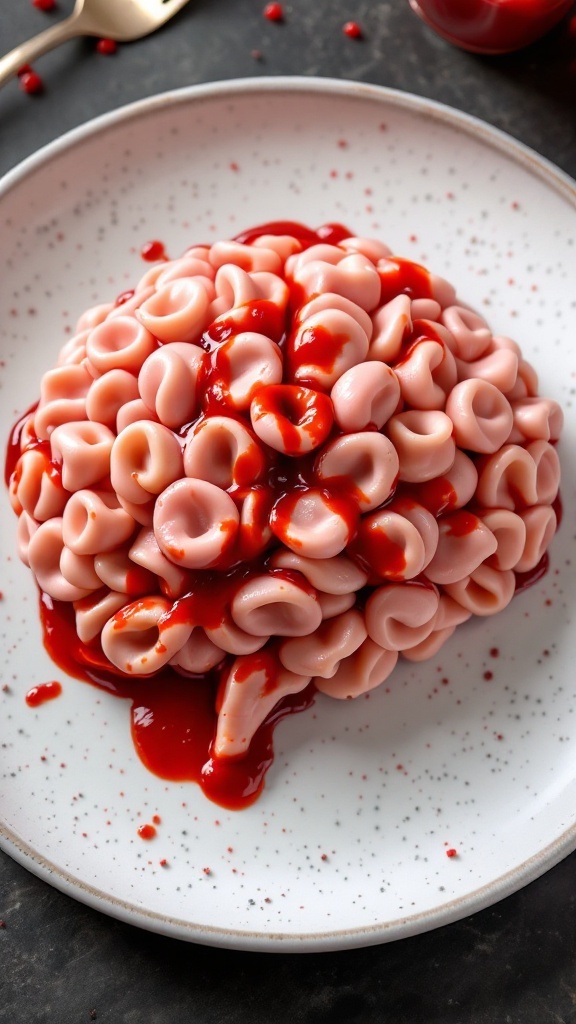
This Brain Pasta Salad is a spooky and fun dish that’s perfect for Halloween gatherings. With its unique shape and colorful presentation, it’s sure to grab the attention of your guests. The mix of flavors from the vegetables, pasta, and dressing creates a delightful taste that balances savory and slightly tangy. Plus, it’s easy to whip up, making it a great addition to your party menu.
Not only is this recipe visually interesting, but it’s also versatile. You can customize it with your favorite vegetables or pasta types. Serve it in a fun bowl and watch your friends react as they dig in!
Ingredients
- 2 cups pasta (your choice, preferably shaped)
- 1 cup cherry tomatoes, halved
- 1 cup black olives, sliced
- 1 cup bell peppers, diced
- 1/2 cup shredded mozzarella cheese
- 1/4 cup mayonnaise
- 1/4 cup Italian dressing
- Salt and pepper to taste
Instructions
- Cook the Pasta: In a pot of salted boiling water, cook the pasta according to package instructions. Drain and let it cool.
- Prepare the Vegetables: While the pasta cools, chop the cherry tomatoes, black olives, and bell peppers.
- Combine Ingredients: In a large bowl, mix the cooled pasta, vegetables, and mozzarella cheese.
- Make the Dressing: In a small bowl, whisk together mayonnaise and Italian dressing. Pour over the pasta mixture and toss to combine.
- Season: Add salt and pepper to taste. If desired, shape the pasta salad to resemble a brain in a serving dish.
- Chill and Serve: Refrigerate for at least 30 minutes before serving to let the flavors meld.
Eyeball Caprese Skewers
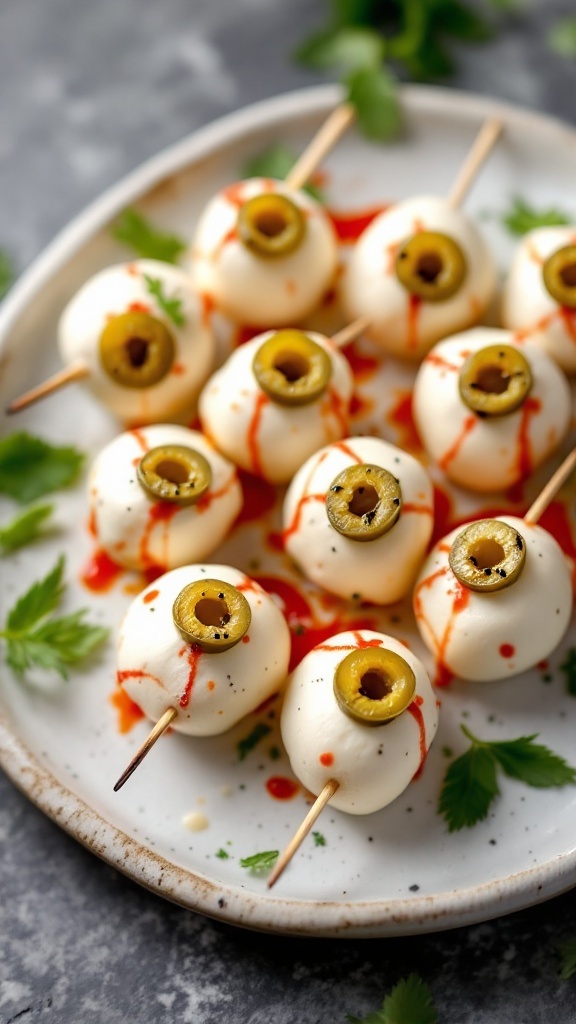
Eyeball Caprese Skewers are a fun and spooky twist on the classic Caprese salad, perfect for Halloween gatherings. These bite-sized treats combine the fresh flavors of mozzarella, olives, and a drizzle of sauce, making for a tasty and visually striking appetizer. They are not only delicious but also simple to assemble, making them a hit for any party.
The creamy mozzarella balls serve as the ‘eyeball’ base, while the green olives create the ‘pupil.’ A squirt of red sauce adds just the right amount of flair, making them both playful and appetizing. Guests will love the combination of flavors, and these skewers will definitely be a conversation starter!
Ingredients
- 12 mozzarella balls (bocconcini)
- 12 green olives (pimento-stuffed)
- 2 tablespoons olive oil
- 2 tablespoons balsamic vinegar
- 1 tablespoon hot sauce (for garnish)
- Fresh basil leaves (for garnish)
- Salt and pepper to taste
- Skewers
Instructions
- Assemble the Skewers: Thread one mozzarella ball onto each skewer, followed by a green olive. Repeat until all skewers are filled.
- Prepare the Dressing: In a small bowl, whisk together olive oil, balsamic vinegar, salt, and pepper.
- Drizzle and Garnish: Arrange the skewers on a platter, drizzle with the dressing, and add a few drops of hot sauce for that spooky effect. Finish with fresh basil leaves for a pop of color.
- Serve and Enjoy: These skewers can be made ahead of time and served cold or at room temperature, making them an easy and festive addition to any Halloween spread.
Frankenstein Avocado Toast
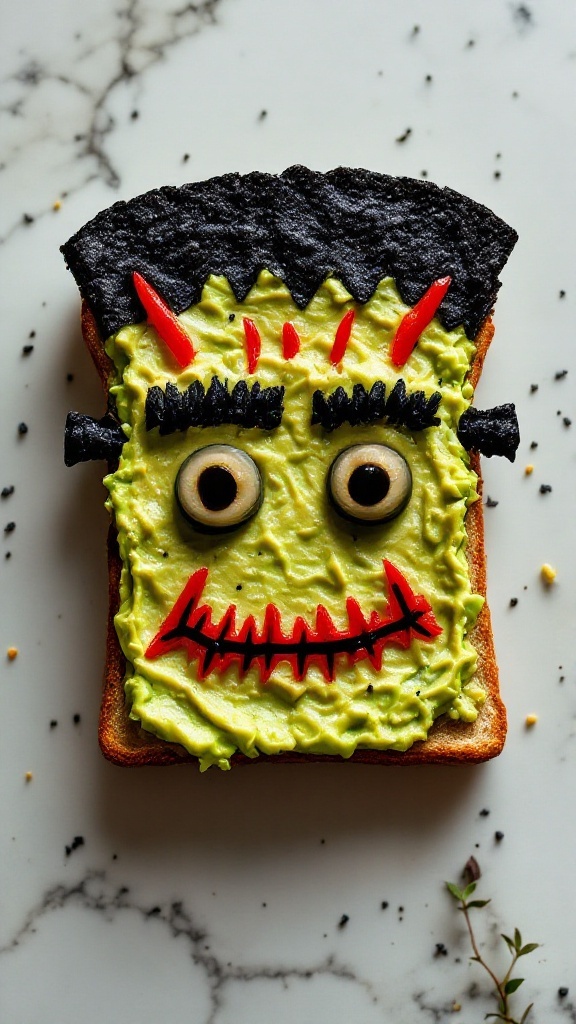
Frankenstein Avocado Toast is a fun and creative twist on your regular avocado toast, perfect for Halloween festivities. This playful dish combines creamy avocado with a touch of imagination, transforming a simple breakfast staple into a spooky character that will delight both kids and adults alike.
With its vibrant green color and silly facial features, this recipe is not only visually appealing but also simple to make. It’s a quick, healthy option that packs a flavorful punch, making it an easy addition to your Halloween party spread.
Ingredients
- 2 slices of whole-grain bread
- 1 ripe avocado
- 1 tablespoon lemon juice
- Black olives, for eyes
- Red bell pepper strips, for mouth and bolts
- Edible black decorating gel, for details
- Salt and pepper, to taste
Instructions
- Toast the Bread: Start by toasting the slices of whole-grain bread until golden brown.
- Prepare the Avocado: In a bowl, mash the ripe avocado and mix in the lemon juice, salt, and pepper.
- Assemble the Toast: Spread the avocado mixture generously over each slice of toast.
- Create the Face: Use black olives for the eyes, red bell pepper strips for the mouth and bolts, and the edible gel for extra details like hair and eyebrows.
- Serve: Arrange your Frankenstein Avocado Toast on a platter and enjoy the spooky fun!
Spider Web Taco Dip
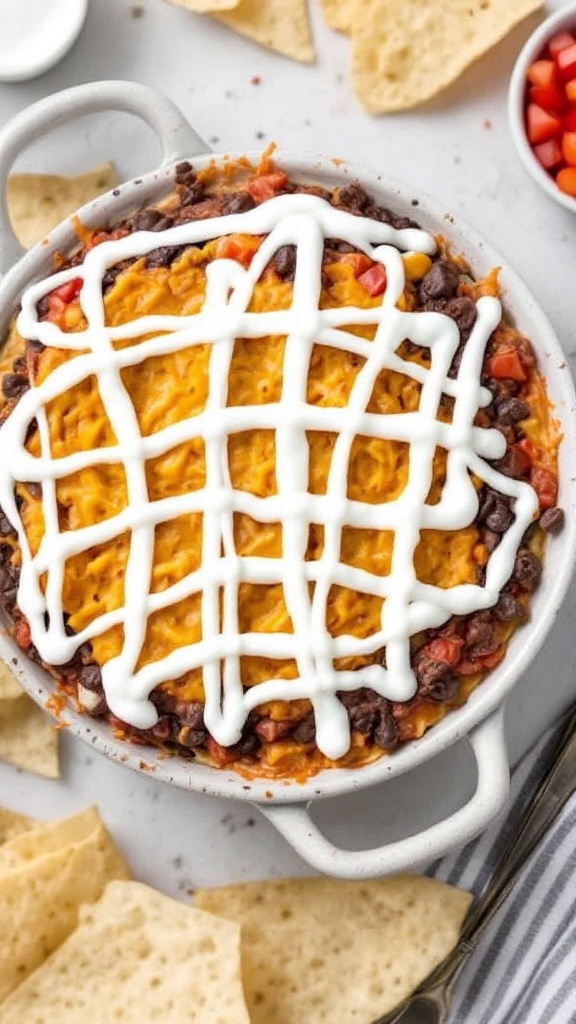
Spider Web Taco Dip is a fun and festive dish that’s perfect for Halloween gatherings. With layers of savory ground beef, creamy cheese, and zesty toppings, this dip is sure to delight your guests. It has a delightful blend of flavors that include the richness of cheese and the freshness of diced vegetables, making it a crowd-pleaser.
This recipe is simple to make and requires minimal prep time, allowing you to focus on enjoying the party. Plus, the spider web design made with sour cream adds an extra spooky touch!
Ingredients
- 1 pound ground beef
- 1 packet taco seasoning
- 1 cup refried beans
- 2 cups shredded cheddar cheese
- 1 cup diced tomatoes
- 1/2 cup chopped green onions
- 1/2 cup sour cream
- 1/4 cup black olives, sliced
- Fresh cilantro for garnish
Instructions
- Cook the Beef: In a skillet, brown the ground beef over medium heat. Drain excess fat and add the taco seasoning, following package instructions.
- Layer the Dip: In a baking dish, spread the refried beans evenly across the bottom. Top with the seasoned beef, then sprinkle with cheddar cheese.
- Bake: Preheat the oven to 350°F (175°C) and bake for about 15-20 minutes, or until the cheese is melted and bubbly.
- Add Toppings: Remove from the oven and allow to cool slightly. Drizzle sour cream in a spider web pattern over the top, then sprinkle with diced tomatoes, green onions, and black olives. Finish with fresh cilantro for garnish.
- Serve: Enjoy with tortilla chips or veggies for dipping!
Bloody Popcorn
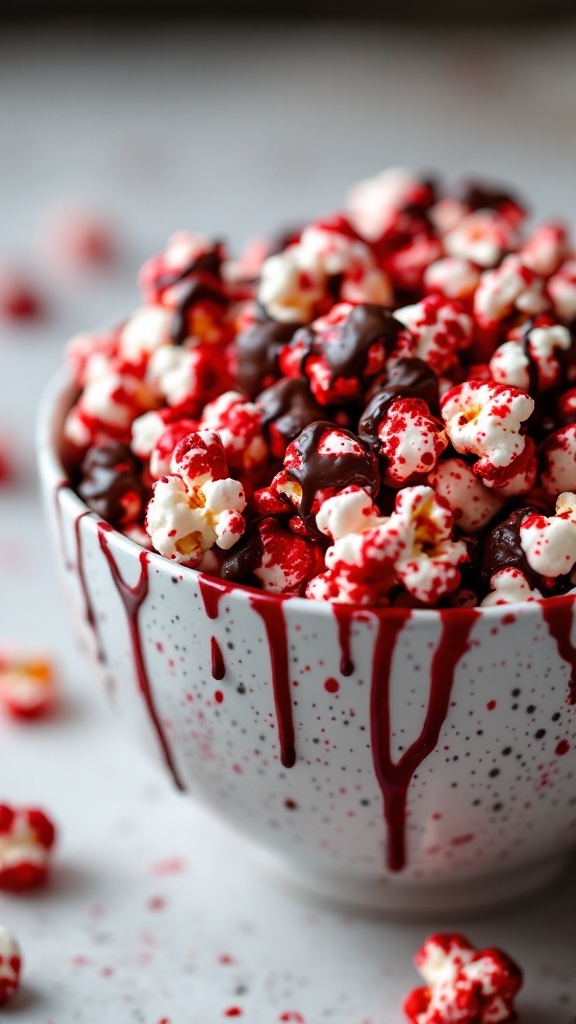
Bloody Popcorn is a fun and spooky snack that’s perfect for Halloween parties. This treat combines the crunch of popcorn with a sweet and slightly tangy flavor, making it a hit with both kids and adults. It’s easy to prepare, requiring just a few ingredients that you probably already have in your pantry.
The vibrant red color gives it a creepy vibe, and it’s sure to be a conversation starter at your Halloween gathering. Plus, it’s a great way to add a little flair to your snack table without spending hours in the kitchen.
Ingredients
- 8 cups popped popcorn
- 1 cup white chocolate chips
- 1/4 cup red food coloring
- 1/4 cup cherry or raspberry flavored powder (like Kool-Aid)
- Pinch of salt
Instructions
- Prepare the Popcorn: Pop the popcorn using an air popper or on the stovetop. Spread the popcorn out on a baking sheet lined with parchment paper.
- Melt the White Chocolate: In a microwave-safe bowl, melt the white chocolate chips in short intervals, stirring until smooth.
- Add Color: Mix the red food coloring into the melted chocolate until you achieve the desired shade of red.
- Coat the Popcorn: Drizzle the red chocolate over the popcorn, tossing gently to coat evenly.
- Sprinkle the Powder: While the chocolate is still wet, sprinkle the cherry or raspberry powder over the popcorn for an extra burst of flavor.
- Let It Set: Allow the popcorn to cool and the chocolate to set before serving. Enjoy your spooky Bloody Popcorn!
Skeletal Veggie Platter

A Skeletal Veggie Platter is a fun and creative way to serve fresh vegetables at your Halloween party. This playful twist on a veggie tray not only looks great but encourages guests to munch on healthy snacks while enjoying the festive spirit. It’s simple to assemble, making it an easy addition to your party spread.
The combination of colorful vegetables like bell peppers, carrots, and broccoli offers a range of textures and flavors. Plus, it’s a great way to get the kids involved in the kitchen by letting them help arrange the veggies into a skeleton shape. Perfect for nibbling while sharing spooky stories!
Ingredients
- 1 head of cauliflower (for the skull)
- 1 red bell pepper (for the ribs)
- 1 cup broccoli florets
- 1 cup baby carrots
- 1 cup cherry tomatoes
- 1 cup celery sticks
- Fresh parsley (for decoration)
Instructions
- Arrange the cauliflower head at the top of a large serving platter to form the skull.
- Use the ribs cut from the red bell pepper to create a rib cage shape beneath the skull.
- Place broccoli florets on either side of the cauliflower to form the shoulders.
- Line up baby carrots along the bottom for the spine, and add cherry tomatoes for the ribs.
- Complete the skeleton with celery sticks for the arms and legs, and garnish with parsley for a touch of green.
- Serve with your favorite dipping sauces like ranch or hummus for extra flavor!
Mummy Meatloaf
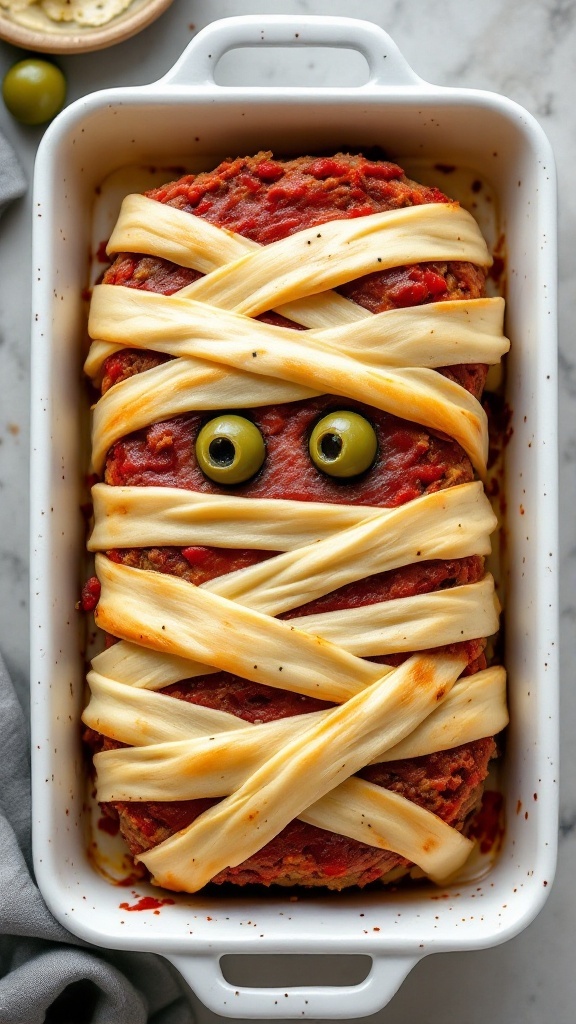
Mummy Meatloaf is a fun and festive dish that’s perfect for Halloween gatherings. It’s a savory meatloaf wrapped in strips of cheese, giving it a spooky mummy-like appearance. The taste is deliciously comforting, combining classic meatloaf flavors with a cheesy twist. Plus, it’s simple to make, making it a great option for both novice cooks and seasoned chefs alike!
This recipe not only looks festive but also delivers hearty flavor in every bite. Your guests will love the creativity, and it’s sure to be a hit with both kids and adults. Let’s dive into how you can whip up your own Mummy Meatloaf for your Halloween celebration.
Ingredients
- 1 pound ground beef
- 1 cup breadcrumbs
- 1/2 cup onion, finely chopped
- 1/2 cup milk
- 1 egg
- 1 teaspoon garlic powder
- 1 teaspoon salt
- 1 teaspoon pepper
- 1 jar marinara sauce
- 1 cup mozzarella cheese, sliced
- 2 black olives (for eyes)
Instructions
- Preheat your oven to 375°F (190°C).
- In a large bowl, mix together the ground beef, breadcrumbs, onion, milk, egg, garlic powder, salt, and pepper until well combined.
- Shape the mixture into a loaf and place it in a baking dish. Spread a layer of marinara sauce on top.
- Wrap the meatloaf with mozzarella cheese slices in a crisscross pattern to create the mummy look.
- Place the black olives on top as eyes.
- Bake for about 45-55 minutes, or until the meatloaf is cooked through. Let it rest for a few minutes before slicing.
Spiderweb Soup
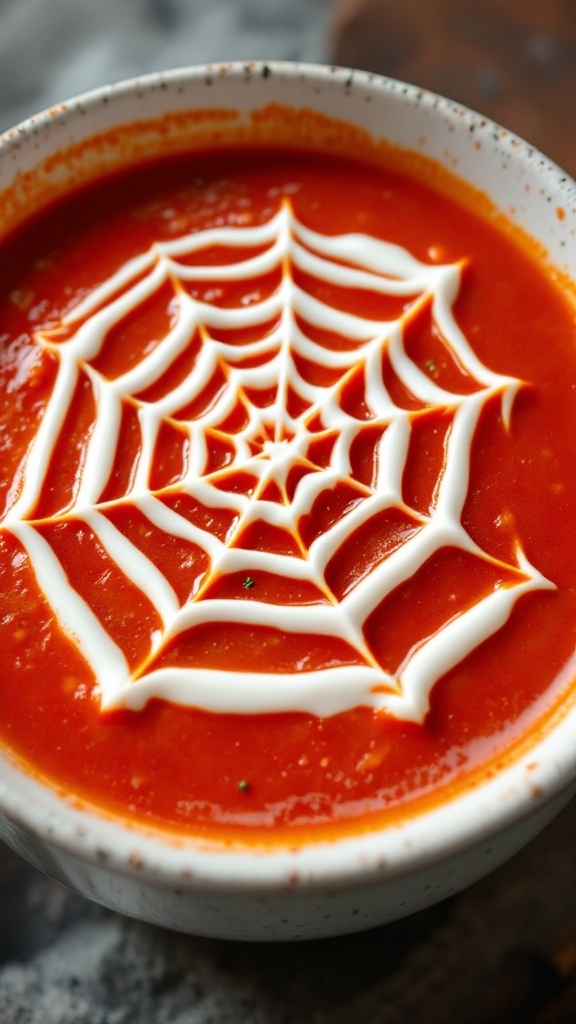
Spiderweb Soup is a fun and spooky addition to your Halloween party menu. With its rich tomato base and creamy spiderweb design, this dish is not only tasty but also visually striking. The combination of flavors is comforting and satisfying, making it a hit among both kids and adults.
This recipe is simple to make, requiring just a few ingredients and minimal prep time. You can prepare the soup ahead of time and add the spiderweb decoration right before serving for a delightful surprise!
Ingredients
- 4 cups tomato soup (canned or homemade)
- 1 cup heavy cream
- 1 teaspoon Italian seasoning
- Salt and pepper to taste
- Fresh basil for garnish (optional)
Instructions
- Heat the tomato soup in a pot over medium heat until warm. Stir in Italian seasoning, and season with salt and pepper.
- In a small bowl, whisk together heavy cream and a pinch of salt until smooth.
- Once the soup is heated through, ladle it into bowls. Using the cream mixture, pipe a spiderweb design on top of the soup.
- To create the web, start from the center and make concentric circles, then draw lines from the center outwards to resemble a spiderweb.
- Garnish with fresh basil if desired and serve hot!
Monster Rice Krispie Treats
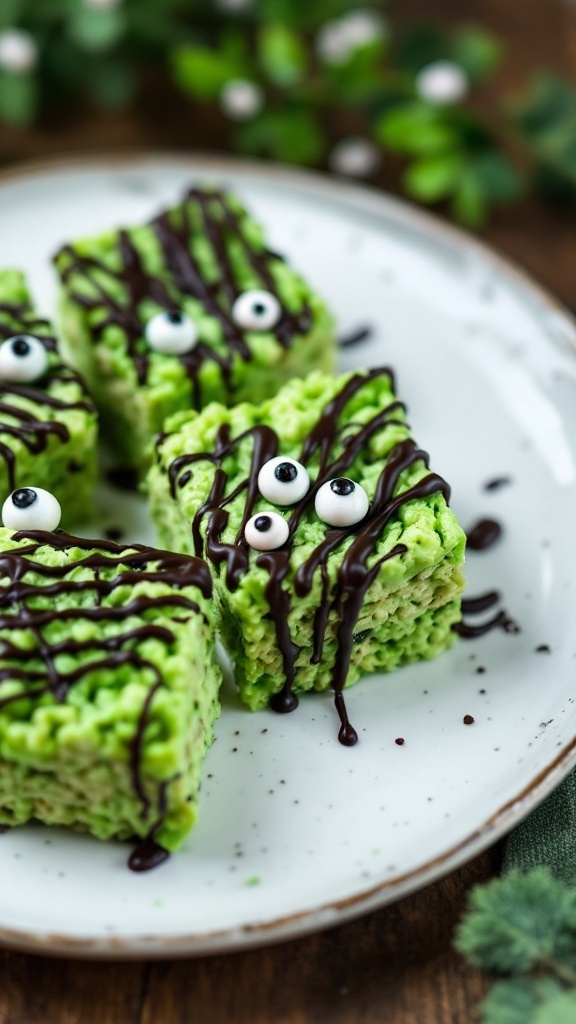
Monster Rice Krispie Treats are a fun and delightful Halloween treat that kids and adults will both love. With a playful green hue and cute monster faces, they add a festive touch to any Halloween party. These treats are chewy, sweet, and slightly crunchy, making for a delightful snack that’s easy to eat.
Making these treats is simple and quick, making them perfect for last-minute party planning. Just a few ingredients and some creativity can transform classic Rice Krispie treats into spooky snacks that will have everyone smiling!
Ingredients
- 3 tablespoons butter
- 1 package (10 oz) mini marshmallows
- 1/2 teaspoon vanilla extract
- 6 cups Rice Krispies cereal
- Green food coloring
- Chocolate drizzle or melted chocolate for decoration
- Edible candy eyes
Instructions
- Melt Butter: In a large pot over low heat, melt the butter. Add the mini marshmallows and stir until fully melted and smooth. Remove from heat.
- Add Coloring and Cereal: Stir in the vanilla extract and a few drops of green food coloring. Mix until you achieve the desired shade of green. Gradually add the Rice Krispies cereal, stirring until evenly coated.
- Shape the Treats: Pour the mixture into a greased 9×13-inch pan. Press down firmly with a spatula or wax paper to create an even layer. Allow to cool completely.
- Decorate: Once cooled, cut into squares. Drizzle melted chocolate over the top and add candy eyes to create monster faces.
- Serve: Enjoy your spooky Monster Rice Krispie Treats at your Halloween party!
Swamp Punch
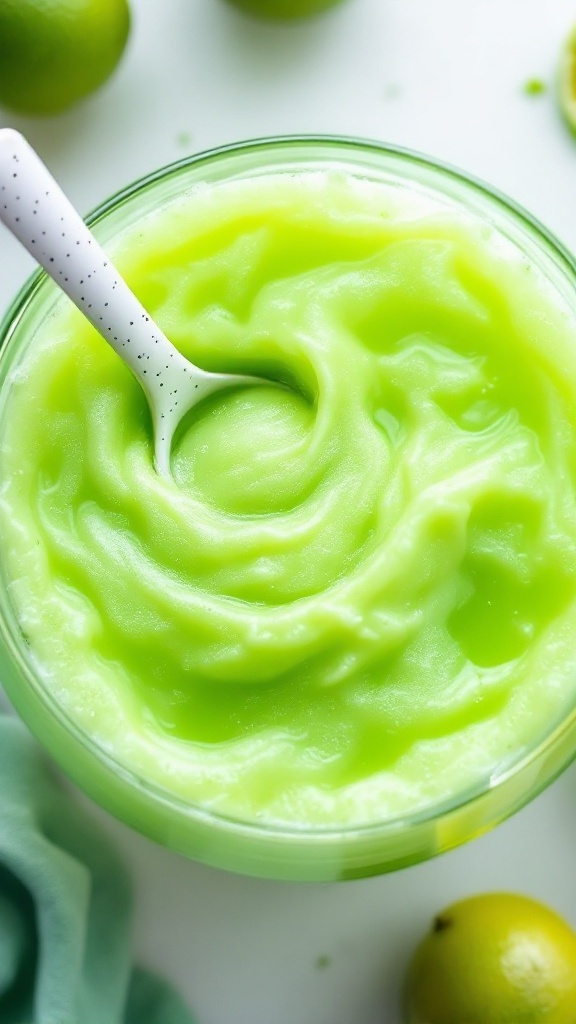
Swamp Punch is a fun and quirky beverage that brings a playful twist to any Halloween gathering. Its vibrant green color and refreshing taste make it an instant hit with both kids and adults. This easy-to-make drink combines fruity flavors with a slightly tangy kick, perfect for setting a spooky atmosphere at your party.
Creating this punch is simple and requires minimal preparation. Just mix your favorite fruity sodas with some lime or lemon sherbet, and watch the magic happen as the colors meld together. Serve it in a large bowl or punch dispenser for an eye-catching centerpiece!
Ingredients
- 2 liters lemon-lime soda
- 1 liter green fruit punch
- 1 quart lime sherbet
- 1 cup pineapple juice
- Fresh lime slices for garnish
Instructions
- In a large punch bowl, combine the lemon-lime soda and green fruit punch.
- Add the pineapple juice and gently stir to mix.
- Scoop the lime sherbet into the punch and allow it to float on top.
- Serve immediately, garnished with fresh lime slices if desired.
Severed Finger Breadsticks
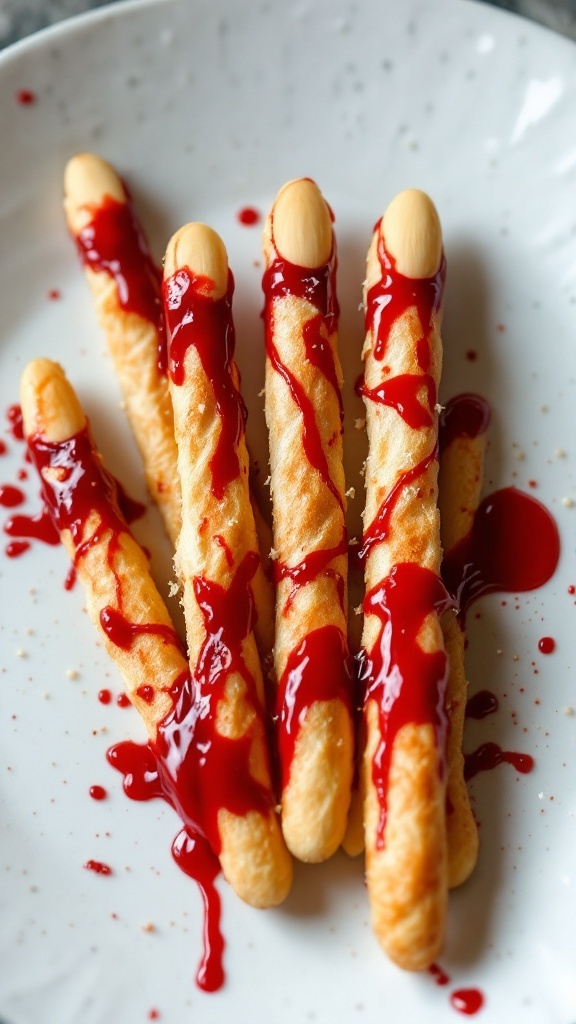
Severed Finger Breadsticks are the ultimate spooky snack for your Halloween party. These breadsticks are not only fun to look at, but they are also deliciously crispy on the outside with a soft, chewy interior. The taste is a delightful combination of buttery goodness, making them perfect for dipping in your favorite sauces or dressings.
Easy to make, these creepy yet tasty finger breadsticks are sure to be a hit with your guests. The playful presentation adds a fun twist to your festive spread, allowing everyone to indulge in a bit of Halloween mischief!
Ingredients
- 1 package of refrigerated breadstick dough
- Almonds (whole) for fingernails
- Red food gel or ketchup for “blood”
- Flour for dusting
Instructions
- Preheat your oven according to the breadstick dough instructions.
- Open the package of breadstick dough and separate it into individual sticks.
- Shape each breadstick into a finger shape, making them slightly thicker in the middle and tapering at one end to form a fingertip.
- Press an almond into the tip of each breadstick to create the fingernail.
- Using a knife, make small cuts in the dough to create “knuckles” for a more realistic look.
- Place the shaped breadsticks on a baking sheet and bake according to the package instructions until golden brown.
- Once baked, let them cool slightly and drizzle with red food gel or ketchup for a bloody effect.
- Serve immediately and enjoy your spooky Severed Finger Breadsticks!
Pumpkin Hummus
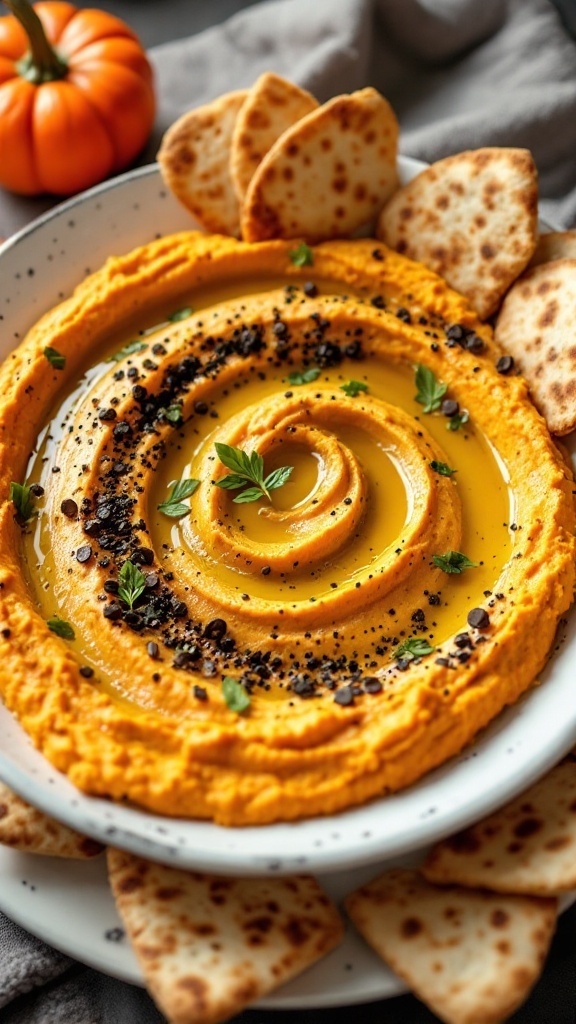
This pumpkin hummus is a delightful twist on the classic dip, making it a perfect addition to your Halloween party spread. With its creamy texture and subtle sweetness, it offers a taste that’s both savory and slightly sweet. Plus, it’s simple to whip up, ensuring you can spend more time enjoying the festivities with friends and family.
Not only does this hummus look festive with its vibrant orange color, but it’s also packed with nutritious ingredients. Pair it with pita chips or fresh veggies for a healthy snack that will impress your guests. Let’s dive into the recipe!
Ingredients
- 1 can (15 oz) chickpeas, drained and rinsed
- 1 cup canned pumpkin puree
- 2 tablespoons tahini
- 2 tablespoons olive oil
- 1 clove garlic, minced
- 1 teaspoon ground cumin
- 1 teaspoon paprika
- 1 tablespoon lemon juice
- Salt and pepper to taste
- Pita chips or fresh veggies for serving
Instructions
- Blend the Base: In a food processor, combine the chickpeas, pumpkin puree, tahini, olive oil, and minced garlic. Pulse until smooth.
- Add Seasonings: Add the cumin, paprika, lemon juice, salt, and pepper. Blend again until everything is well combined and has a creamy texture.
- Taste and Adjust: Taste the hummus and adjust the seasoning if necessary. If you prefer a thinner consistency, add a bit of water and blend until smooth.
- Serve: Transfer the hummus to a serving bowl, drizzle a little olive oil on top, and sprinkle with extra paprika if desired. Serve with pita chips or an assortment of fresh veggies.
Halloween Charcuterie Board
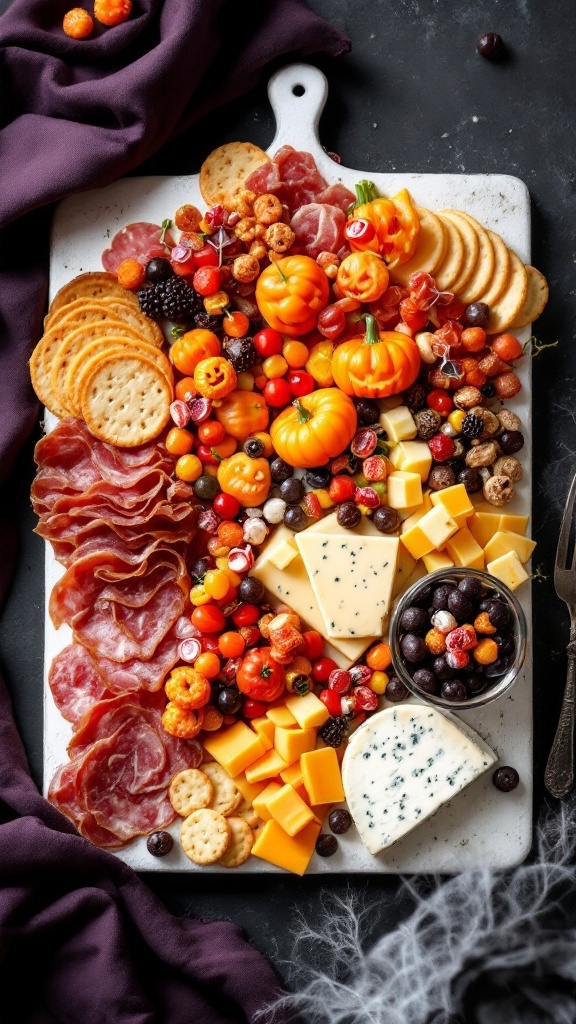
Creating a Halloween charcuterie board is a fun and interactive way to celebrate the spooky season. This board is not only visually striking but also packed with flavors that everyone will enjoy. It’s perfect for a gathering, as guests can help themselves to a variety of meats, cheeses, and fun Halloween-themed snacks.
As you assemble this festive spread, consider mixing sweet and savory elements. Think of pairing salty cured meats with creamy cheeses and crunchy crackers, alongside some seasonal fruits and spooky treats. This recipe is simple to prepare, making it an enjoyable addition to your Halloween festivities.
Ingredients
- 1 cup sliced salami
- 1 cup prosciutto
- 1 cup assorted cheeses (cheddar, gouda, etc.)
- 1 cup crackers (variety of shapes and flavors)
- 1 cup grapes (red or green)
- 1/2 cup dried cranberries
- 1/4 cup nuts (almonds or walnuts)
- 1 cup Halloween-themed candies (like gummy worms or candy corn)
- 1 small bowl of olives
Instructions
- Choose a large wooden board or platter as your base. Start by placing the cheese in the center, arranging them in a way that showcases their unique shapes.
- Next, layer the sliced meats around the cheese, fanning them out for an appealing look.
- Add the crackers in clusters, ensuring they’re easily accessible for guests.
- Fill in the spaces with grapes, dried cranberries, and nuts, creating a colorful and inviting display.
- Finally, sprinkle in your Halloween-themed candies for a festive touch and add a small bowl of olives to one side for extra flavor.
Vampire Bite Strawberries
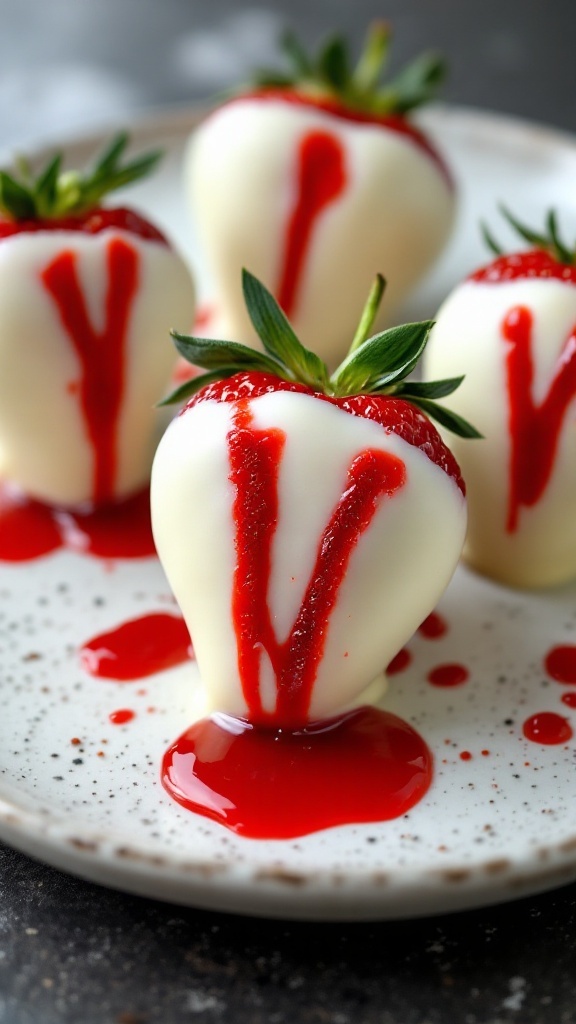
Vampire Bite Strawberries are a fun and spooky treat that perfectly fits the Halloween theme. These chocolate-covered strawberries are not only delicious but also super easy to make, making them a hit at any Halloween party.
With the sweet taste of ripe strawberries combined with the creamy white chocolate coating, these treats offer a delightful contrast. The added touch of red candy dots simulates little drops of blood, giving them a playful yet eerie vibe that’s sure to impress your guests.
Ingredients
- 1 pound fresh strawberries, washed and dried
- 10 ounces white chocolate chips
- Red candy melts or red sprinkles
- Parchment paper
Instructions
- Prepare the Strawberries: Ensure that the strawberries are completely dry after washing, as moisture can prevent the chocolate from sticking.
- Melt the Chocolate: In a microwave-safe bowl, melt the white chocolate chips in 30-second intervals, stirring in between until smooth.
- Dip the Strawberries: Hold each strawberry by the green leaves and dip it into the melted chocolate, coating it about two-thirds of the way up. Let excess chocolate drip off.
- Add the Blood: Place the dipped strawberries on parchment paper. While the chocolate is still wet, add two red candy dots on each strawberry to resemble vampire bites.
- Let Them Set: Allow the chocolate to harden at room temperature or in the refrigerator for about 15-20 minutes before serving.
Ghost Toast
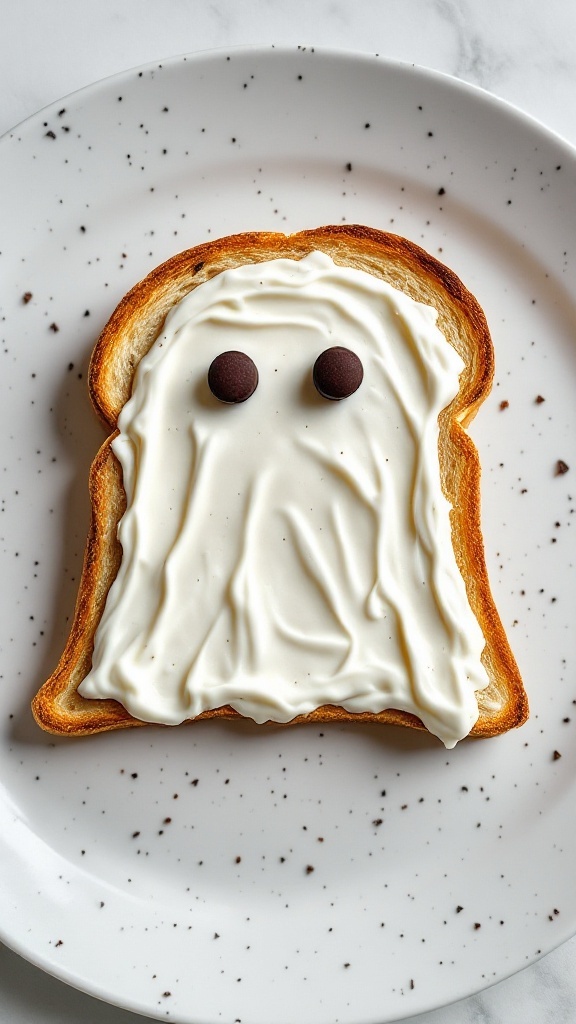
Ghost toast is a fun and spooky treat that’s perfect for any Halloween gathering. It’s simple to make, requiring just a few ingredients that most people have at home. The combination of crispy toast with creamy toppings creates a delightful contrast that’s both tasty and visually appealing.
This playful snack is not just about looks, but also about flavor. The creamy layer gives a light sweetness that pairs well with the crunchy bread. Kids will love helping to make this ghostly delight, making it a great activity for family fun!
Ingredients
- 2 slices of your favorite bread
- 2 tablespoons cream cheese or yogurt
- 2 chocolate chips or small candies for eyes
Instructions
- Toast the Bread: Begin by toasting the slices of bread until golden and crispy.
- Spread the Creamy Layer: Once toasted, spread the cream cheese or yogurt generously over the top of each slice.
- Create the Ghostly Face: Place two chocolate chips or candies on the cream layer to create eyes.
- Serve: Enjoy your ghost toast immediately for a fun Halloween treat!
Witch’S Cauldron Dip
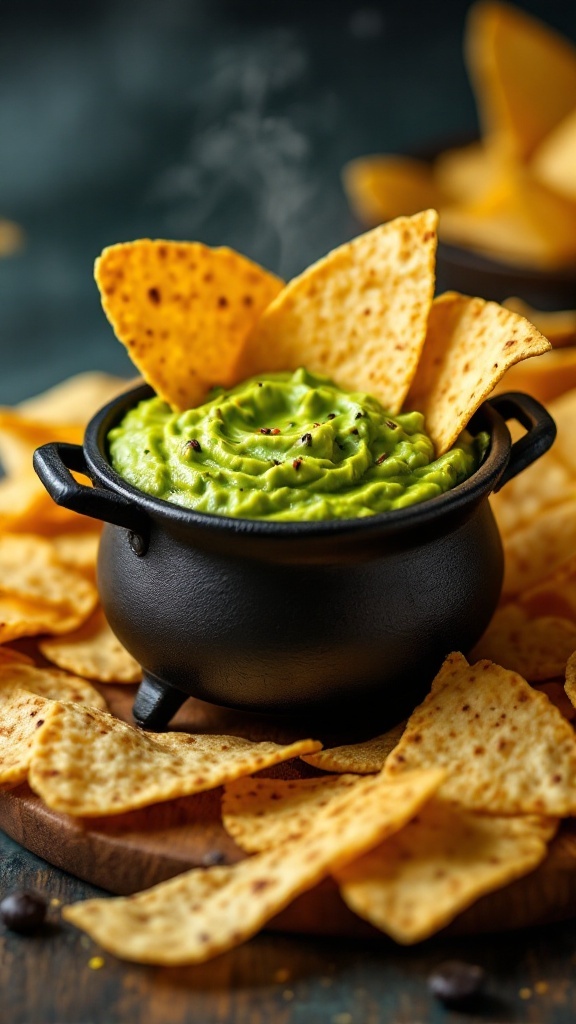
Witch’s Cauldron Dip is a fun and festive treat that’s perfect for your Halloween party. This vibrant green dip, reminiscent of a bubbling cauldron, combines creamy avocado with zesty lime, making it both delicious and refreshing. It’s simple to whip up, ensuring you can spend more time enjoying the festivities and less time in the kitchen.
Pair this dip with your favorite tortilla chips for a satisfying crunch that complements the smooth texture of the avocado. The bright colors and playful presentation make it a highlight at any Halloween gathering, and it’s sure to be a hit with guests of all ages!
Ingredients
- 2 ripe avocados
- 1 lime, juiced
- 1/4 teaspoon garlic powder
- 1/4 teaspoon onion powder
- Salt and pepper, to taste
- Tortilla chips, for serving
Instructions
- Prepare the Avocado: Cut the avocados in half, remove the pit, and scoop the flesh into a bowl.
- Mash the Avocado: Use a fork to mash the avocado to your desired level of creaminess.
- Add Flavor: Stir in lime juice, garlic powder, onion powder, and season with salt and pepper to taste.
- Serve: Transfer the dip to a serving bowl or a small cauldron for a fun presentation. Serve with tortilla chips for dipping.
Bloody Potion Bottles
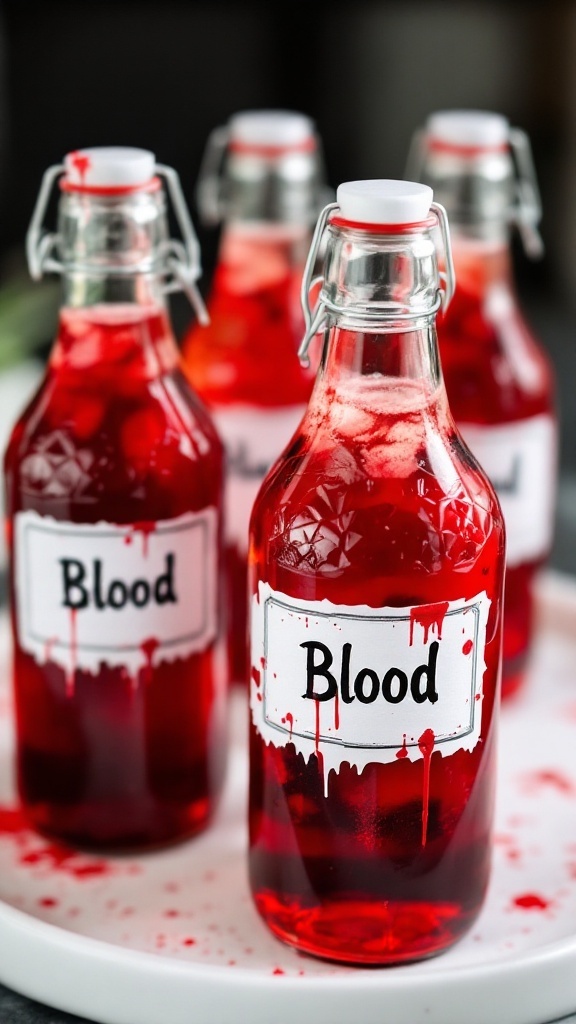
Get ready for a spooky treat that’s both visually striking and delicious! These Bloody Potion Bottles are a fun way to serve drinks at your Halloween party. The vibrant red color and floating fruit pieces give an eerie vibe, perfect for the occasion. Plus, they’re super simple to make, ensuring you won’t be stuck in the kitchen when you could be enjoying the festivities.
This recipe combines the refreshing taste of fruity soda with a hint of sweetness from berries, making it a hit among guests of all ages. It’s a playful twist on traditional beverages that adds a festive touch to your Halloween spread. Here’s how to whip up these delightful drinks!
Ingredients
- 4 cups cranberry juice
- 2 cups lemon-lime soda
- 1 cup mixed berries (strawberries, blueberries, raspberries)
- 1 cup ice cubes
- Optional: gummy worms or other spooky candies for decoration
Instructions
- In a large pitcher, combine the cranberry juice and lemon-lime soda. Stir gently to mix.
- Add the mixed berries and ice cubes to the pitcher for a fun and fruity touch.
- Pour the mixture into glass bottles or cups, filling them about three-quarters full.
- If desired, top each drink with gummy worms or other spooky candies for an extra festive flair.
- Serve immediately and watch your guests delight in this chilling concoction!
Candy Corn Quesadillas

Candy Corn Quesadillas are a playful and festive addition to any Halloween gathering. With a delicious blend of cheeses that mimic the colors of candy corn, these quesadillas are not just fun to look at; they also offer a delightful cheesy flavor in every bite. They are easy to whip up and perfect for both kids and adults alike, making them an excellent choice for a spooky celebration.
The combination of melted cheese and the crispy tortilla adds a satisfying texture, while the bright colors make them eye-catching on the snack table. Plus, you can get creative with the fillings, adding your favorite ingredients to personalize them. Let’s dive into how to make these tasty treats for your Halloween party!
Ingredients
- 4 large flour tortillas
- 1 cup shredded cheddar cheese
- 1 cup shredded mozzarella cheese
- 1/2 cup cream cheese, softened
- 1/4 cup diced bell peppers (yellow and orange)
- 1 tablespoon olive oil
- Salt and pepper to taste
Instructions
- Prepare the Filling: In a bowl, mix the cheddar cheese, mozzarella cheese, softened cream cheese, and diced bell peppers. Season with salt and pepper to taste.
- Assemble the Quesadillas: Spread the cheese mixture evenly over two tortillas. Top with the remaining tortillas to form two quesadilla stacks.
- Cook the Quesadillas: Heat olive oil in a skillet over medium heat. Place one quesadilla in the skillet and cook for about 3-4 minutes on each side, or until golden brown and the cheese is melted. Repeat with the second quesadilla.
- Slice and Serve: Remove from the skillet, let cool slightly, then slice into wedges. Serve warm and enjoy your festive treat!
Worms In Dirt Brownies
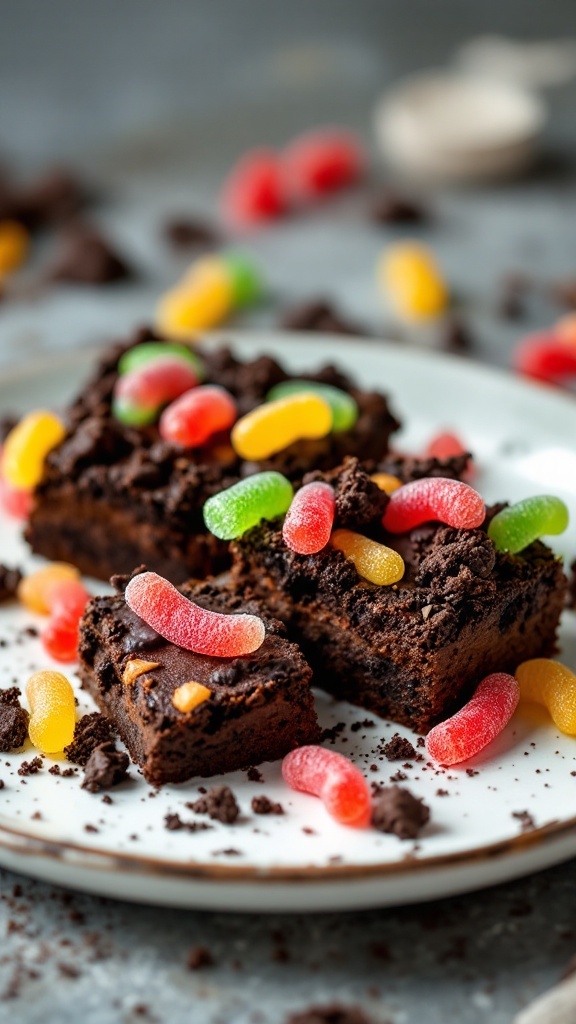
If you’re looking for a fun treat that captures the spirit of Halloween, Worms In Dirt Brownies are a delightful choice. These brownies are rich, chocolaty, and topped with crumbly chocolate cookies and colorful gummy worms, creating an enjoyable contrast of textures and flavors.
Not only are they simple to make, but they also add a playful element to any Halloween gathering. Perfect for kids and adults alike, these brownies will surely become a favorite at your spooky celebrations!
Ingredients
- 1 box of brownie mix (plus ingredients required on the box)
- 1 cup crushed chocolate sandwich cookies
- 1 cup gummy worms
- 1/4 cup chocolate chips (optional)
Instructions
- Preheat the Oven: Start by preheating your oven according to the brownie mix instructions.
- Prepare the Brownie Batter: In a mixing bowl, prepare the brownie mix as directed on the box, adding in any additional ingredients required, such as eggs and oil.
- Bake the Brownies: Pour the brownie batter into a greased baking dish and bake for the time suggested on the box. Allow them to cool completely.
- Add the Topping: Once cooled, sprinkle the crushed chocolate cookies over the top of the brownies to create the ‘dirt’ layer. Press down gently to ensure they stick.
- Finish with Worms: Scatter the gummy worms across the top for a creepy-crawly effect. For an extra touch, you can also add chocolate chips.
- Slice and Serve: Cut the brownies into squares and serve. Enjoy the spooky fun!
Jack-O’-Lantern Fruit Cups
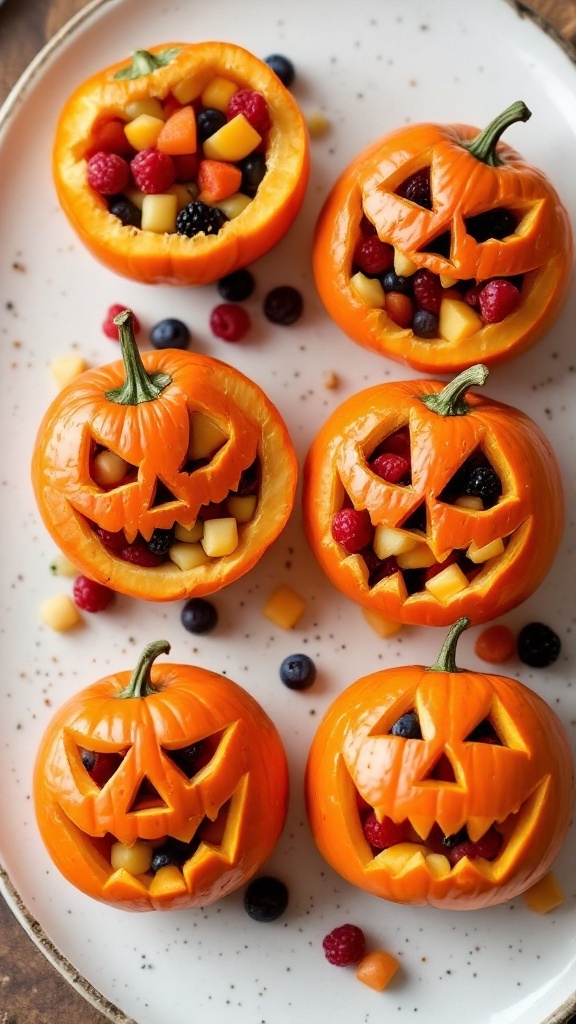
Jack-O’-Lantern Fruit Cups are a fun and festive treat for any Halloween party. These cute little fruit cups not only look great but are also a tasty way to get kids excited about healthy snacks. Filled with a colorful mix of fresh fruits, they offer a sweet and juicy bite that’s perfect for any celebration.
Making these fruit cups is super easy and requires minimal preparation. Just carve out some small pumpkins, scoop out the insides, and fill them with your favorite fruits. This recipe is perfect for adding a playful touch to your Halloween festivities without any fuss!
Ingredients
- 6 small orange pumpkins
- 2 cups diced pineapple
- 1 cup blueberries
- 1 cup raspberries
- 1 cup diced cantaloupe
- 1/2 cup diced kiwi
- 1 tablespoon honey (optional)
Instructions
- Prepare the Pumpkins: Carefully cut the tops off the pumpkins and scoop out the seeds and pulp.
- Make the Fruit Salad: In a large bowl, combine the diced pineapple, blueberries, raspberries, cantaloupe, and kiwi. If desired, drizzle honey over the fruit and toss gently to combine.
- Fill the Pumpkins: Spoon the fruit mixture into each carved pumpkin, filling them to the top.
- Display: Place the filled Jack-O’-Lanterns on a serving platter and enjoy!