21 Delicious Finger Foods Perfect for Fall Parties
Fall finger foods are all about embracing the cozy flavors of the season while keeping things fun and easy to eat. Whether you’re gathering with friends for a watch party or just enjoying a casual night in, these bite-sized delights make snacking simple and satisfying. From savory pumpkin bites to sweet apple pastries, there’s something for everyone to nibble on during those crisp autumn evenings.
Mini Pumpkin Spice Cheesecake Bites
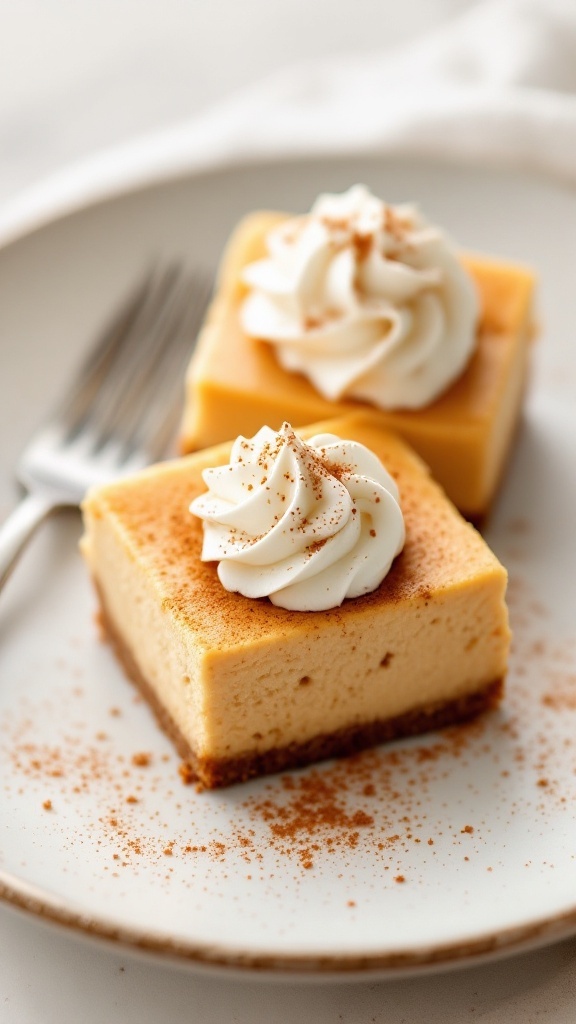
These Mini Pumpkin Spice Cheesecake Bites capture the essence of fall in every delicious bite. With a creamy pumpkin filling infused with warm spices, they beautifully balance sweetness and spice, making them a delightful treat for any gathering. They are not only tasty but also simple to whip up, perfect for impressing guests or indulging yourself.
Each bite features a buttery graham cracker crust that complements the rich pumpkin cheesecake. These mini desserts are wonderfully portable, making them ideal for parties or cozy evenings at home. Your friends and family will love the seasonal flavor they bring!
Ingredients
- 1 ½ cups graham cracker crumbs
- 1/4 cup granulated sugar
- 1/2 cup unsalted butter, melted
- 16 oz cream cheese, softened
- 1 cup canned pumpkin puree
- 1 cup powdered sugar
- 2 large eggs
- 1 teaspoon vanilla extract
- 1 teaspoon ground cinnamon
- 1/2 teaspoon ground nutmeg
- 1/4 teaspoon ground ginger
- Whipped cream for topping
Instructions
- Prepare the Crust: Preheat your oven to 325°F (165°C). In a bowl, combine graham cracker crumbs, sugar, and melted butter until well mixed. Press the mixture firmly into the bottom of a greased mini muffin tin.
- Make the Filling: In a large mixing bowl, beat the cream cheese until smooth. Add in pumpkin puree, powdered sugar, eggs, vanilla, and spices. Blend until everything is well combined and creamy.
- Fill the Cups: Spoon the pumpkin cheesecake filling into the prepared crusts, filling each mini muffin cup about three-quarters full.
- Bake: Place in the preheated oven and bake for 15-20 minutes, or until the edges are set and the centers have a slight jiggle. Remove and let cool completely.
- Serve: Once cooled, refrigerate for at least an hour. Top with whipped cream and a sprinkle of cinnamon before serving.
Apple Cider Donut Holes
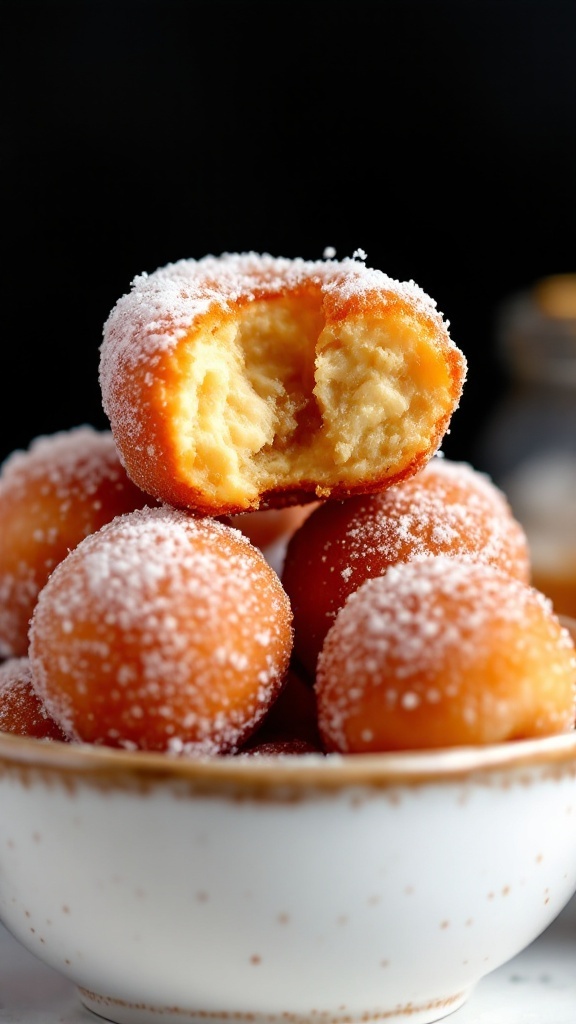
Apple cider donut holes are a delightful treat that perfectly capture the essence of fall. With a warm, spiced flavor and a soft, fluffy texture, these little bites of joy are ideal for gatherings or cozy nights at home.
Making them is easier than you might think! Just combine simple ingredients, fry them to a golden brown, and roll them in cinnamon sugar for that signature sweetness. They’re sure to be a hit with everyone!
Ingredients
- 2 cups all-purpose flour
- 1/2 cup granulated sugar
- 1 tablespoon baking powder
- 1 teaspoon ground cinnamon
- 1/2 teaspoon ground nutmeg
- 1/4 teaspoon salt
- 1/2 cup apple cider
- 1 large egg
- 2 tablespoons unsalted butter, melted
- Oil for frying
- 1/2 cup granulated sugar (for coating)
- 1 teaspoon ground cinnamon (for coating)
Instructions
- Prepare the Dough: In a bowl, mix together flour, sugar, baking powder, cinnamon, nutmeg, and salt. In another bowl, whisk together apple cider, egg, and melted butter. Combine the wet ingredients with the dry ingredients until just mixed.
- Form the Donut Holes: Scoop out small portions of dough and roll them into balls, about 1 inch in diameter.
- Heat the Oil: In a deep pan, heat about 2 inches of oil over medium heat until it reaches 350°F (175°C).
- Fry the Donut Holes: Carefully drop the balls into the hot oil in batches, frying until they are golden brown on all sides, about 2-3 minutes. Remove them with a slotted spoon and drain on paper towels.
- Coat in Cinnamon Sugar: In a bowl, mix the granulated sugar with cinnamon. While the donut holes are still warm, roll them in the cinnamon sugar mixture until well coated.
Bacon-Wrapped Maple Glazed Brussels Sprouts
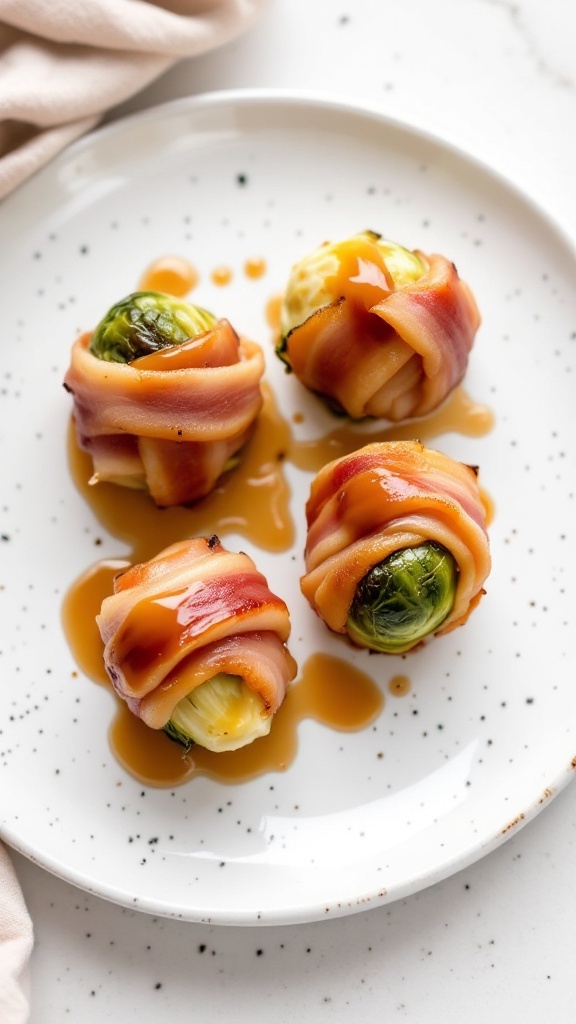
Bacon-wrapped maple glazed Brussels sprouts are a delightful treat that perfectly marries savory and sweet flavors. The crispy, salty bacon complements the earthy taste of the Brussels sprouts, while a drizzle of maple syrup adds a touch of sweetness that elevates the dish. Not only is this recipe easy to make, but it also brings a cozy, autumnal vibe that’s perfect for gatherings.
These bites are not just for show—they’re packed with flavor and sure to impress your guests. They can be whipped up quickly, making them a go-to choice for impromptu get-togethers or as a standout appetizer for any fall feast. Plus, they’re a fun way to get in those greens while enjoying a deliciously crispy treat!
Ingredients
- 1 pound Brussels sprouts, trimmed
- 8 slices of bacon, cut in half
- 1/4 cup maple syrup
- 1 tablespoon olive oil
- 1 teaspoon salt
- 1/2 teaspoon black pepper
Instructions
- Preheat the oven to 400°F (200°C). Line a baking sheet with parchment paper.
- In a large bowl, toss the trimmed Brussels sprouts with olive oil, salt, and pepper until evenly coated.
- Wrap each Brussels sprout with a half slice of bacon, securing it with a toothpick if necessary. Place the wrapped sprouts on the prepared baking sheet.
- Drizzle the maple syrup over the bacon-wrapped Brussels sprouts, ensuring they are nicely coated.
- Bake in the preheated oven for 25-30 minutes, or until the bacon is crispy and the Brussels sprouts are tender. Serve warm and enjoy!
Sweet Potato Tots With Cranberry Ketchup
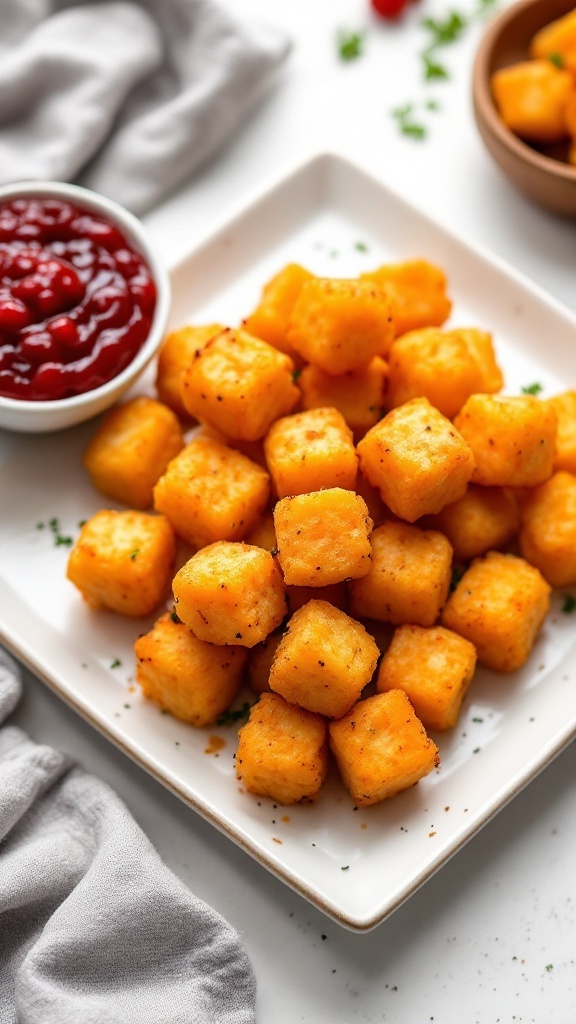
Sweet potato tots are a delightful twist on traditional potato snacks. These little bites are not only crispy on the outside but also soft and flavorful on the inside, thanks to the natural sweetness of the sweet potatoes. Paired with a tangy cranberry ketchup, they bring a burst of fall flavors that are perfect for any gathering or cozy night in.
Making sweet potato tots is simple and fun! You just need to mash cooked sweet potatoes, mix them with some seasonings, form them into bite-sized pieces, and bake until golden. The cranberry ketchup adds a unique touch, balancing the sweetness of the potatoes with a bit of tartness. It’s a recipe everyone will enjoy!
Ingredients
- 2 cups mashed sweet potatoes
- 1 cup breadcrumbs
- 1/2 teaspoon garlic powder
- 1/2 teaspoon onion powder
- 1/4 teaspoon paprika
- Salt and pepper to taste
- 1 tablespoon olive oil
- 1 cup cranberry sauce
- 1 tablespoon apple cider vinegar
- 1 teaspoon honey or maple syrup
Instructions
- Preheat your oven to 400°F (200°C) and line a baking sheet with parchment paper.
- In a bowl, combine the mashed sweet potatoes, breadcrumbs, garlic powder, onion powder, paprika, salt, and pepper. Mix until well combined.
- Form the mixture into small tots and place them on the prepared baking sheet.
- Drizzle with olive oil and bake for 20-25 minutes, turning halfway through, until they are golden brown.
- While the tots are baking, prepare the cranberry ketchup by mixing cranberry sauce, apple cider vinegar, and honey (or maple syrup) in a small bowl. Adjust the sweetness to your liking.
- Once the tots are done, serve them warm with the cranberry ketchup for dipping.
Butternut Squash And Sage Arancini
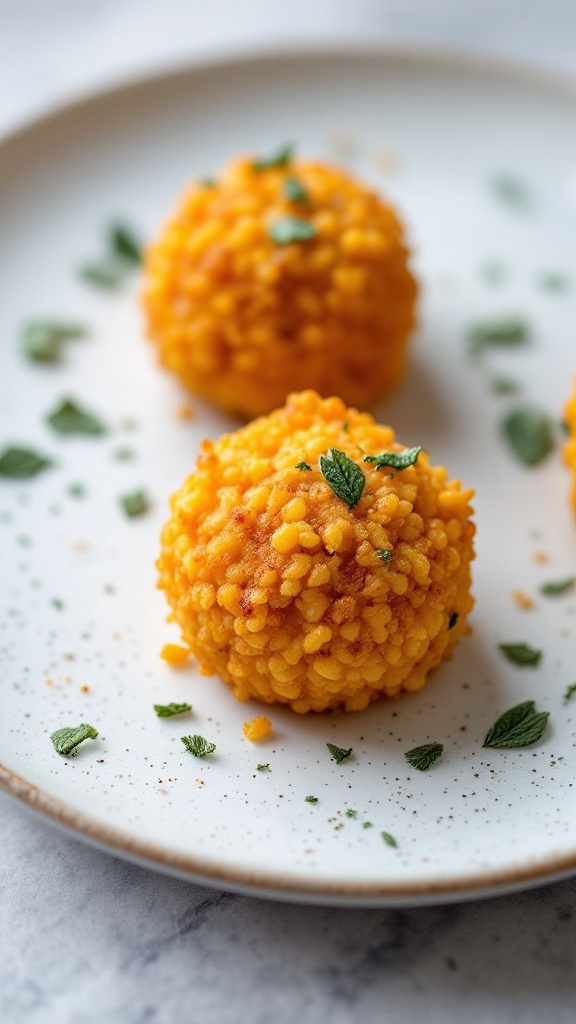
Butternut squash and sage arancini are a delightful twist on traditional Italian risotto balls. These crispy bites are packed with the warm flavors of fall, featuring sweet butternut squash and fragrant sage. They make an excellent finger food for gatherings, offering a comforting taste that’s perfect for chilly evenings.
With a crispy exterior and a creamy filling, these arancini are surprisingly easy to prepare. They can be made ahead of time and simply popped in the oven or fryer when your guests arrive. Perfect for sharing, these little balls of joy will surely steal the spotlight at any fall gathering.
Ingredients
- 1 cup cooked arborio rice
- 1 cup butternut squash, roasted and mashed
- 1/2 cup grated Parmesan cheese
- 1/4 cup fresh sage, chopped
- 1/2 teaspoon salt
- 1/4 teaspoon black pepper
- 1/2 cup all-purpose flour
- 2 eggs, beaten
- 1 cup breadcrumbs
- Vegetable oil for frying
Instructions
- Prepare the Mixture: In a large bowl, combine the cooked arborio rice, mashed butternut squash, Parmesan cheese, chopped sage, salt, and pepper. Mix until well combined.
- Shape the Arancini: Take a small handful of the mixture and form it into a ball about the size of a golf ball. Repeat until all the mixture is used.
- Coat the Balls: Dredge each ball in flour, dip in the beaten eggs, and then roll in breadcrumbs to create a nice coating.
- Fry the Arancini: Heat vegetable oil in a deep pan over medium heat. Fry the arancini in batches until golden brown, about 3-4 minutes per side. Drain on paper towels.
- Serve: Enjoy the arancini warm, perhaps with a side of marinara sauce for dipping!
Caramel Apple Slices With Nut Toppings
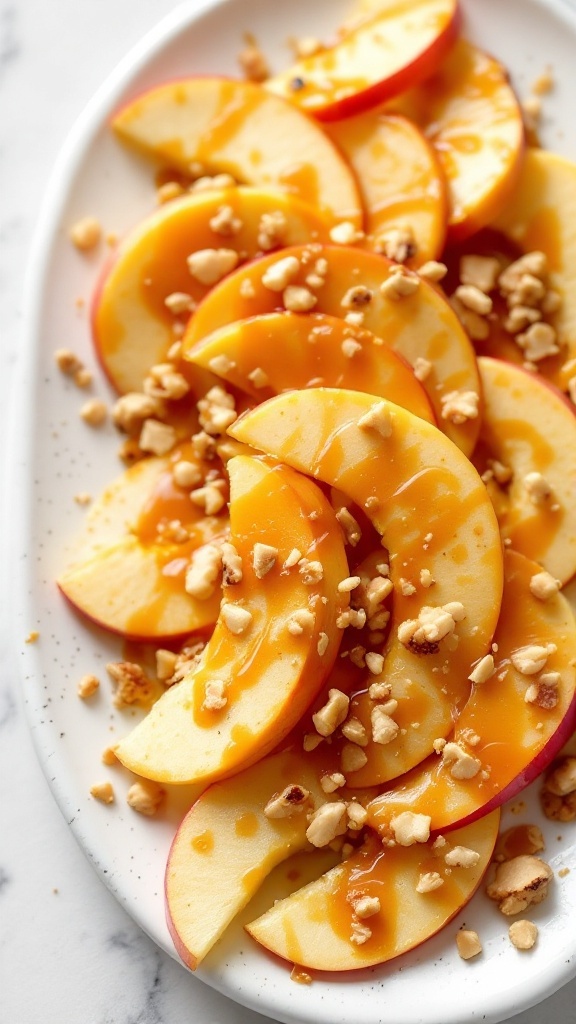
Caramel apple slices with nut toppings are a delightful treat that perfectly capture the essence of fall. The crispness of fresh apples paired with rich, buttery caramel creates a sweet and slightly salty flavor profile. Topped with crunchy nuts, this snack is not only delicious but also simple to prepare, making it a go-to option for gatherings or cozy evenings at home.
This recipe requires minimal ingredients and can be whipped up in no time. It’s a fun twist on the classic caramel apple, offering a portion-controlled option that makes it easy to enjoy without the mess. Whether you’re hosting a party or just want to indulge in a seasonal favorite, these caramel apple slices are sure to please.
Ingredients
- 2 large apples (any variety)
- 1 cup caramel sauce
- 1/2 cup chopped nuts (such as walnuts or pecans)
- 1 teaspoon cinnamon (optional)
Instructions
- Prepare the Apples: Wash and slice the apples into wedges, removing the core. Arrange the slices on a serving platter.
- Drizzle Caramel: Heat the caramel sauce in a microwave-safe bowl for about 30 seconds to soften. Drizzle the warm caramel over the apple slices.
- Add Nut Toppings: Sprinkle the chopped nuts evenly over the caramel-coated apple slices. If desired, sprinkle a little cinnamon on top for added flavor.
- Serve: Enjoy immediately or chill in the refrigerator for about 10 minutes to let the caramel set slightly before serving.
Cranberry Brie Pastry Cups
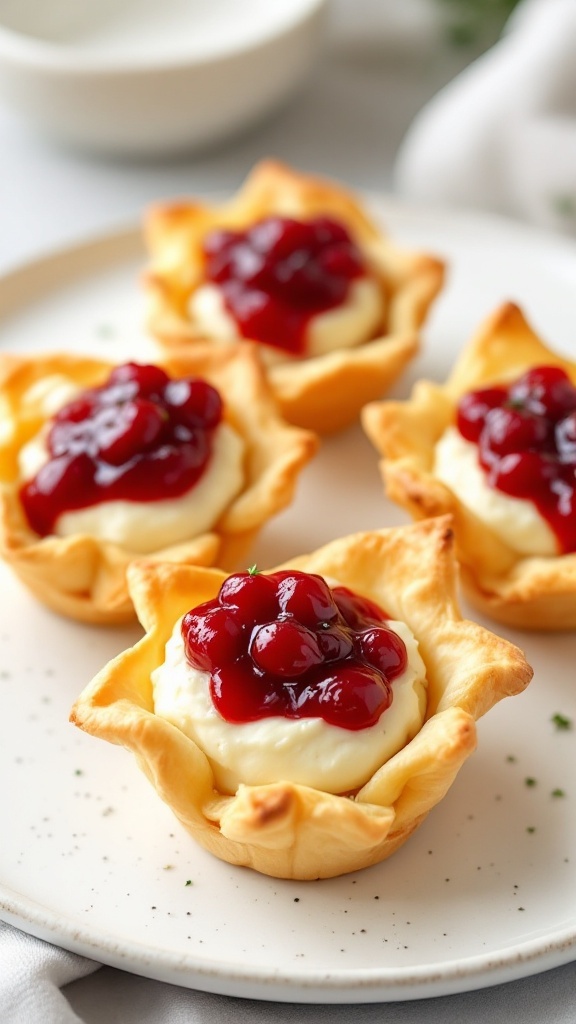
Cranberry Brie Pastry Cups are the perfect bite-sized treats for your fall gatherings. Combining the rich, creamy texture of brie cheese with the sweet and tart flavor of cranberry sauce, these little cups deliver a delightful mix of tastes that everyone loves. Plus, they are super easy to whip up, making them a great choice for both seasoned cooks and kitchen novices.
The flaky pastry adds the perfect crunch, balancing the creaminess of the brie and the sweetness of the cranberries. These cups are not only visually appealing but also bursting with flavors that scream fall festivities. Whether it’s a holiday party or a simple get-together, these savory snacks will be a hit!
Ingredients
- 1 package of puff pastry, thawed
- 8 ounces brie cheese, cut into small pieces
- 1 cup cranberry sauce (canned or homemade)
- 1 egg, beaten (for egg wash)
- Fresh thyme or rosemary (for garnish, optional)
Instructions
- Preheat your oven to 375°F (190°C). Roll out the thawed puff pastry on a lightly floured surface.
- Cut the pastry into squares and place them into a greased muffin tin to form cups.
- Fill each pastry cup with a piece of brie cheese, then top with a spoonful of cranberry sauce.
- Brush the edges of the pastry with the beaten egg for a golden finish.
- Bake for 15-20 minutes, or until the pastry is puffed and golden brown.
- Remove from the oven and let cool slightly before garnishing with fresh thyme or rosemary, if desired. Serve warm.
Maple Bourbon Bacon-Wrapped Dates
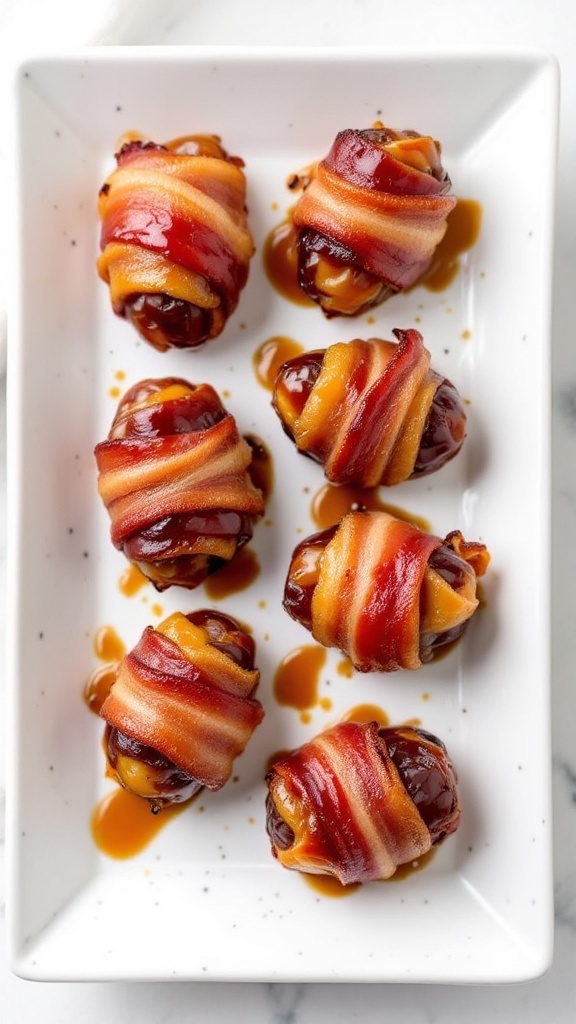
Maple Bourbon Bacon-Wrapped Dates are a delightful combination of sweet and savory flavors, making them a perfect finger food for fall gatherings. The sweet, caramel-like taste of medjool dates pairs beautifully with the smoky richness of bacon, while a hint of maple bourbon glaze adds warmth and depth. These bites are not only delicious but also super easy to prepare, making them a go-to choice for any occasion.
In just a few simple steps, you can create these tasty morsels that are sure to impress your guests. Whether you’re hosting a party or enjoying a cozy night in, Maple Bourbon Bacon-Wrapped Dates are a delicious addition to your fall finger food lineup.
Ingredients
- 12 large medjool dates, pitted
- 6 slices of thick-cut bacon, cut in half
- 1/4 cup maple syrup
- 2 tablespoons bourbon
- 1/2 teaspoon black pepper
- 1/4 teaspoon cayenne pepper (optional)
Instructions
- Preheat your oven to 375°F (190°C) and line a baking sheet with parchment paper.
- In a small bowl, mix the maple syrup, bourbon, black pepper, and cayenne pepper (if using).
- Wrap each date with a half slice of bacon and secure with a toothpick. Arrange them on the prepared baking sheet.
- Brush the bacon-wrapped dates with the maple bourbon glaze.
- Bake for 20-25 minutes, turning once halfway, until the bacon is crispy and caramelized.
- Remove from the oven and let cool slightly before serving. Enjoy your delicious bites!
Pumpkin Deviled Eggs

Pumpkin deviled eggs are a delightful twist on the classic recipe, bringing in the warm flavors of fall. These eggs are creamy, slightly sweet, and perfectly spiced, making them a fun addition to any gathering. They’re simple to prepare and can be made ahead of time, which is always a bonus when entertaining.
The pumpkin puree adds a lovely color and unique flavor, complemented by seasonings like cinnamon and nutmeg. Topped with a sprinkle of paprika and fresh herbs, these deviled eggs are both tasty and visually appealing. They’re sure to be a hit at your next autumn celebration!
Ingredients
- 6 large eggs
- 1/2 cup canned pumpkin puree
- 3 tablespoons mayonnaise
- 1 teaspoon Dijon mustard
- 1/2 teaspoon ground cinnamon
- 1/4 teaspoon ground nutmeg
- Salt and pepper to taste
- Paprika for garnish
- Fresh herbs (like thyme or parsley) for garnish
Instructions
- Hard boil the Eggs: Place the eggs in a pot and cover them with cold water. Bring to a boil, then cover and remove from heat. Let sit for 10-12 minutes. Cool in ice water and peel.
- Prepare the Filling: Cut the eggs in half lengthwise and remove the yolks. In a mixing bowl, mash the yolks with pumpkin puree, mayonnaise, mustard, cinnamon, nutmeg, salt, and pepper until smooth.
- Fill the Egg Whites: Spoon or pipe the pumpkin mixture back into the egg whites. You can use a piping bag for a nice presentation.
- Garnish: Sprinkle with paprika and fresh herbs before serving.
Mini Pecan Pie Tarts
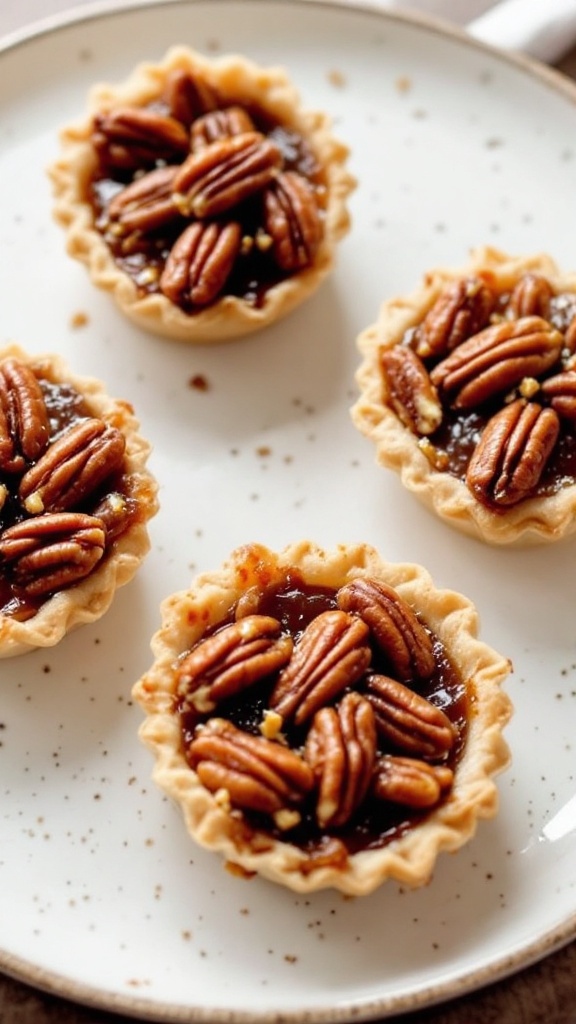
Mini pecan pie tarts are a delightful take on the classic dessert, capturing the rich, nutty flavor of pecans in a bite-sized form. With a buttery crust and a gooey filling, these tarts bring a touch of sweetness that’s sure to please. They’re simple to make, making them a perfect addition to any fall gathering.
These little treats are great for sharing and are sure to be a hit at parties or family events. The combination of crunchy pecans and the sweet filling creates a comforting, homely taste that embodies the essence of fall.
Ingredients
- 1 package of pre-made mini tart shells
- 1 cup pecans, chopped
- 3/4 cup light brown sugar
- 1/2 cup corn syrup
- 1/4 cup unsalted butter, melted
- 2 large eggs
- 1 teaspoon vanilla extract
- 1/2 teaspoon salt
Instructions
- Preheat your oven to 350°F (175°C).
- In a mixing bowl, combine the brown sugar, corn syrup, melted butter, eggs, vanilla extract, and salt. Whisk until well combined.
- Place a few chopped pecans into each mini tart shell.
- Pour the filling mixture over the pecans, filling each shell about three-quarters full.
- Bake for 20-25 minutes or until the filling is set and the crust is golden brown.
- Allow the tarts to cool for a few minutes before serving. Enjoy!
Roasted Acorn Squash Crostini With Brown Butter
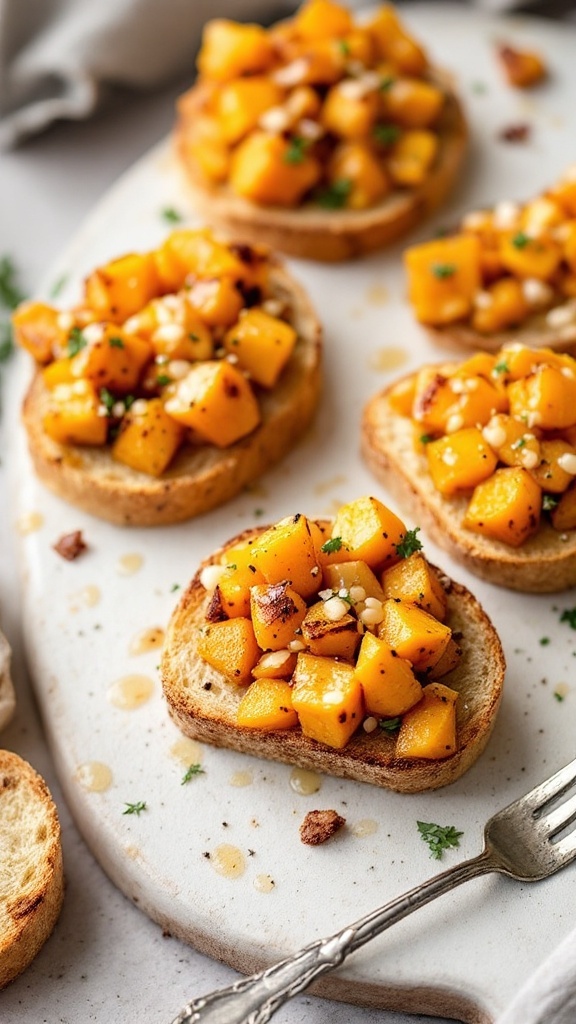
Roasted acorn squash crostini is a delightful fall appetizer that perfectly captures the season’s flavors. With a sweet, nutty taste, the squash pairs beautifully with the nutty richness of brown butter, making each bite comforting and satisfying. This recipe is simple enough for beginners and will impress your guests with its warm, seasonal essence.
The crispy crostini serve as a wonderful base for the tender roasted squash, while the addition of pine nuts adds a lovely crunch. It’s an easy dish to prepare, allowing you to enjoy the cozy vibes of fall without spending hours in the kitchen.
Ingredients
- 1 acorn squash, peeled, seeded, and diced
- 2 tablespoons olive oil
- Salt and pepper to taste
- 1/4 cup unsalted butter
- 1 French baguette, sliced into 1/2-inch pieces
- 1/4 cup pine nuts, toasted
- Fresh parsley, chopped for garnish
- Balsamic glaze for drizzling (optional)
Instructions
- Preheat the oven to 400°F (200°C). On a baking sheet, toss the diced acorn squash with olive oil, salt, and pepper. Roast for 25-30 minutes until tender and caramelized.
- In a saucepan, melt the butter over medium heat. Continue cooking, swirling occasionally, until it turns a golden brown and has a nutty aroma. Be careful not to burn it.
- While the butter is browning, arrange the baguette slices on another baking sheet. Brush them lightly with olive oil and toast in the oven for about 5-7 minutes until golden and crispy.
- Once everything is ready, assemble the crostini by spooning the roasted acorn squash onto the toasted baguette slices. Drizzle with the brown butter and sprinkle with toasted pine nuts and fresh parsley. Optionally, add a drizzle of balsamic glaze for extra flavor.
- Serve warm and enjoy your delicious fall finger food!
Apple Butter And Brie Phyllo Cups

Apple Butter and Brie Phyllo Cups are a delightful treat that perfectly capture the flavors of fall. These little bites combine the rich creaminess of brie with the sweet, spiced goodness of apple butter, all nestled in a flaky phyllo cup. They’re simple to make and will impress your guests at any gathering!
With just a few ingredients, you can create an elegant appetizer that balances savory and sweet flavors beautifully. These phyllo cups are not only delicious but also add a lovely presentation to your fall finger food spread.
Ingredients
- 1 package of phyllo cups
- 8 ounces brie cheese, cut into small cubes
- 1/2 cup apple butter
- Fresh thyme or parsley for garnish (optional)
Instructions
- Preheat your oven to 350°F (175°C).
- Place the phyllo cups on a baking sheet.
- In each phyllo cup, add a small cube of brie cheese.
- Top the brie with a spoonful of apple butter.
- Bake in the preheated oven for about 10-12 minutes, or until the brie is melted and bubbly.
- Remove from the oven and garnish with fresh thyme or parsley, if desired. Serve warm.
Sausage Stuffed Mushrooms With Sage
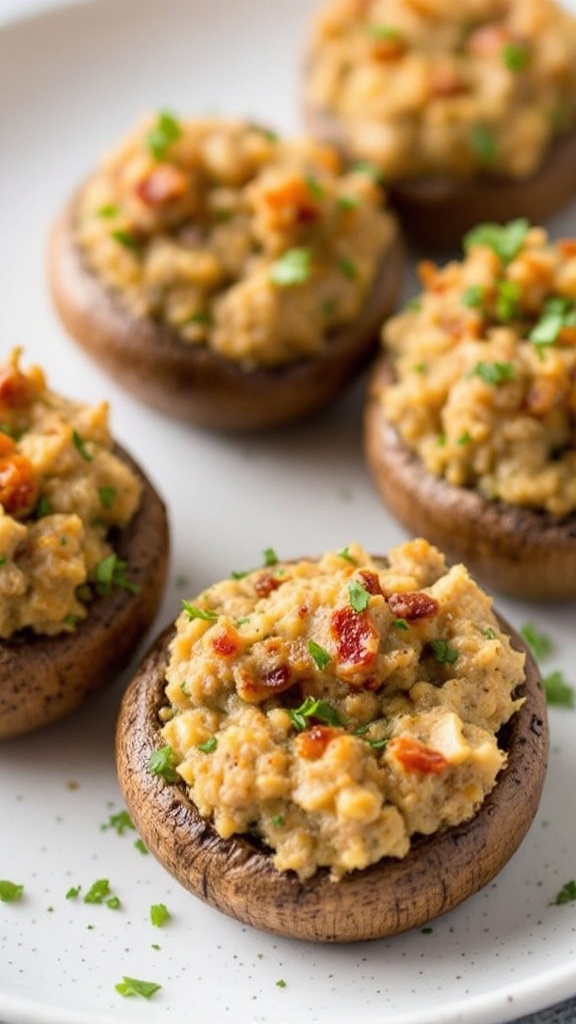
Sausage stuffed mushrooms with sage are a delightful blend of flavors, perfect for fall gatherings. These bite-sized treats combine the heartiness of sausage with the earthiness of mushrooms and a hint of fresh sage, creating a savory snack that everyone will love.
This recipe is simple to make, making it great for both novice and experienced cooks. The combination of ingredients is not only tasty but also fills the kitchen with a cozy aroma that sets the mood for any occasion.
Ingredients
- 1 pound Italian sausage
- 16 large mushrooms, stems removed
- 1 cup cream cheese, softened
- 1/2 cup breadcrumbs
- 1/4 cup grated Parmesan cheese
- 2 tablespoons fresh sage, chopped
- 1 clove garlic, minced
- Salt and pepper to taste
- Olive oil for drizzling
Instructions
- Preheat your oven to 375°F (190°C).
- In a skillet, cook the Italian sausage over medium heat until browned. Drain excess fat and set aside.
- In a mixing bowl, combine the cooked sausage, cream cheese, breadcrumbs, Parmesan cheese, sage, garlic, salt, and pepper. Mix until well combined.
- Stuff each mushroom cap with the sausage mixture and place them on a baking sheet.
- Drizzle a little olive oil over the tops and bake for 20-25 minutes, or until the mushrooms are tender and the tops are golden brown.
- Let them cool slightly before serving. Enjoy your savory bites!
Butternut Squash And Goat Cheese Quesadilla Triangles

Butternut squash and goat cheese quesadilla triangles are a delicious and seasonal finger food, perfect for fall gatherings. The combination of the sweet, creamy squash paired with the tangy goat cheese creates a delightful flavor that’s both comforting and sophisticated.
This recipe is simple to make and can easily be prepared ahead of time. Just a few ingredients come together quickly, making it a great choice for entertaining or a cozy night in. Serve them warm with a dollop of sour cream or a sprinkle of fresh herbs for added flavor!
Ingredients
- 1 medium butternut squash, peeled and diced
- 1 tablespoon olive oil
- Salt and pepper to taste
- 4 large flour tortillas
- 6 oz goat cheese, crumbled
- 1 cup shredded mozzarella cheese
- Fresh herbs (like cilantro or parsley) for garnish
Instructions
- Preheat the oven to 400°F (200°C). Toss the diced butternut squash with olive oil, salt, and pepper. Spread it in a single layer on a baking sheet and roast for about 25-30 minutes, or until tender and slightly caramelized.
- Once the squash is done, let it cool slightly. In a large skillet over medium heat, place a tortilla and sprinkle half with goat cheese and mozzarella, followed by a layer of roasted squash. Fold the tortilla in half.
- Cook the quesadilla for about 3-4 minutes on each side or until golden brown and the cheese has melted. Remove from the skillet and slice into triangles.
- Repeat with the remaining tortillas and filling. Garnish with fresh herbs before serving.
Harvest Vegetable Spring Rolls With Maple Dipping Sauce
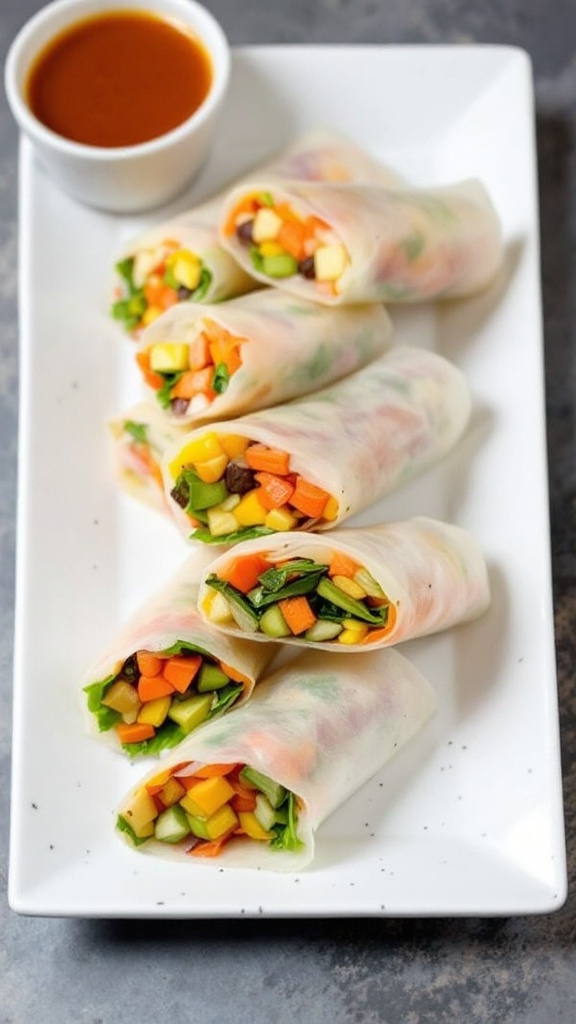
Harvest Vegetable Spring Rolls are a fresh and vibrant way to celebrate the flavors of fall. These rolls are loaded with crisp vegetables, bringing a delightful crunch with every bite. They are not only simple to make but also provide a healthy snack option for gatherings or a light lunch.
The combination of colorful veggies wrapped in delicate rice paper creates a visually appealing dish that is sure to impress. Pairing these rolls with a sweet maple dipping sauce adds a cozy, autumnal twist that enhances the overall experience. Enjoying these spring rolls is a light and satisfying way to embrace the harvest season.
Ingredients
- 6 rice paper wrappers
- 1/2 cup shredded carrots
- 1/2 cup sliced bell peppers (red, yellow, or green)
- 1/2 cup cucumber, julienned
- 1/2 cup fresh spinach or lettuce leaves
- 1/4 cup fresh herbs (like cilantro or mint)
- 1/4 cup corn kernels (fresh or canned)
Instructions
- Prepare the Veggies: Wash and slice all vegetables into thin strips. Set aside.
- Soften the Rice Paper: Fill a shallow dish with warm water. Dip one rice paper wrapper into the water for about 10-15 seconds until it softens. Lay it flat on a clean surface.
- Assemble the Spring Rolls: Place a small amount of each vegetable and some herbs onto the lower third of the rice paper. Be careful not to overfill.
- Roll It Up: Fold the sides of the rice paper over the filling, then roll it up tightly from the bottom to the top. Repeat with remaining wrappers and fillings.
- Make the Maple Dipping Sauce: In a small bowl, mix 1/4 cup maple syrup, 1 tablespoon soy sauce, and a dash of sesame oil. Stir until well combined.
- Serve: Arrange the spring rolls on a platter with the maple dipping sauce in a bowl for dipping.
Turkey Cranberry Sliders
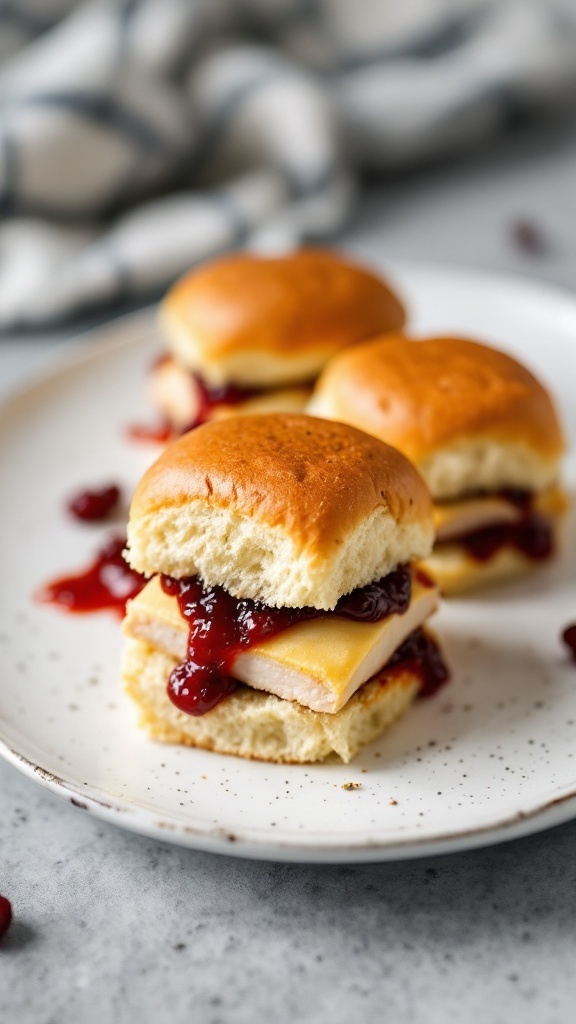
Turkey cranberry sliders are a delightful blend of savory and sweet flavors, making them the perfect finger food for fall gatherings. These mini sandwiches combine tender turkey with creamy cheese and tart cranberry sauce, all nestled between soft slider buns. They’re easy to whip up and can be enjoyed warm or at room temperature, making them an ideal choice for parties or family get-togethers.
Not only do these sliders taste great, but they also capture the essence of the season. The combination of turkey and cranberry is reminiscent of Thanksgiving, but these little bites are perfect for any fall occasion. Plus, they’re simple enough to make that even novice cooks can impress their guests!
Ingredients
- 12 slider buns
- 1 pound sliced turkey breast
- 8 slices of Swiss cheese
- 1 cup cranberry sauce
- 2 tablespoons butter, melted
- 1 teaspoon garlic powder
- 1 teaspoon onion powder
Instructions
- Preheat your oven to 350°F (175°C).
- In a baking dish, arrange the bottom halves of the slider buns. Layer the turkey slices evenly over the buns.
- Place a slice of Swiss cheese on top of the turkey, then spoon cranberry sauce over the cheese.
- Cover with the top halves of the buns.
- In a small bowl, mix the melted butter, garlic powder, and onion powder. Brush this mixture over the top of the slider buns.
- Bake in the preheated oven for about 15-20 minutes, or until the cheese is melted and the buns are golden brown.
- Remove from the oven, slice, and serve warm!
Pumpkin Hummus With Pita Chips
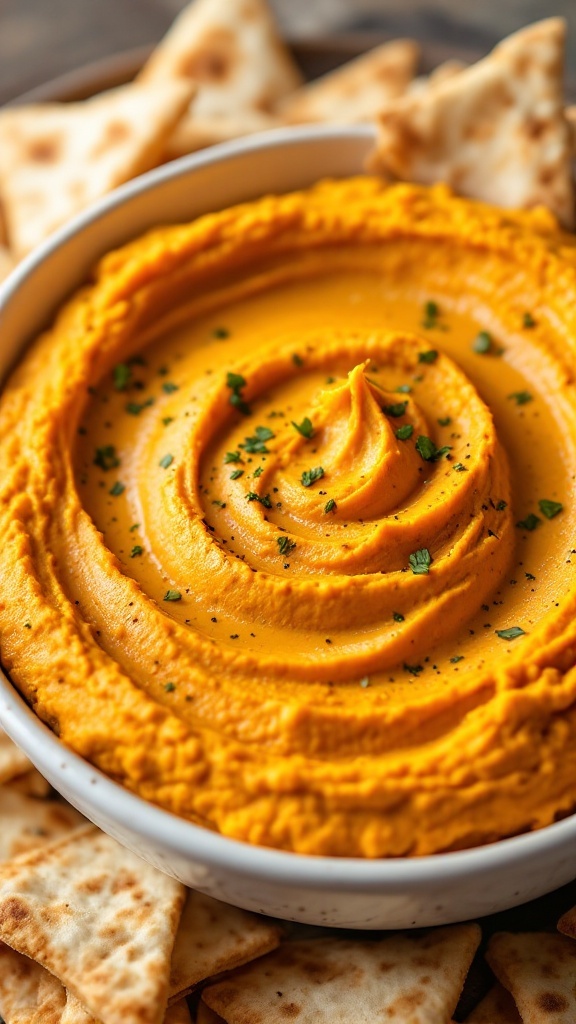
Pumpkin hummus is a delightful twist on the classic chickpea dip, featuring the warm flavors of autumn. This creamy dip has a subtle sweetness from the pumpkin and is perfectly spiced with hints of cinnamon and nutmeg. It’s easy to whip up and makes for a fun and healthy snack, especially when paired with crispy pita chips.
The rich texture and vibrant orange color of the hummus make it an appealing choice for gatherings, parties, or even just a cozy night in. Whether you’re a hummus lover or new to this treat, pumpkin hummus is simple to make and sure to please everyone!
Ingredients
- 1 can (15 oz) chickpeas, drained and rinsed
- 1 cup pumpkin puree
- 1/4 cup tahini
- 2 tablespoons olive oil
- 2 tablespoons lemon juice
- 1 teaspoon ground cumin
- 1/2 teaspoon ground cinnamon
- 1/4 teaspoon nutmeg
- Salt and pepper to taste
- Pita chips for serving
Instructions
- In a food processor, combine the chickpeas, pumpkin puree, tahini, olive oil, lemon juice, cumin, cinnamon, and nutmeg.
- Blend until smooth, adding a bit of water if necessary to reach your desired consistency.
- Season with salt and pepper to taste, then give it one final blend.
- Transfer to a serving dish and drizzle with a little olive oil if desired. Serve with pita chips for dipping!
Maple Glazed Chicken Wings

These maple glazed chicken wings are a delightful blend of sweet and savory flavors, making them an irresistible fall finger food. The rich maple syrup creates a sticky glaze that caramelizes beautifully as the wings cook, giving them a mouthwatering finish. Plus, they’re easy to whip up, making them perfect for game days, parties, or just a cozy night in.
With just a few simple ingredients, you can create a crowd-pleaser that pairs perfectly with your favorite dipping sauces. Whether you serve them as an appetizer or a main course, these wings will have everyone coming back for more!
Ingredients
- 2 pounds chicken wings
- 1/2 cup maple syrup
- 1/4 cup soy sauce
- 2 tablespoons apple cider vinegar
- 1 teaspoon garlic powder
- 1 teaspoon onion powder
- Salt and pepper to taste
- Fresh parsley for garnish
Instructions
- Preheat your oven to 400°F (200°C). Line a baking sheet with foil and place a wire rack on top.
- In a bowl, whisk together the maple syrup, soy sauce, apple cider vinegar, garlic powder, onion powder, salt, and pepper.
- Place the chicken wings in a large bowl and pour the marinade over them. Toss to coat the wings thoroughly.
- Arrange the wings in a single layer on the wire rack. Bake for 40-45 minutes, flipping halfway through, until the wings are crispy and caramelized.
- Remove from the oven and let them rest for a few minutes. Garnish with fresh parsley before serving.
Spiced Pear And Brie Tartlets

These spiced pear and brie tartlets are the perfect bite-sized treats for fall gatherings. The combination of sweet, ripe pears and creamy brie cheese creates a delightful contrast that’s both comforting and elegant. Plus, they’re surprisingly simple to whip up, making them an excellent choice for novice cooks and seasoned chefs alike.
The warmth of spices like cinnamon and nutmeg complements the pear’s sweetness, while the buttery tart crust adds a lovely crunch. Whether you’re entertaining friends or just treating yourself, these tartlets will surely impress!
Ingredients
- 1 sheet of puff pastry, thawed
- 2 ripe pears, thinly sliced
- 6 ounces brie cheese, cut into small pieces
- 1 teaspoon ground cinnamon
- 1/2 teaspoon ground nutmeg
- 1 tablespoon honey
- 1 egg, beaten (for egg wash)
- Fresh thyme or mint for garnish (optional)
Instructions
- Preheat the oven to 400°F (200°C). Roll out the puff pastry on a lightly floured surface and cut into circles that fit your tartlet pans.
- Place the pastry circles into the tartlet pans, gently pressing down. Cut off any excess pastry hanging over the edges.
- Distribute the brie cheese evenly among the tartlet shells. Arrange the sliced pears on top of the cheese.
- Drizzle honey over the pears, then sprinkle with cinnamon and nutmeg.
- Brush the edges of the pastry with the beaten egg for a golden finish.
- Bake for 20-25 minutes, or until the pastry is golden brown and the cheese is bubbly.
- Let the tartlets cool slightly before garnishing with fresh thyme or mint, if desired. Serve warm or at room temperature.
Sweet Corn Fritters With Apple Butter

Sweet corn fritters are a delightful blend of savory and slightly sweet flavors, making them a perfect fall finger food. These golden, crispy treats are easy to whip up and pair beautifully with the rich sweetness of apple butter. The combination creates a cozy comfort food that’s perfect for gatherings or a simple snack at home.
The fritters are light and fluffy on the inside with a satisfying crunch on the outside, while the apple butter adds a lovely depth of flavor. They’re simple to make, requiring just a few ingredients and minimal cooking time, allowing you to enjoy the fall season in every bite!
Ingredients
- 2 cups fresh corn kernels (or frozen, thawed)
- 1 cup all-purpose flour
- 1/2 cup milk
- 2 large eggs
- 1 teaspoon baking powder
- 1/2 teaspoon salt
- 1/4 teaspoon black pepper
- 1/4 cup finely chopped green onions
- Vegetable oil for frying
- Apple butter for serving
Instructions
- In a large bowl, combine corn, flour, milk, eggs, baking powder, salt, pepper, and green onions. Mix until just combined; the batter should be thick.
- Heat a generous amount of vegetable oil in a skillet over medium heat. Once hot, drop spoonfuls of the batter into the pan, flattening them slightly with the back of the spoon.
- Cook for about 3-4 minutes on each side, or until golden brown and crispy. Remove from the skillet and place on paper towels to drain excess oil.
- Serve warm with apple butter on the side for dipping. Enjoy your sweet corn fritters fresh from the skillet!
Mini Turkey Pot Pies
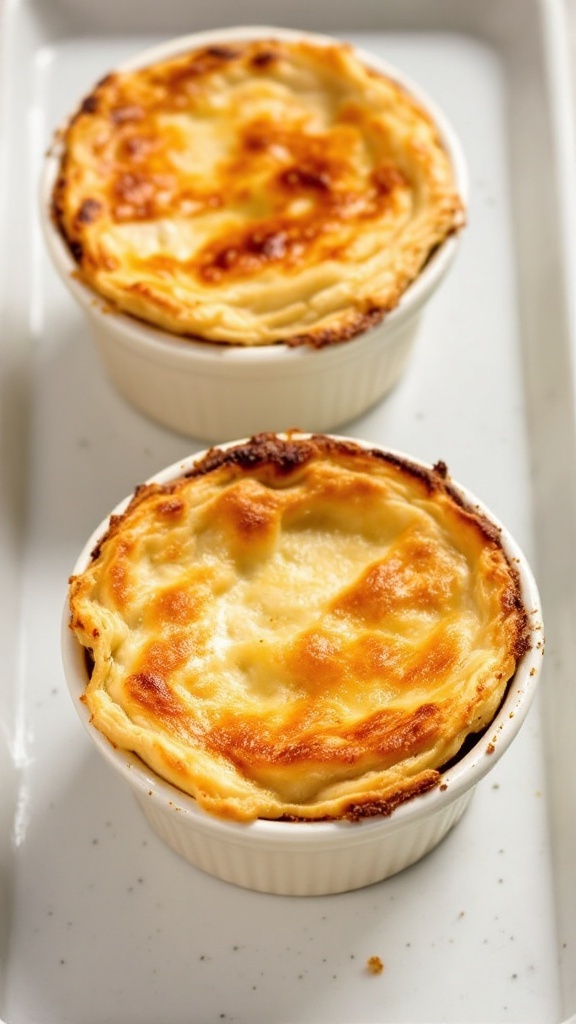
Mini turkey pot pies are the ultimate comfort food, bringing warmth and satisfaction in every bite. These tasty little pies are filled with tender turkey, fresh vegetables, and a creamy sauce, all encased in a flaky, golden crust. They’re perfect for gatherings or a cozy night in, and surprisingly easy to make!
With just a handful of ingredients, you can whip these up in no time. They’re a delightful way to use leftover turkey from holiday meals or to enjoy a hearty snack. Serve them warm, and your guests will love the personal touch of individual servings.
Ingredients
- 2 cups cooked turkey, shredded
- 1 cup frozen mixed vegetables (peas, carrots, corn)
- 1/2 cup onion, diced
- 1/4 cup all-purpose flour
- 1 cup chicken broth
- 1/2 cup milk
- 1 teaspoon dried thyme
- Salt and pepper to taste
- 1 package refrigerated pie crusts (2 crusts)
- 1 egg, beaten (for egg wash)
Instructions
- Preheat the oven to 425°F (220°C).
- In a large skillet, sauté the onion over medium heat until soft. Stir in the flour, mixing well.
- Add the chicken broth, milk, thyme, salt, and pepper. Cook until the mixture thickens, about 5 minutes.
- Fold in the shredded turkey and mixed vegetables, ensuring everything is coated in the sauce.
- Roll out the pie crusts and cut them into circles that fit your ramekins. Place one circle in the bottom of each ramekin.
- Spoon the turkey filling into each ramekin, then cover with another circle of pie crust, sealing the edges.
- Brush the top with the beaten egg for a golden finish.
- Bake for 25-30 minutes, or until the crust is golden brown and the filling is bubbly.
- Let them cool slightly before serving. Enjoy your mini turkey pot pies!