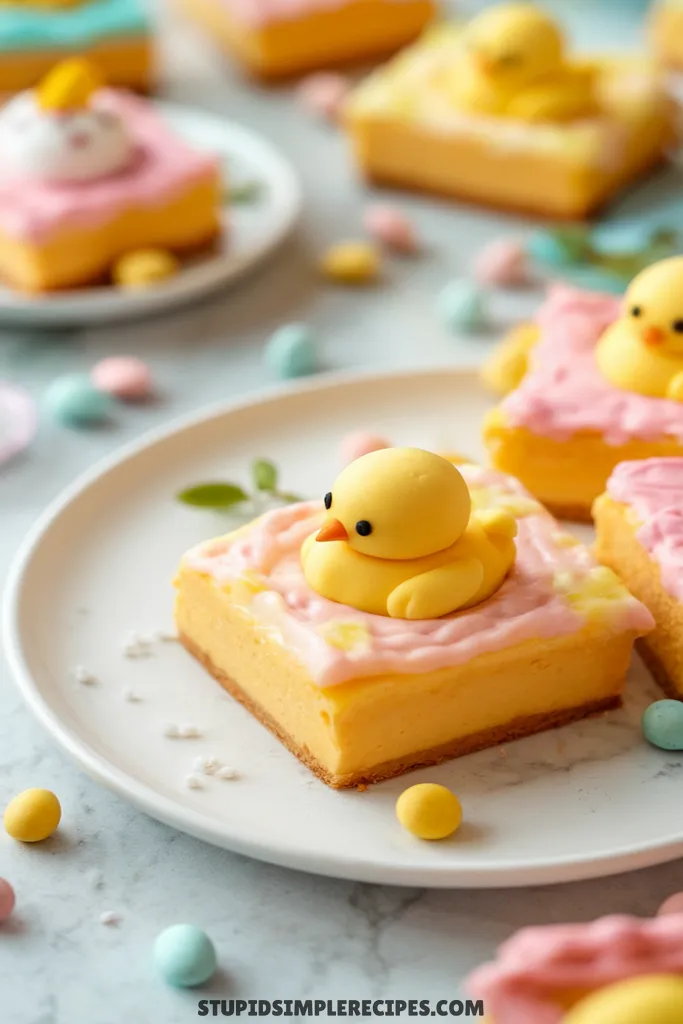
Easter Chick Lemon Bars
These lemon bars are a fun twist on the classic, decorated to look like little chicks for Easter. The buttery shortbread base holds up well under the silky lemon curd filling, which hits that perfect sweet-tart balance.
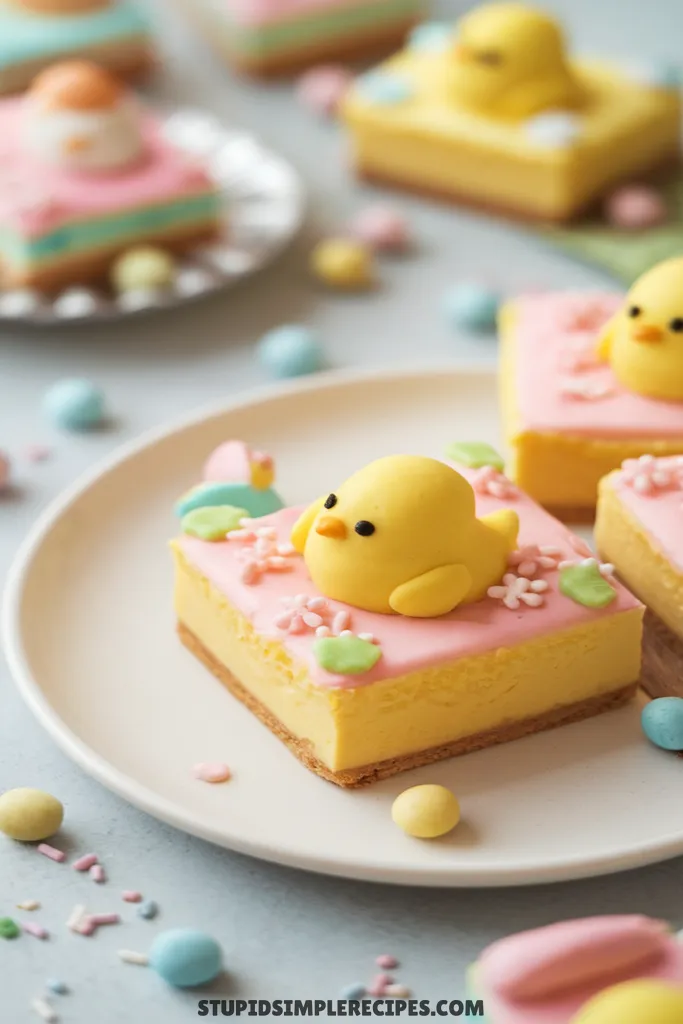
What I love is that they’re actually pretty simple to make – the decorating just requires a few strategic drops of yellow food coloring and some mini chocolate chips for eyes. They’re a hit at spring gatherings, and kids get excited when they see them. Make them the day before your Easter celebration – they need time to set up properly in the fridge anyway.
Servings: 24 bars (2-inch squares)
Time Taken:
Prep: 25-30 mins (including zesting)
Bake: 40-45 mins total
Cooling: 2 hrs minimum
Total time needed: 3.5 hrs
Active time: 45 mins
What you need for Easter Chick Lemon Bars
Ingredients You’ll Need For The crust
- 2 cups all-purpose flour
- 1/2 cup powdered sugar
- 1 cup butter, softened
Ingredients You’ll Need For The filling
- 4 large eggs
- 2 cups granulated sugar
- 1/3 cup all-purpose flour
- 1/2 cup fresh lemon juice
- Zest of 2 lemons
Ingredients You’ll Need For decoration
- Yellow food coloring
- Orange food coloring
- Mini chocolate chips
- Additional powdered sugar for dusting
How to make Easter Chick Lemon Bars
For the Crust:
1. Start by preheating your oven to 350°F (175°C). Line a 9×13 inch baking pan with parchment paper, leaving some overhang on the sides – this will make it much easier to lift the bars out later.
2. In a large bowl, mix together 2 cups flour and 1/2 cup powdered sugar. Add your softened butter (it should be soft enough to leave an indent when pressed, but not melty). Using your fingers or a pastry cutter, work the butter into the dry ingredients until it looks like coarse crumbs and starts to come together when you squeeze it.
3. Press this mixture firmly into your lined pan – I like to use the bottom of a measuring cup to really pack it down evenly. You want it nice and compact or it’ll be crumbly later. Bake for 15-20 minutes until the edges are just starting to turn light golden brown.
For the Filling:
4. While the crust bakes, make your filling. Whisk the eggs in a large bowl until well combined. Add the granulated sugar and whisk until the mixture becomes slightly lighter in color, about 1 minute.
5. Add 1/3 cup flour and whisk until completely smooth – any lumps now will show up in your final bars. Stir in the lemon juice and zest. The mixture will look quite liquid, that’s exactly what you want.
6. Here’s where we make our chicks: Divide the filling into two portions. Leave one portion plain, and add 4-5 drops of yellow food coloring to the other portion, stirring until you get a nice sunny yellow color.
7. When the crust comes out of the oven, pour the plain lemon filling over about 2/3 of the crust. Pour the yellow filling in round “chick” shapes in the remaining space. Use a toothpick to add small dabs of orange food coloring for beaks and mini chocolate chips for eyes.
8. Return to the oven and bake for 20-25 minutes, or until the filling is set. You’ll know it’s done when the center barely jiggles when you gently shake the pan – if it waves like liquid, it needs more time. The top should not be brown.
9. Let the bars cool completely at room temperature (about 1 hour) then refrigerate for at least another hour. The chilling step is crucial for clean cuts.
10. When ready to serve, use the parchment overhang to lift the bars out. Cut into squares around your chick designs, and dust the plain lemon sections with powdered sugar, leaving the yellow chicks uncovered.
These will keep in the fridge for about 4 days, though the crust will soften slightly over time. Just make sure to store them in an airtight container with wax paper between layers to prevent sticking.
🔍 Recipe Notes & Tips
- Room temp eggs blend better – set them out 30 mins before starting
- Zest lemons before juicing – way easier!
- No pastry cutter? Use a fork or grate cold butter
- Crust should feel sandy but hold together when squeezed
- Tap pan on counter before baking to pop air bubbles
- Too yellow? Add 1 drop blue food coloring to tone it down
- Measure flour by spooning into cups, not scooping
🍽️ Serving Suggestions
- Perfect with:
Afternoon tea or coffee
Prosecco
Lemonade (yeah, double down on that lemon!) - Serve chilled for cleanest cuts
- Skip powdered sugar if packing for travel
🎯 Make it Work for
- Halloween: Make orange ghosts instead of chicks
- Christmas: Red/green tree shapes
- Valentine’s: Pink hearts
- Birthday: Colored dots like balloons
- Regular days: Skip the designs, just make classic bars
📦 Storage & Leftovers
- Keep refrigerated up to 4 days
- Freeze undecorated bars up to 2 months
- Don’t freeze decorated ones – food coloring can bleed
- Layer with wax paper to prevent sticking
- Let frozen bars thaw overnight in fridge