
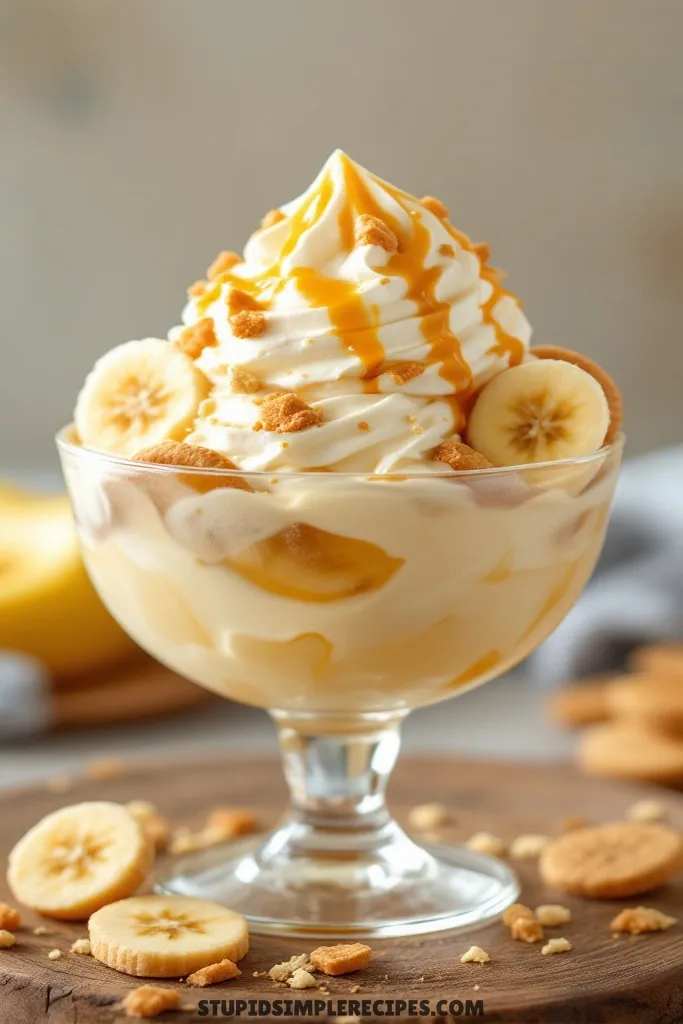
Banana Pudding Ice Cream
There’s something magical about turning classic banana pudding into ice cream. You get all those familiar flavors – fresh bananas, vanilla wafers, creamy pudding – but in a smooth, cold scoop that’s perfect for summer.
The cookies soften slightly in the ice cream but still keep some crunch, and the bananas get really sweet and intense when they’re super ripe. It’s become my go-to dessert for cookouts since you can make it ahead and it stays creamy even after a few days in the freezer. Plus, people get excited when they find pieces of cookie in their scoop.
What you need for Banana Pudding Ice Cream
Ingredients You’ll Need For This Recipe
- 2 cups heavy whipping cream
- 1 (14 oz) can sweetened condensed milk
- 3 ripe bananas, mashed
- 1 teaspoon vanilla extract
- 1 box (11 oz) vanilla wafer cookies, crushed
- 1 (3.4 oz) package of instant vanilla pudding mix
- 1 cup whole milk
How to make Banana Pudding Ice Cream
1. First, mash your bananas in a bowl until they’re pretty smooth – I like to use really ripe ones with lots of brown spots since they’re sweeter and more flavorful. A few small lumps are fine and will actually add nice texture to your ice cream.
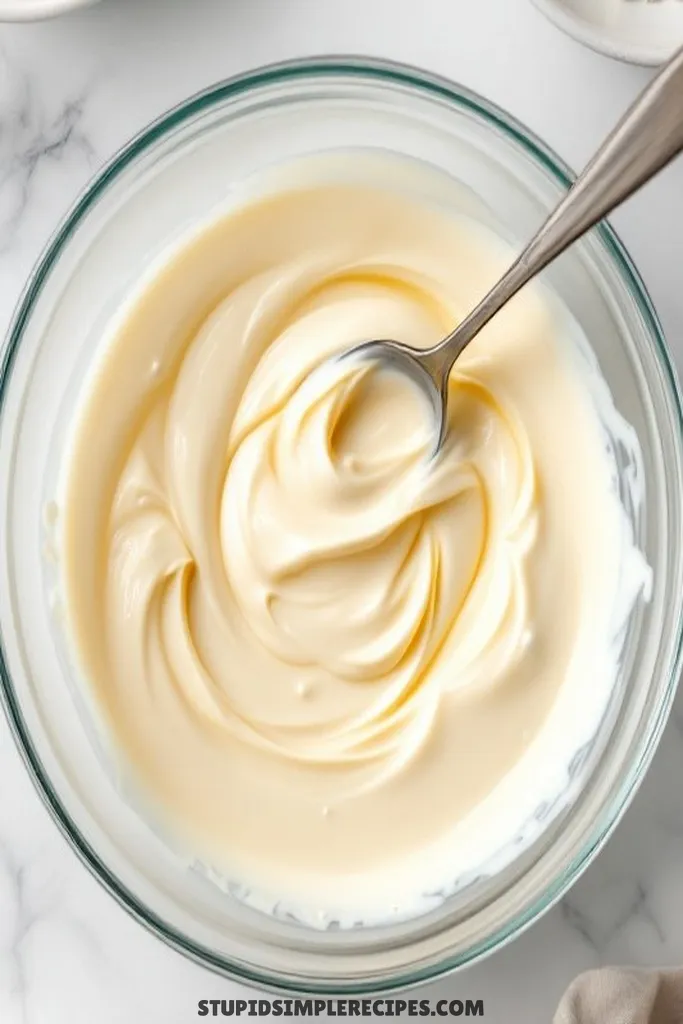
2. In a large bowl, whisk together the vanilla pudding mix and whole milk until completely smooth, about 2 minutes. You’ll see it start to thicken up – let it sit for about 5 minutes until it’s set to a soft pudding consistency.
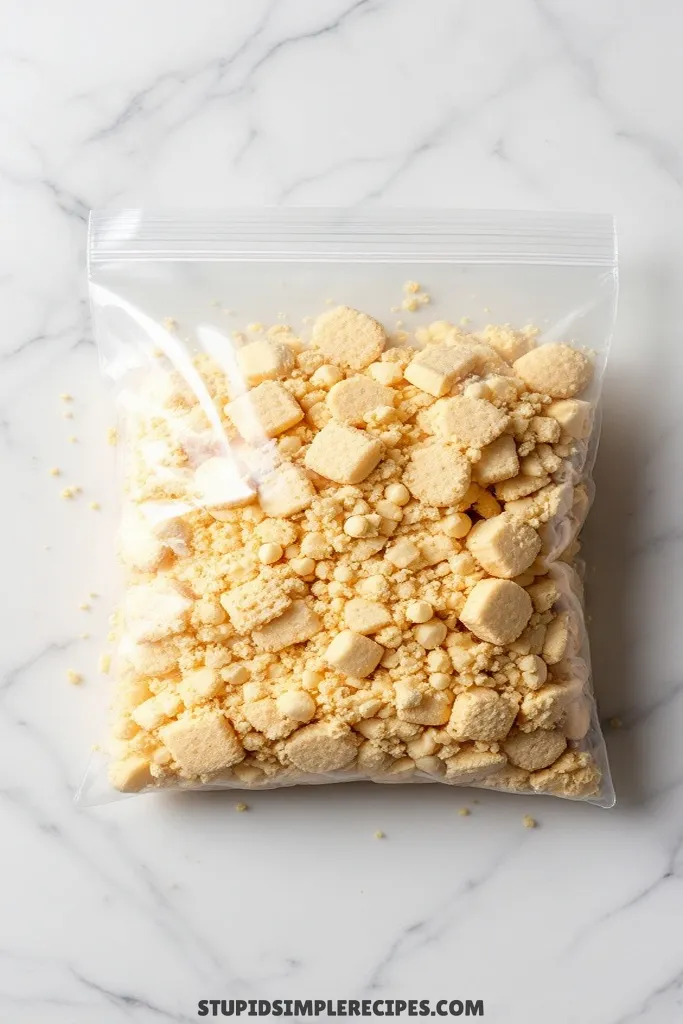
3. While the pudding sets, take about half of your vanilla wafers and crush them into coarse crumbs. I put them in a zip-top bag and crush them with a rolling pin – you want pieces about the size of peas, not powder. Set these aside.
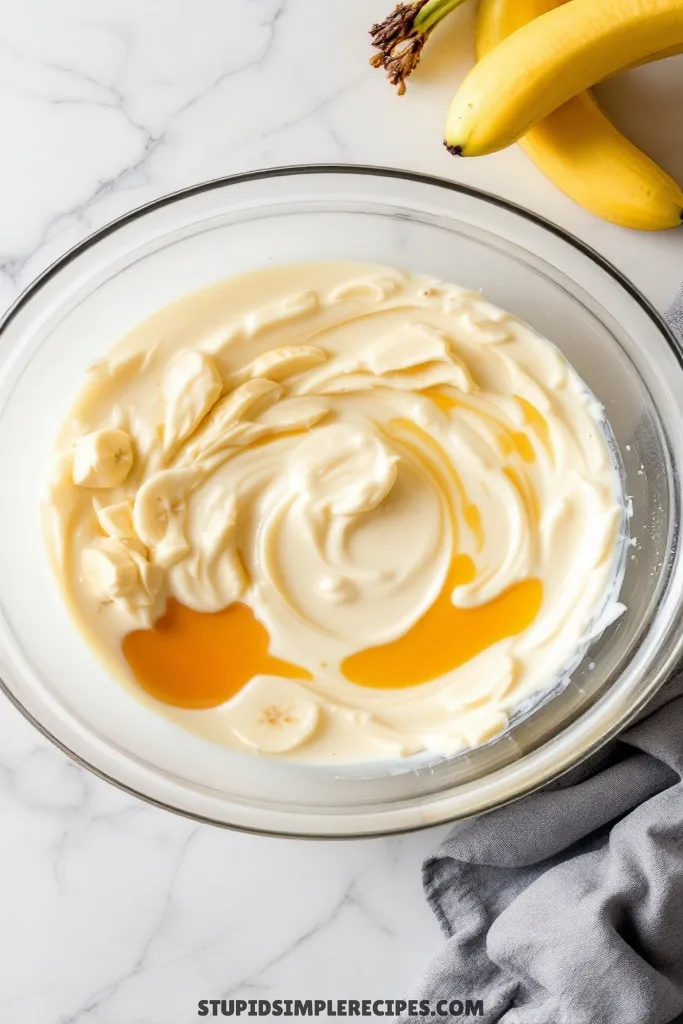
4. Pour the sweetened condensed milk into your pudding mixture and stir until well combined. Add the mashed bananas and vanilla extract, mixing until everything’s evenly distributed.
5. In a separate bowl, whip the heavy cream until stiff peaks form – when you lift the beaters, the peaks should stand up straight and not flop over. This usually takes 3-4 minutes on medium-high speed. You want it really well whipped because this is what makes your ice cream light and creamy.
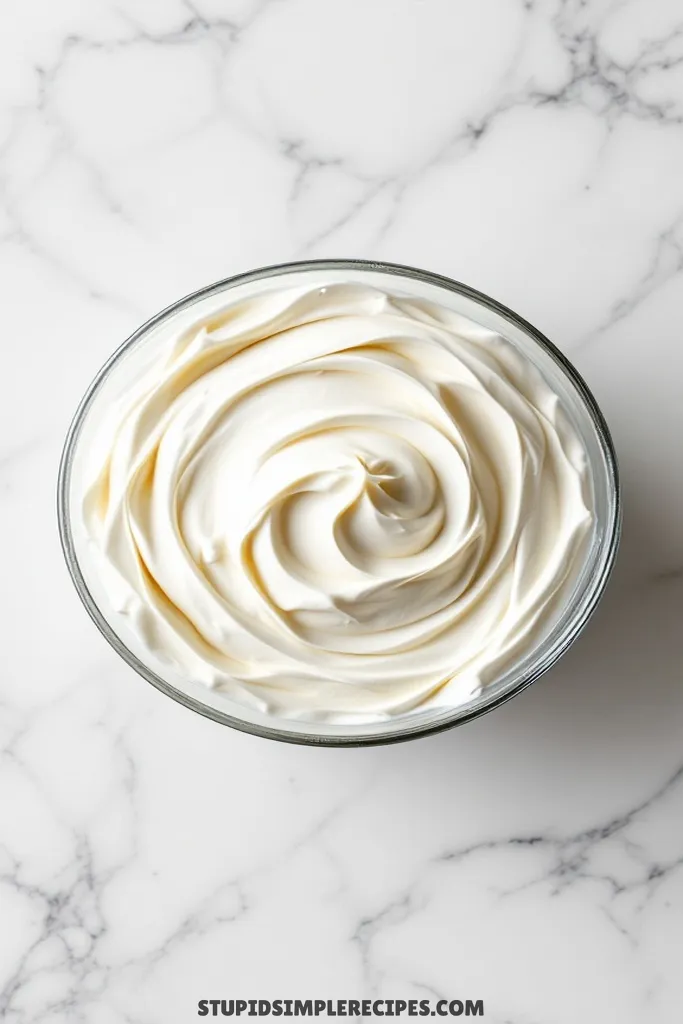
6. Gently fold the whipped cream into your banana-pudding mixture. I do this in three batches, using a rubber spatula and a light hand. You want to keep as much air in there as possible, but make sure there are no streaks of white cream left.
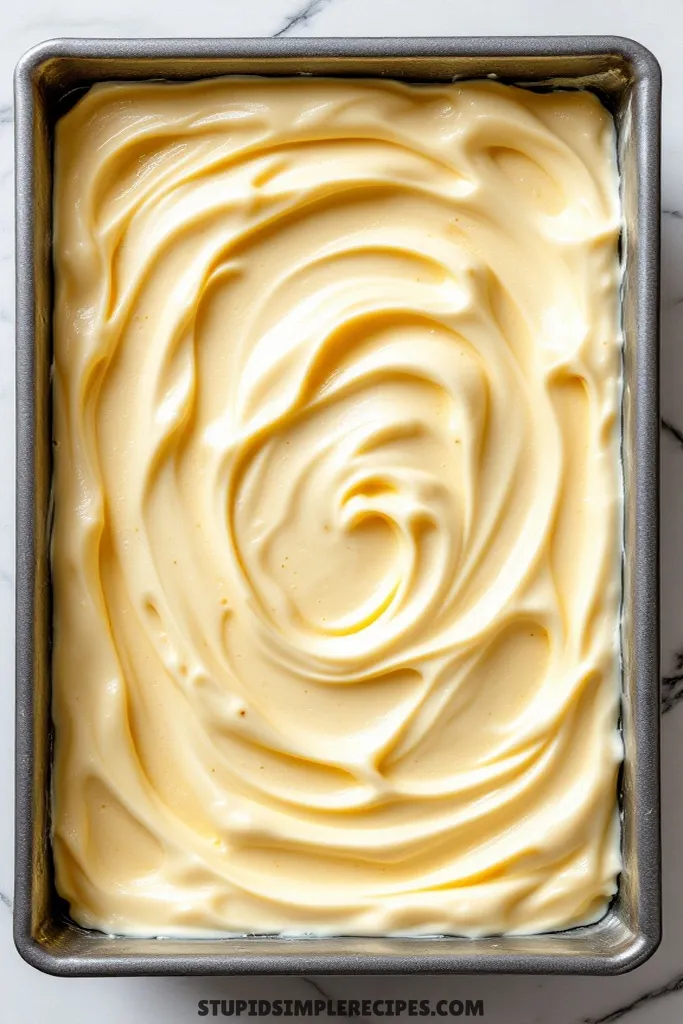
7. Pour half of this mixture into a 9×13 freezer-safe container. Sprinkle half of your crushed cookies over the top, then repeat with the remaining ice cream mixture and cookies. Using a butter knife, gently swirl everything together with a few figure-8 motions.
8. Cover with plastic wrap, pressing it right against the surface of the ice cream to prevent ice crystals from forming. Then cover with a lid or foil.
9. Freeze for at least 6 hours, but preferably overnight. The ice cream is ready when it’s firm but still scoopable – if it gets too hard, let it sit on the counter for about 5 minutes before scooping.
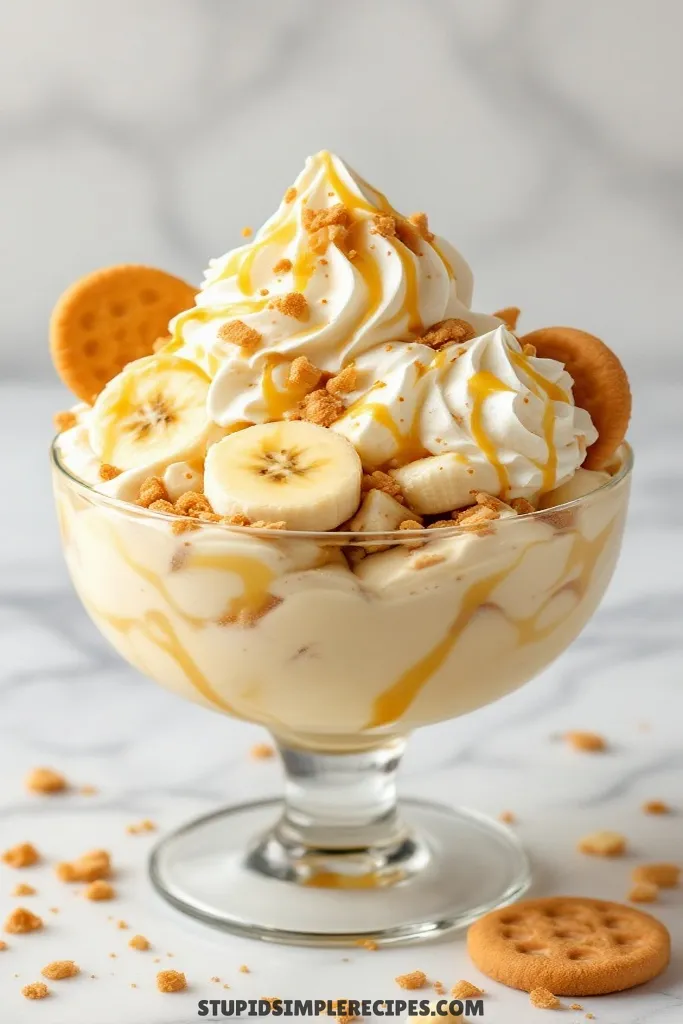
The finished ice cream should have a creamy banana flavor with bits of cookie scattered throughout. It’ll keep well in the freezer for about a week, but honestly, in my house, it never lasts that long!
🔍 Recipe Notes & Tips
- Use super ripe bananas – the spottier, the better
- Don’t skip the pudding set time – rushing this makes it grainy
- Crush cookies by hand – the food processor makes them too fine
- Cold bowls help the cream whip faster – stick them in the freezer 10 mins before
- Generic vanilla wafers work fine – save the Nilla brand money
- Room temp condensed milk blends easier than cold
🍽️ Serving Suggestions
- Perfect with cold-brew coffee
- Add a splash of bourbon on top for grown-up sundaes
- Pairs great with chocolate sauce or caramel drizzle
- Sweet wines like moscato work surprisingly well
🎯 Make it Work for
- Parties:
– Scoop ahead into paper cups, and freeze until firm
– Make mini ice cream sandwiches with whole wafers
– Layer in clear cups with extra cookies for display - Kids:
– Add sprinkles on top
– Make smaller portions in popsicle molds
– Skip the cookie pieces if texture’s an issue
📦 Storage & Leftovers
- Keeps 1 week in freezer (taste best first 3-4 days)
- Always press plastic wrap directly on the surface
- Use a container with a tight-fitting lid
- Let sit 5-10 mins before scooping if too hard
- Avoid storing indoors where temp fluctuates

Banana Pudding Ice Cream
Ingredients
- 2 cups heavy whipping cream
- 1 14 oz can sweetened condensed milk
- 3 ripe bananas mashed
- 1 teaspoon vanilla extract
- 1 box 11 oz vanilla wafer cookies, crushed
- 1 3.4 oz package instant vanilla pudding mix
- 1 cup whole milk
Instructions
- First, mash your bananas in a bowl until they’re pretty smooth. A few small lumps are fine and will actually add nice texture to your ice cream.
- In a large bowl, whisk together the vanilla pudding mix and whole milk until completely smooth, about 2 minutes. You’ll see it start to thicken up – let it sit for about 5 minutes until it’s set to a soft pudding consistency.
- While the pudding sets, take about half of your vanilla wafers and crush them into coarse crumbs. Set these aside.
- Pour the sweetened condensed milk into your pudding mixture and stir until well combined. Add the mashed bananas and vanilla extract, mixing until everything’s evenly distributed.
- In a separate bowl, whip the heavy cream until stiff peaks form – when you lift the beaters, the peaks should stand up straight and not flop over. This usually takes 3-4 minutes on medium-high speed. You want it really well whipped because this is what makes your ice cream light and creamy.
- Gently fold the whipped cream into your banana-pudding mixture. I do this in three batches, using a rubber spatula and a light hand. You want to keep as much air in there as possible, but make sure there are no streaks of white cream left.
- Pour half of this mixture into a 9×13 freezer-safe container. Sprinkle half of your crushed cookies over the top, then repeat with the remaining ice cream mixture and cookies. Using a butter knife, gently swirl everything together with a few figure-8 motions.
- Cover with plastic wrap, pressing it right against the surface of the ice cream to prevent ice crystals from forming. Then cover with a lid or foil.
- Freeze for at least 6 hours, but preferably overnight. The ice cream is ready when it’s firm but still scoopable – if it gets too hard, let it sit on the counter for about 5 minutes before scooping.