13 Refreshing Summer Meal Ideas for Hot Days
With summer in full swing, it’s time to shake up your meal routine with some fresh and fun ideas! Whether you’re firing up the grill, tossing together some salads, or whipping up refreshing smoothies, there are countless ways to enjoy seasonal flavors. Dive into these tasty summer meal suggestions that are as easy to prepare as they are delicious!
Grilled Cedar Plank Salmon With Summer Succotash
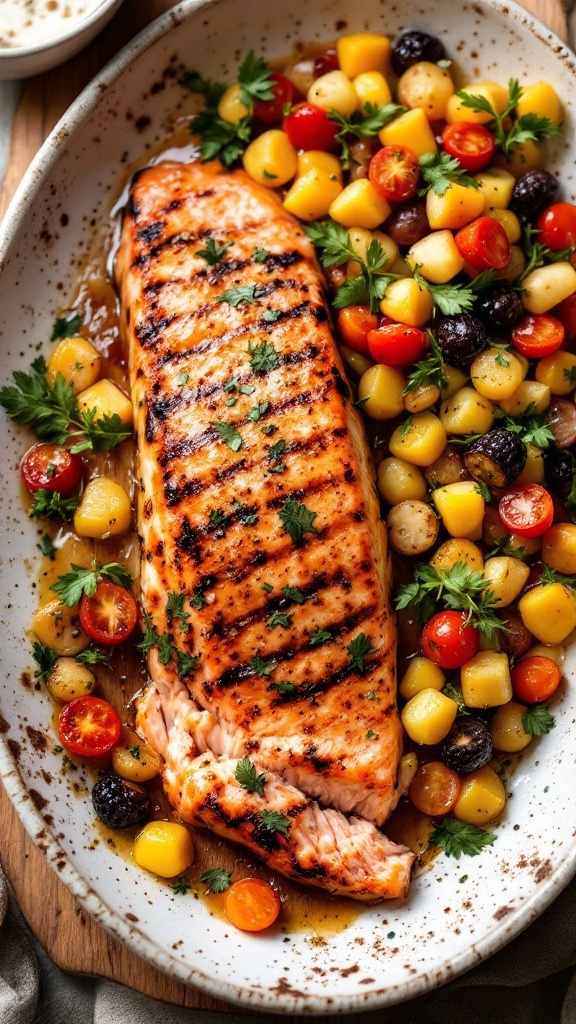
Grilled cedar plank salmon is a delightful dish that brings together the fresh flavors of summer. The natural oils in the cedar wood enhance the rich taste of the salmon, making it juicy and tender. Paired with a colorful summer succotash, the meal offers a vibrant mix of vegetables that not only looks appealing but also adds crunch and sweetness to each bite. This recipe is simple enough for a weeknight dinner yet elegant enough for entertaining guests.
The salmon cooks evenly on the cedar plank, while the succotash bursts with seasonal vegetables like corn, zucchini, and bell peppers. Together, they create a delicious harmony of flavors that perfectly captures the essence of summer. Plus, cleanup is a breeze since everything is cooked on the plank!
Ingredients
- 1 cedar plank (soaked in water for at least 1 hour)
- 1 pound salmon fillet
- 1 tablespoon olive oil
- 1 tablespoon lemon juice
- Salt and pepper to taste
- 2 cups corn (fresh or frozen)
- 1 cup diced zucchini
- 1 cup cherry tomatoes, halved
- 1 cup diced bell peppers (any color)
- 2 tablespoons fresh parsley, chopped
Instructions
- Prepare the Cedar Plank: Soak the cedar plank in water for at least 1 hour. This will prevent it from burning during grilling.
- Season the Salmon: Preheat your grill to medium heat. In a small bowl, mix olive oil, lemon juice, salt, and pepper. Brush this mixture over the salmon fillet.
- Prepare the Succotash: In a large bowl, combine corn, zucchini, cherry tomatoes, and bell peppers. Season with salt and pepper.
- Grill the Salmon: Place the soaked cedar plank on the grill and close the lid for about 5 minutes. Once hot, place the salmon on the plank and close the lid. Grill for about 15-20 minutes, or until the salmon flakes easily with a fork.
- Cook the Succotash: While the salmon is grilling, place the succotash mixture in a grill basket or foil pouch. Grill alongside the salmon for about 10-15 minutes, stirring occasionally, until the vegetables are tender.
- Serve: Once cooked, remove the salmon and succotash from the grill. Garnish the salmon with fresh parsley and serve with the colorful succotash on the side.
Heirloom Tomato Gazpacho With Jumbo Lump Crab
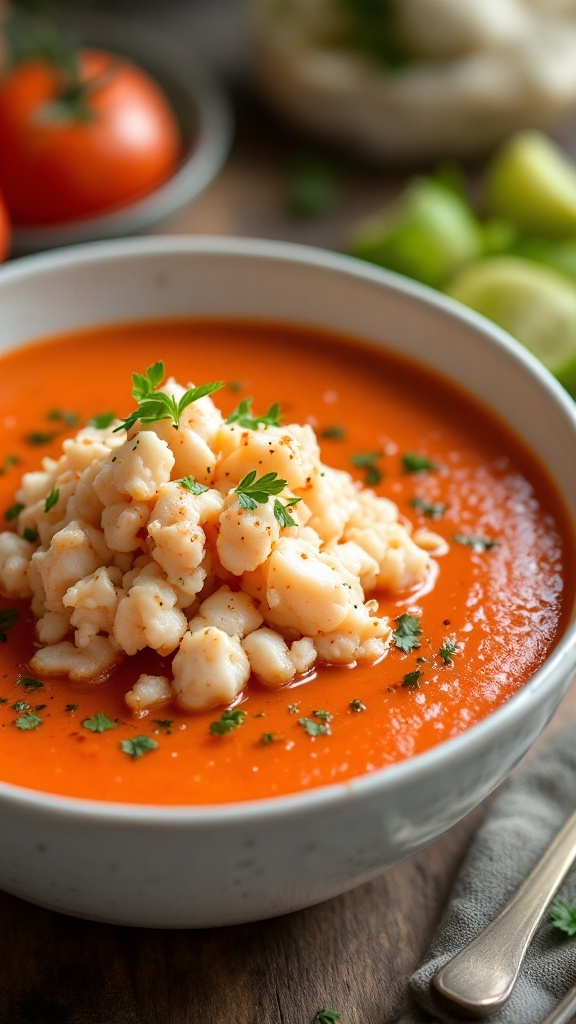
This Heirloom Tomato Gazpacho with Jumbo Lump Crab is a vibrant and refreshing dish, perfect for those warm summer days. Combining the natural sweetness of heirloom tomatoes with the delicate taste of jumbo lump crab, this chilled soup is both satisfying and light. It’s simple to whip up, making it a fantastic option for a quick lunch or a light dinner.
With a blend of fresh ingredients, this gazpacho is not only delightful in flavor but also visually appealing. The creamy crab adds a touch of indulgence, while the tomatoes provide a fresh burst of flavor. Serve it in a bowl, topped with a sprinkle of herbs for an extra pop. It’s a delightful way to enjoy summer produce!
Ingredients
- 6 cups chopped heirloom tomatoes
- 1 cucumber, peeled and diced
- 1 bell pepper, diced
- 1 small red onion, chopped
- 2 cloves garlic, minced
- 3 cups tomato juice
- 1/4 cup olive oil
- 2 tablespoons red wine vinegar
- Salt and pepper to taste
- 1 pound jumbo lump crab meat
- Fresh basil or parsley for garnish
Instructions
- Blend the base: In a blender, combine the heirloom tomatoes, cucumber, bell pepper, red onion, and garlic. Blend until smooth.
- Mix in liquids: Add the tomato juice, olive oil, and red wine vinegar to the blender. Season with salt and pepper. Blend again until well mixed.
- Chill: Pour the gazpacho into a bowl and refrigerate for at least 1 hour to chill.
- Prepare crab: Just before serving, gently fold the jumbo lump crab meat into the chilled gazpacho.
- Serve: Ladle the gazpacho into bowls and garnish with fresh herbs. Enjoy this refreshing summer soup!
Southern-Style Shrimp Boil With Corn, Potatoes, And Andouille

Southern-Style Shrimp Boil is a delightful dish that brings together the flavors of the coast with a twist of Southern charm. The combination of juicy shrimp, tender corn, and hearty potatoes creates a comforting meal, perfect for summer gatherings. It’s not only easy to make, but also a fun way to enjoy a casual meal with friends and family.
This recipe is all about vibrant flavors and simple preparation. You can customize it with your favorite seasonings and adjust the spice level to your liking. The bright, slightly sweet corn pairs beautifully with the savory shrimp and andouille sausage, making every bite a celebration of summer.
Ingredients
- 2 pounds large shrimp, peeled and deveined
- 1 pound andouille sausage, sliced
- 4 ears of corn, cut into thirds
- 1 pound baby potatoes, halved
- 1/4 cup Old Bay seasoning
- 4 cloves garlic, minced
- 1 lemon, halved
- Salt, to taste
- Water, enough to fill a large pot
Instructions
- In a large pot, bring water to a boil and add Old Bay seasoning, garlic, and salt.
- Add the baby potatoes and cook for about 10 minutes, or until they start to soften.
- Next, add the corn and sausage, cooking for an additional 5 minutes.
- Finally, add the shrimp and cook for another 3-5 minutes, until they turn pink.
- Remove from heat and drain the water. Squeeze fresh lemon juice over the mixture and toss gently.
- Serve hot on a large platter, garnished with lemon wedges and fresh parsley if desired.
Lobster Rolls With Quick Pickled Cucumber Slaw
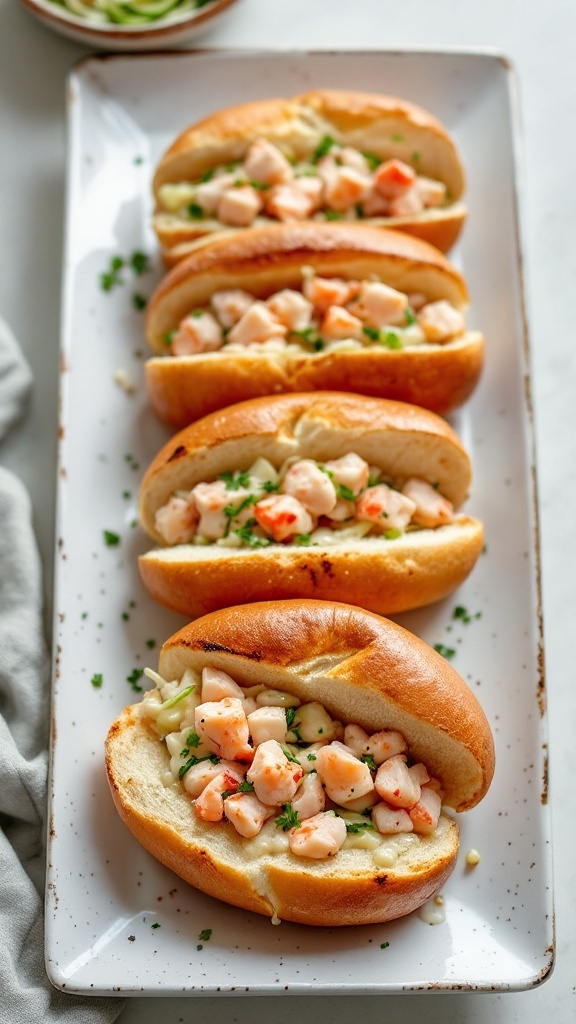
Lobster rolls are a delightful summer treat that bring the taste of the ocean right to your plate. With tender, buttery lobster meat and a refreshing cucumber slaw, these rolls are light yet satisfying. They’re easy to whip up, making them an ideal choice for a casual get-together or a sunny picnic.
The combination of rich lobster and zesty slaw creates a flavor explosion in every bite. These rolls are not just tasty; they also bring a vibrant touch to your summer meals. Whether you’re hosting friends or just treating yourself, lobster rolls will certainly be a hit.
Ingredients
- 1 pound cooked lobster meat, chopped
- 1/4 cup mayonnaise
- 1 tablespoon lemon juice
- 1 tablespoon fresh chives, chopped
- Salt and pepper to taste
- 4 split-top hot dog buns
- 2 cups cucumbers, thinly sliced
- 1/2 cup white vinegar
- 1 tablespoon sugar
- 1 teaspoon salt
Instructions
- Prepare the Pickled Cucumbers: In a bowl, combine vinegar, sugar, and salt. Stir until dissolved. Add the sliced cucumbers, mix well, and let them pickle for at least 30 minutes.
- Make the Lobster Filling: In a separate bowl, mix chopped lobster meat, mayonnaise, lemon juice, chives, salt, and pepper until well combined.
- Toast the Buns: Lightly toast the split-top hot dog buns until golden brown.
- Assemble: Fill each bun with the lobster mixture and top with pickled cucumber slaw.
- Serve: Enjoy the lobster rolls immediately, perhaps with a side of chips or a light salad.
Buttermilk Fried Chicken With Watermelon And Feta Salad
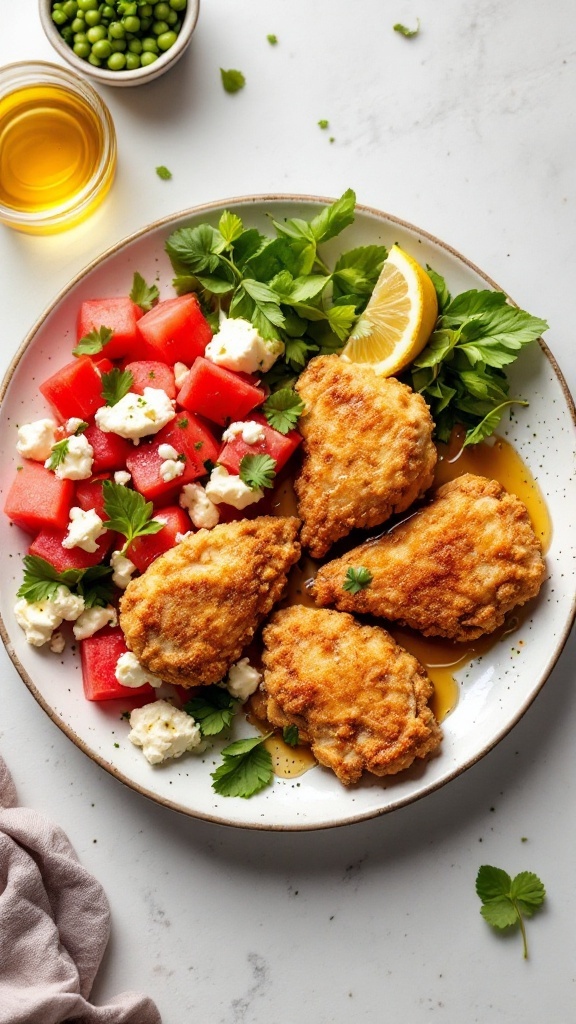
Buttermilk fried chicken is a classic dish that brings comfort and satisfaction with every bite. The juicy and crispy chicken pairs beautifully with a refreshing watermelon and feta salad, making it a delightful summer meal. The sweetness of the watermelon, the saltiness of the feta, and the crunch of fresh herbs create a vibrant contrast to the rich chicken.
This dish is not only tasty but also simple to prepare, making it perfect for a laid-back summer gathering or a cozy weeknight dinner. Just marinate the chicken in buttermilk, fry until golden, and toss together your salad for a meal that’s sure to impress!
Ingredients
- 4 chicken thighs, bone-in and skin-on
- 2 cups buttermilk
- 1 cup all-purpose flour
- 1 teaspoon garlic powder
- 1 teaspoon onion powder
- Salt and pepper to taste
- Vegetable oil for frying
- 4 cups watermelon, cubed
- 1 cup feta cheese, crumbled
- 1/4 cup fresh mint leaves, chopped
- 1/4 cup fresh cilantro leaves, chopped
- 1 tablespoon olive oil
- Juice of 1 lime
Instructions
- Marinate the Chicken: In a large bowl, combine the chicken thighs and buttermilk. Cover and refrigerate for at least 2 hours, or overnight for best results.
- Prepare the Coating: In another bowl, mix the flour, garlic powder, onion powder, salt, and pepper. Remove the chicken from the buttermilk and dredge each piece in the flour mixture until fully coated.
- Heat the Oil: In a large skillet, heat about 1 inch of vegetable oil over medium-high heat. Once hot, carefully add the chicken pieces.
- Fry the Chicken: Cook the chicken for about 7-8 minutes on each side, or until golden brown and cooked through. Use a meat thermometer to check for an internal temperature of 165°F (75°C). Transfer to a paper towel-lined plate to drain excess oil.
- Make the Salad: In a large bowl, combine the watermelon, feta, mint, and cilantro. Drizzle with olive oil and lime juice, then toss gently to combine.
- Serve: Plate the fried chicken alongside the watermelon and feta salad. Enjoy this refreshing and satisfying summer meal!
Fresh Corn, Zucchini, And Black Bean Enchiladas

Fresh Corn, Zucchini, and Black Bean Enchiladas are a delightful summer dish that showcases the vibrant flavors of the season. These enchiladas combine sweet corn, tender zucchini, and hearty black beans, all wrapped in soft tortillas and topped with your favorite salsa. The result is a dish that’s not only satisfying but also packed with nutrients. Plus, it’s a simple recipe that’s perfect for weeknight dinners or casual gatherings.
The combination of fresh vegetables gives these enchiladas a bright and lively taste, making them a hit with both kids and adults. They can be customized with different toppings, such as avocado or cilantro, to suit your preferences. Enjoy these enchiladas warm and fresh, and savor the flavors of summer!
Ingredients
- 4 large flour tortillas
- 1 cup sweet corn (fresh or frozen)
- 1 medium zucchini, diced
- 1 can (15 oz) black beans, drained and rinsed
- 1 cup shredded cheese (cheddar or mozzarella)
- 1 cup salsa
- 1 teaspoon cumin
- 1 teaspoon chili powder
- Salt and pepper to taste
- Cilantro for garnish
Instructions
- Preheat your oven to 375°F (190°C).
- In a large mixing bowl, combine the corn, zucchini, black beans, cumin, chili powder, salt, and pepper.
- Lay out the tortillas and fill each with a generous scoop of the vegetable mixture and a sprinkle of cheese. Roll them tightly and place them seam-side down in a greased baking dish.
- Pour salsa over the top of the enchiladas, then sprinkle with remaining cheese.
- Bake for 20-25 minutes, or until the cheese is melted and bubbly.
- Garnish with cilantro before serving. Enjoy your fresh and flavorful enchiladas!
Barbecue Pulled Pork Sliders With Stone Fruit Slaw
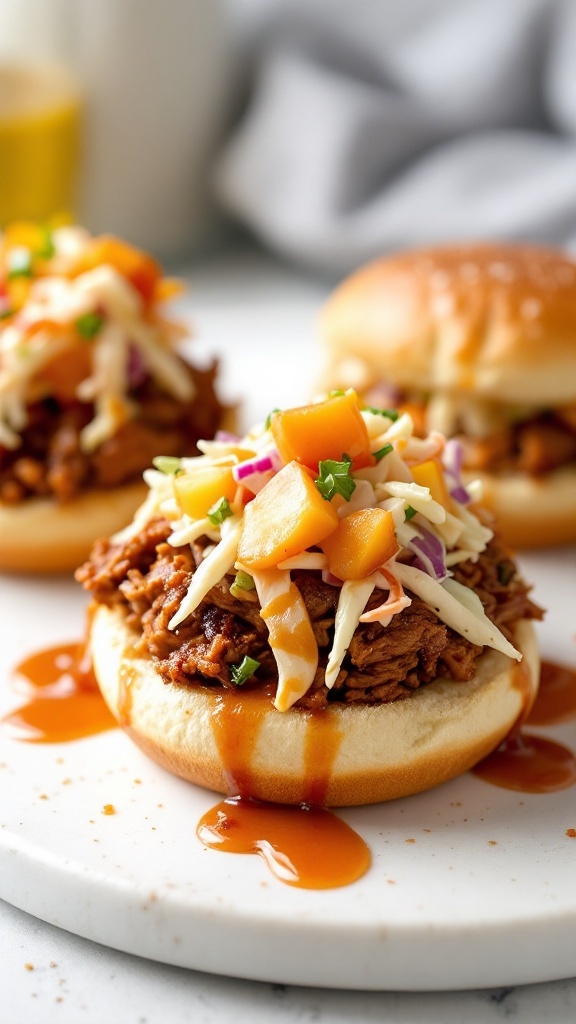
Barbecue pulled pork sliders topped with fresh stone fruit slaw are a delightful summer treat. The tender, flavorful pork pairs perfectly with the crunchy, sweet slaw, creating a balance that’s both refreshing and satisfying. Plus, these sliders are super easy to make, making them ideal for casual gatherings or weekend barbecues.
This recipe is all about layering flavors. The smoky and savory pulled pork is complemented by the bright and colorful stone fruit slaw, which adds a delightful crunch and a touch of sweetness. Whether you’re hosting friends or enjoying a family meal, these sliders are sure to be a hit!
Ingredients
- 2 pounds pork shoulder
- 1 cup barbecue sauce
- 1 tablespoon smoked paprika
- 1 teaspoon garlic powder
- 1 teaspoon onion powder
- Salt and pepper to taste
- 12 slider buns
- 2 cups coleslaw mix
- 1 cup diced stone fruits (like peaches and plums)
- 1 tablespoon apple cider vinegar
- 1 tablespoon honey
- Fresh cilantro for garnish
Instructions
- Prepare the Pulled Pork: Season the pork shoulder with smoked paprika, garlic powder, onion powder, salt, and pepper. Place it in a slow cooker, add half of the barbecue sauce, and cook on low for 8 hours or until tender.
- Shred the Pork: Once cooked, shred the pork using two forks and mix with the remaining barbecue sauce.
- Make the Slaw: In a bowl, combine coleslaw mix, diced stone fruits, apple cider vinegar, and honey. Toss until well coated.
- Assemble the Sliders: Place a generous portion of pulled pork on each slider bun, top with the stone fruit slaw, and garnish with fresh cilantro.
- Serve and Enjoy: These sliders are perfect for summer gatherings—just serve them up and let everyone dig in!
New England Clam Bake With Garlic Butter
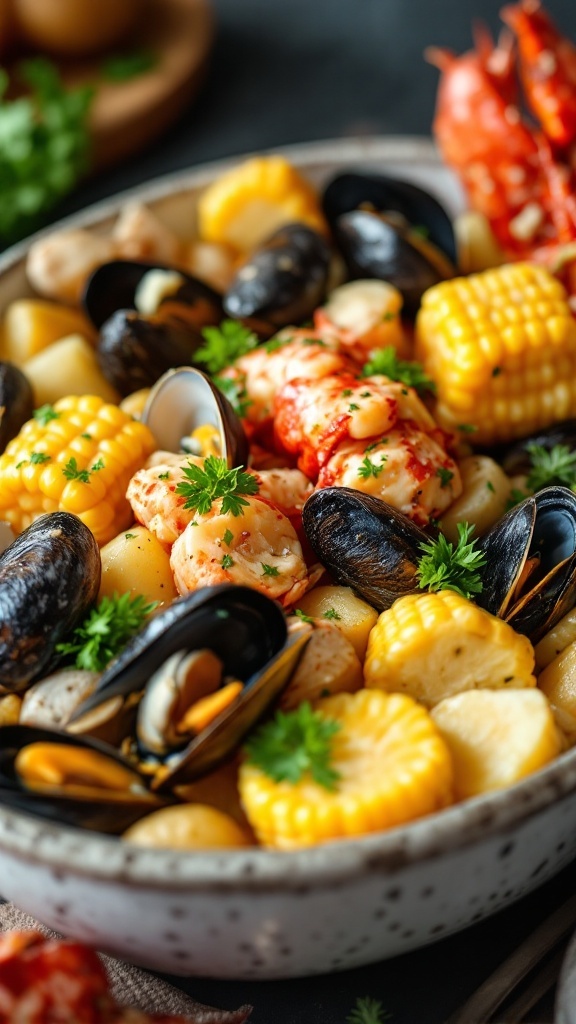
New England Clam Bake is a delightful summer dish that brings the taste of the coast right to your table. The combination of fresh seafood, tender potatoes, and sweet corn creates a meal that’s as satisfying as it is flavorful. Toss in a generous drizzle of garlic butter, and you have a dish that’s sure to impress your family and friends.
This recipe is straightforward, making it perfect for a casual gathering or a cozy night in. With a medley of shellfish and vegetables, it’s not only tasty but also visually appealing. Let’s dive into the details of this clam bake!
Ingredients
- 2 pounds littleneck clams, cleaned
- 1 pound mussels, cleaned
- 1 pound shrimp, peeled and deveined
- 2 ears of corn, cut into thirds
- 1 pound baby potatoes, halved
- 4 cloves garlic, minced
- 1/2 cup unsalted butter
- 1 tablespoon fresh parsley, chopped
- 1 lemon, cut into wedges
- Salt and pepper to taste
Instructions
- Prep the Seafood: Rinse the clams and mussels under cold water to remove any sand. Peel and devein the shrimp if not done already.
- Boil the Vegetables: In a large pot, bring water to a boil and add the halved baby potatoes. Cook for about 10 minutes, then add the corn. Cook for an additional 5 minutes.
- Add the Seafood: Reduce the heat to medium and add the clams, mussels, and shrimp to the pot. Cover and cook until the clams and mussels open, about 5-7 minutes.
- Make the Garlic Butter: While the seafood is cooking, melt the butter in a small saucepan over medium heat. Stir in the minced garlic and cook for 1-2 minutes until fragrant. Season with salt and pepper.
- Serve: Drain the seafood and vegetables from the pot. Transfer to a large serving platter, drizzle with garlic butter, and garnish with fresh parsley. Serve with lemon wedges on the side.
Harvest Tomato Pie With Basil And Gruyère
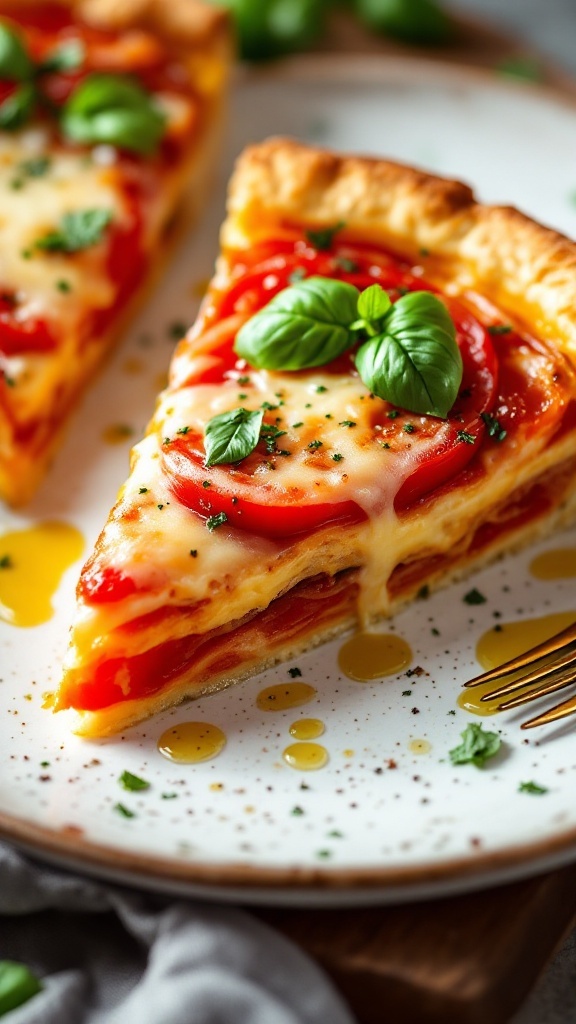
Harvest Tomato Pie with Basil and Gruyère is a delightful way to celebrate summer’s bounty. The fresh tomatoes create a juicy, flavorful base, while the Gruyère cheese adds a rich, nutty flavor that melts beautifully. This dish is perfect for a light lunch or a casual dinner, and it’s simple enough for even beginner cooks to tackle.
The combination of crispy crust, savory cheese, and aromatic basil makes this pie a crowd-pleaser. Plus, it’s a great way to use up those ripe summer tomatoes from your garden or local farmers’ market!
Ingredients
- 1 pie crust (store-bought or homemade)
- 4 medium ripe tomatoes, sliced
- 1 cup Gruyère cheese, shredded
- 1/2 cup fresh basil leaves, chopped
- 1/2 cup ricotta cheese
- 1/4 cup mayonnaise
- 1 teaspoon garlic powder
- Salt and pepper to taste
Instructions
- Preheat your oven to 375°F (190°C).
- Place the pie crust in a 9-inch pie dish and pre-bake for 10 minutes until lightly golden.
- In a mixing bowl, combine the ricotta cheese, mayonnaise, garlic powder, salt, and pepper. Spread this mixture evenly over the pre-baked crust.
- Layer the sliced tomatoes on top of the ricotta mixture, followed by the chopped basil and shredded Gruyère cheese.
- Bake for 30-35 minutes, or until the cheese is bubbly and golden brown. Let it cool for a few minutes before slicing. Serve warm or at room temperature.
Fried Green Tomato Bits With Sweet Corn Aioli

Fried Green Tomato BLTs with Sweet Corn Aioli bring a delightful twist to a classic favorite. The crispness of the fried green tomatoes pairs beautifully with the rich, creamy aioli, creating a sandwich that is both satisfying and refreshing. This recipe is simple enough for a quick lunch or an impressive dinner, making it a great choice for summer gatherings.
The sweet corn aioli adds an unexpected sweetness that complements the savory flavors of the bacon and tomatoes. With layers of texture and taste, each bite is a delicious experience. Grab your ingredients, and let’s make this tasty summer meal!
Ingredients
- 4 slices of thick-cut bacon
- 2 large green tomatoes, sliced
- 1 cup buttermilk
- 1 cup cornmeal
- 1/2 cup all-purpose flour
- Salt and pepper, to taste
- 4 slices of your favorite bread
- 1 cup fresh corn kernels
- 1/4 cup mayonnaise
- 1 tablespoon lemon juice
- 1 tablespoon chopped fresh basil
- Romaine or lettuce leaves, for serving
Instructions
- Cook the Bacon: In a skillet, cook the bacon over medium heat until crispy. Remove and let drain on paper towels.
- Prepare the Tomatoes: Dip the sliced green tomatoes in buttermilk, then dredge them in a mixture of cornmeal, flour, salt, and pepper.
- Fry the Tomatoes: Heat oil in a separate skillet over medium-high heat. Fry the coated tomatoes until golden brown on both sides. Drain on paper towels.
- Make the Aioli: In a bowl, mix the corn kernels, mayonnaise, lemon juice, and basil until well combined. Add salt and pepper to taste.
- Assemble the Sandwiches: Toast the bread, then layer with lettuce, fried green tomatoes, bacon, and a generous spread of the sweet corn aioli. Top with another slice of bread and cut in half.
Grilled Whole Snapper With Citrus And Herbs
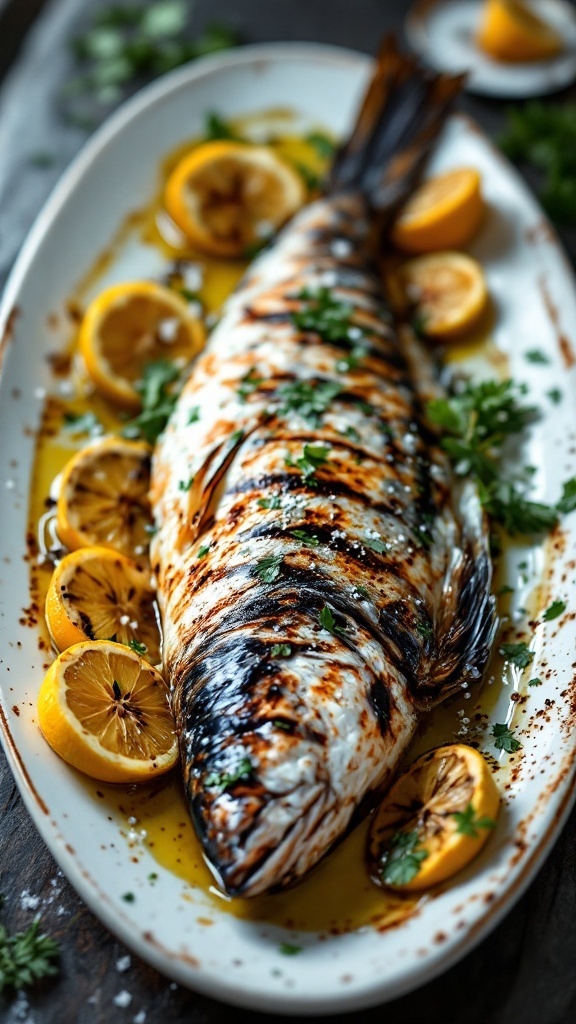
Grilled whole snapper is a delightful dish that brings the flavors of summer right to your table. The fresh fish, combined with citrus and herbs, creates a light and zesty meal that is perfect for warm evenings. This recipe is simple to follow, making it accessible for both novice cooks and seasoned chefs looking for a quick, flavorful option.
The smoky char from the grill, paired with the bright notes of lemon and the aromatic herbs, elevates the snapper and makes it a standout choice for any summer gathering. Not only is it a treat for the taste buds, but it also presents beautifully, making it a great dish for entertaining.
Ingredients
- 1 whole snapper, cleaned and scaled
- 2 lemons, sliced
- 1 orange, sliced
- 1/4 cup olive oil
- 3 cloves garlic, minced
- 1/4 cup fresh parsley, chopped
- 1/4 cup fresh cilantro, chopped
- Salt and pepper to taste
- 1 teaspoon paprika
Instructions
- Prepare the Marinade: In a small bowl, mix olive oil, minced garlic, parsley, cilantro, salt, pepper, and paprika. Rub this mixture generously over the entire fish, inside and out.
- Stuff the Fish: Place lemon and orange slices inside the cavity of the snapper for added flavor.
- Grill the Snapper: Preheat your grill to medium-high heat. Place the snapper on the grill and cook for about 6-8 minutes per side, or until the fish flakes easily with a fork.
- Serve: Once cooked, remove the fish from the grill. Garnish with additional herbs and serve with extra lemon and orange slices on the side.
Blackened Catfish With Creole Corn Maque Choux

Blackened catfish is a flavor-packed dish that combines a crispy, spicy crust with tender, flaky fish. This recipe brings together the rich, smoky spices of blackening seasoning and the creamy, sweet essence of Creole corn maque choux for a delicious summer meal. It’s not only quick to prepare but also provides a delightful balance of flavors, making it a perfect choice for a casual dinner or a special occasion.
The corn maque choux adds a lovely texture and vibrant color to the plate, with the sweetness of the corn complementing the savory catfish perfectly. This dish is simple enough for a weeknight meal yet impressive enough to serve at a gathering. Let’s dive into how to make this tasty recipe!
Ingredients
- 2 catfish fillets
- 2 tablespoons blackening seasoning
- 2 tablespoons olive oil
- 1 cup corn kernels (fresh or frozen)
- 1/2 cup diced bell pepper
- 1/2 cup diced onion
- 1/4 cup diced celery
- 1 cup heavy cream
- Salt and pepper to taste
- Chopped green onions for garnish
Instructions
- Season the Catfish: Rub the blackening seasoning all over the catfish fillets, ensuring they are evenly coated.
- Cook the Catfish: In a skillet over medium-high heat, add olive oil. Once hot, place the seasoned catfish fillets in the skillet. Cook for about 3-4 minutes on each side until the fish is cooked through and has a nice char.
- Prepare the Maque Choux: In another pan, sauté the bell pepper, onion, and celery over medium heat until softened. Stir in the corn and cook for another 2 minutes.
- Add Cream: Pour in the heavy cream and let it simmer until slightly thickened. Season with salt and pepper to taste.
- Serve: Spoon the corn maque choux onto plates and top with the blackened catfish. Garnish with chopped green onions before serving.
Hatch Chile Cheeseburgers With Roasted Poblano Guacamole
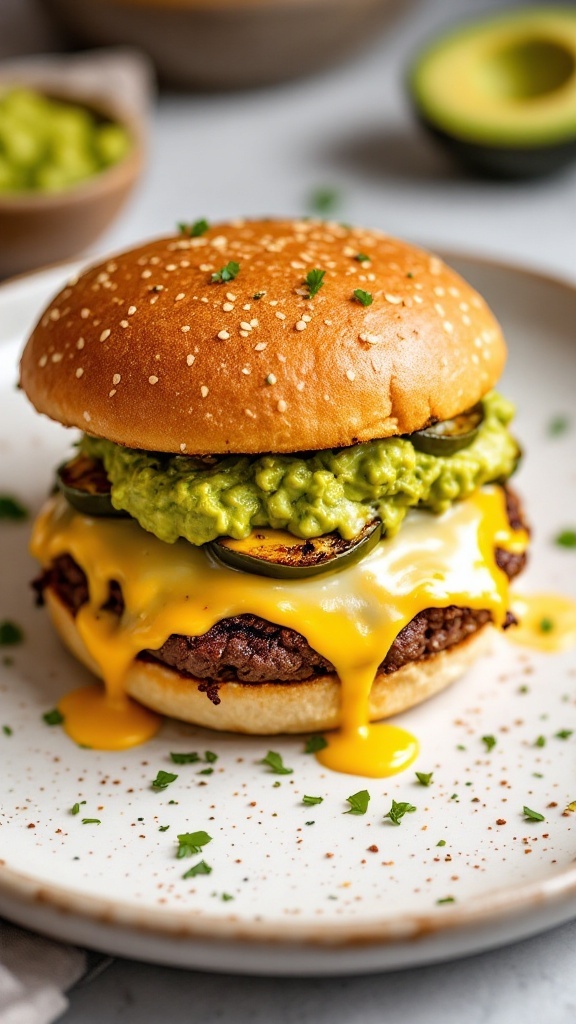
Hatch Chile cheeseburgers bring a lively twist to your summer grilling. The blend of juicy beef patties with roasted Hatch chiles offers a delightful kick, making every bite a flavorful experience. Topped with creamy roasted poblano guacamole, these burgers are a delicious way to enjoy the season’s best produce.
This dish is simple to whip up, perfect for backyard gatherings or casual weeknight dinners. The combination of spicy and creamy flavors will definitely please your taste buds!
Ingredients
- 1 lb ground beef
- 1 cup Hatch chiles, roasted and chopped
- 4 slices cheddar cheese
- 4 hamburger buns
- 1 avocado
- 1 roasted poblano pepper, chopped
- 1 lime, juiced
- Salt and pepper to taste
- Fresh cilantro, for garnish
Instructions
- Prepare the Patties: In a bowl, combine ground beef, chopped Hatch chiles, salt, and pepper. Form into four patties.
- Cook the Patties: Preheat a grill or skillet over medium-high heat. Cook the patties for about 4-5 minutes on each side, adding a slice of cheddar cheese on top during the last minute of cooking.
- Make the Guacamole: In a bowl, mash the avocado and mix in the chopped roasted poblano, lime juice, and salt.
- Assemble the Burgers: Toast the hamburger buns if desired. Place a cheesy beef patty on each bun, top with a generous scoop of roasted poblano guacamole, and garnish with fresh cilantro.
- Serve: Enjoy immediately with your favorite side dishes!