21 Delicious Desserts to Celebrate Memorial Day
Memorial Day is all about honoring those we’ve lost, and what better way to celebrate the occasion than with some delicious desserts? Whether you’re hosting a backyard barbecue or enjoying a picnic with friends and family, these sweet treats will add a festive touch to your gathering. From red, white, and blue treats to easy no-bake options, get ready to satisfy your sweet tooth while paying tribute to this special day.
Red, White, And Blue Berry Trifle
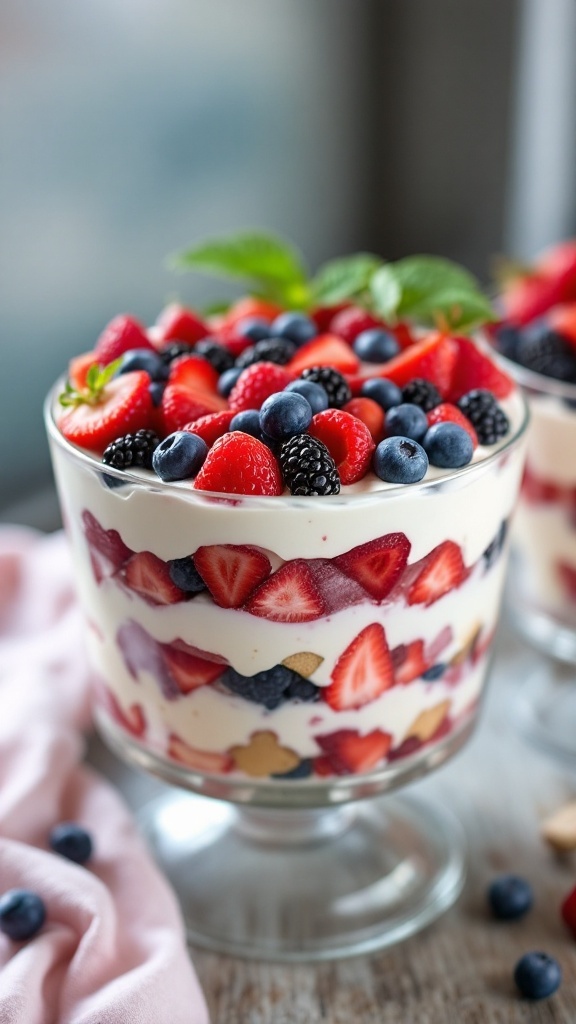
This Red, White, and Blue Berry Trifle is a delightful dessert that’s perfect for Memorial Day celebrations. With layers of fresh strawberries, blueberries, and creamy layers, it captures the festive spirit of the holiday while being refreshingly light and sweet.
Not only is this trifle easy to put together, but it also offers a beautiful presentation that will impress your guests. The combination of flavors and textures makes each bite a treat, and you can have it ready in no time!
Ingredients
- 2 cups strawberries, sliced
- 2 cups blueberries
- 2 cups whipped cream or whipped topping
- 1 cup vanilla pudding mix
- 2 cups milk
- 1 package (8 oz) ladyfinger cookies
Instructions
- Prepare the Pudding: In a bowl, whisk together the vanilla pudding mix and milk until thickened. Set aside.
- Layer the Ingredients: In a large trifle dish, start with a layer of ladyfingers at the bottom. Follow with a layer of pudding, then add a layer of sliced strawberries and blueberries.
- Repeat the Layers: Continue layering until all ingredients are used, finishing with whipped cream on top.
- Chill and Serve: Refrigerate the trifle for at least an hour before serving to allow the flavors to meld. Enjoy this festive dessert at your gathering!
Classic American Flag Cake
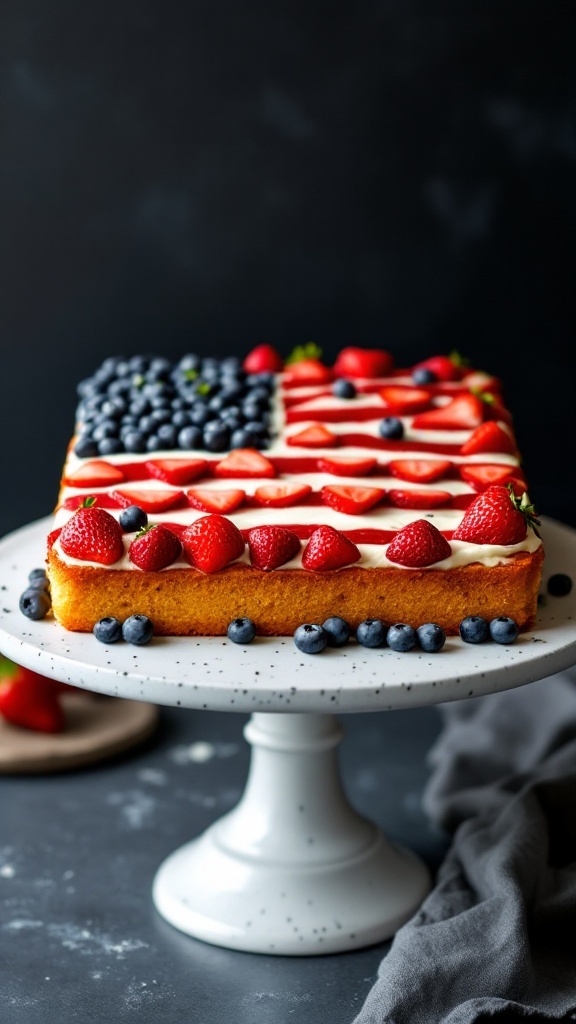
The Classic American Flag Cake is a delightful way to celebrate Memorial Day. This cake is a simple, yet elegant dessert that combines fluffy vanilla cake, creamy frosting, and fresh berries to represent the colors of the American flag.
With its light and sweet flavor, it’s sure to be a hit at any gathering. Plus, it’s easy to make, making it an ideal choice for those who want to impress without spending all day in the kitchen.
Ingredients
- 1 box of vanilla cake mix
- 3 large eggs
- 1 cup water
- 1/2 cup vegetable oil
- 2 cups heavy whipping cream
- 1/2 cup powdered sugar
- 1 teaspoon vanilla extract
- 1 cup fresh strawberries, hulled and sliced
- 1 cup fresh blueberries
Instructions
- Preheat the oven to 350°F (175°C). Grease and flour a rectangular baking dish.
- In a large bowl, mix the cake mix, eggs, water, and vegetable oil until well combined. Pour the batter into the prepared baking dish.
- Bake for 25-30 minutes or until a toothpick inserted in the center comes out clean. Let it cool completely in the pan.
- Once cooled, whip the heavy cream with powdered sugar and vanilla extract until soft peaks form.
- Spread the whipped cream evenly over the cooled cake.
- Arrange sliced strawberries and blueberries on top to create the design of the American flag.
- Chill in the refrigerator for a few hours before serving. Enjoy your festive dessert!
Star-Spangled Strawberry Shortcake
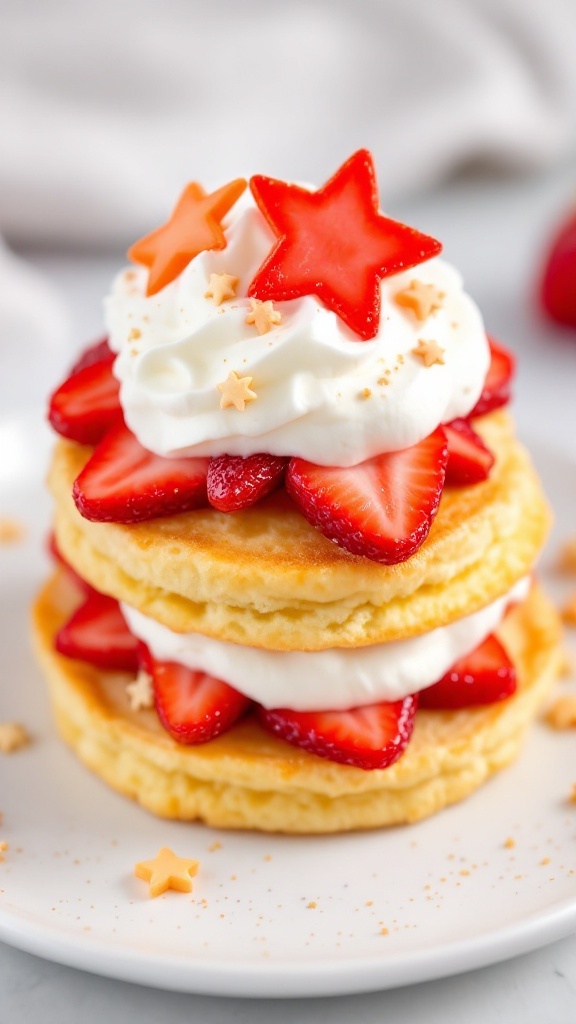
Star-Spangled Strawberry Shortcake is a delightful twist on a classic dessert that perfectly captures the spirit of Memorial Day. With layers of fluffy shortcake, fresh strawberries, and light whipped cream, this treat is not only tasty but also visually appealing. It’s a simple recipe that can be quickly assembled, making it an ideal choice for gatherings.
The freshness of the strawberries paired with the sweet cream creates a refreshing and satisfying dessert. Whether you’re hosting a backyard barbecue or enjoying a picnic, this shortcake is sure to impress your guests and add a festive touch to your celebration.
Ingredients
- 2 cups all-purpose flour
- 1/4 cup granulated sugar
- 1 tablespoon baking powder
- 1/2 teaspoon salt
- 1/4 cup unsalted butter, chilled and cubed
- 3/4 cup milk
- 1 teaspoon vanilla extract
- 2 cups fresh strawberries, sliced
- 1 cup heavy whipping cream
- 2 tablespoons powdered sugar
Instructions
- Preheat your oven to 400°F (200°C). In a bowl, mix flour, sugar, baking powder, and salt. Add the cubed butter and mix until crumbly.
- Pour in the milk and vanilla, stirring gently until just combined. Turn the dough onto a floured surface and knead lightly. Roll out to about 1-inch thick and cut into rounds.
- Place the rounds on a baking sheet and bake for 15-20 minutes or until golden. Allow to cool.
- While the shortcakes cool, whip the cream with powdered sugar until soft peaks form.
- Assemble the shortcakes by splitting them in half. Layer with strawberries and whipped cream, then top with the other half. Serve immediately for a refreshing dessert!
Patriotic Fruit Pizza With Sugar Cookie Base
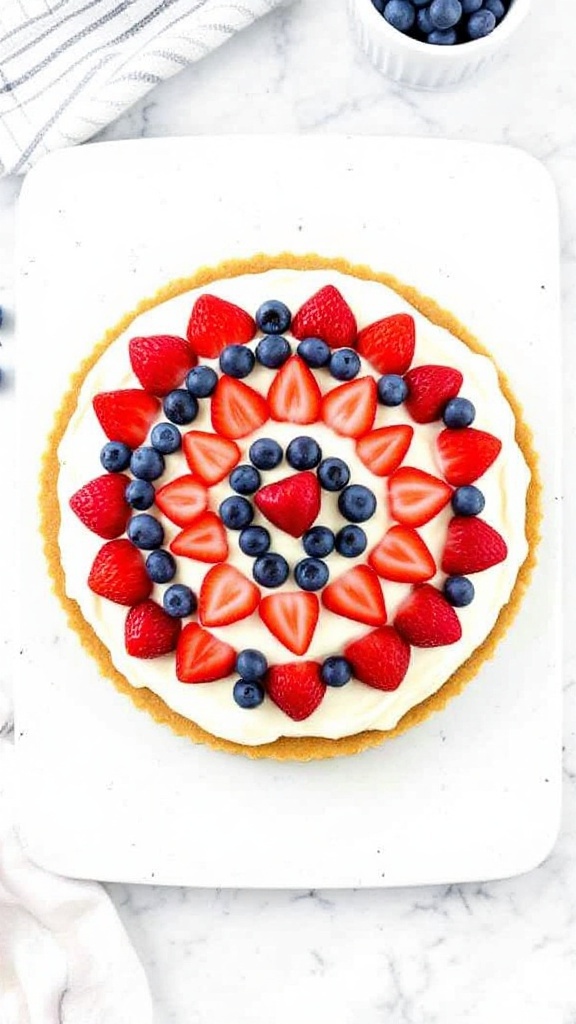
Indulging in a patriotic fruit pizza is a delightful way to celebrate Memorial Day. This dessert features a soft sugar cookie base topped with a creamy layer of vanilla frosting and an assortment of fresh berries. The combination of buttery cookie, sweet cream, and tangy fruit creates a refreshing treat that’s perfect for summer gatherings.
This recipe is not only easy to make, but it also allows for creativity in decorating. You can arrange the berries in fun patterns, making it a fun project for kids and adults alike. It’s a simple yet impressive dessert that brings a festive touch to any picnic or barbecue.
Ingredients
- 1 roll of refrigerated sugar cookie dough
- 1 cup cream cheese, softened
- 1/2 cup powdered sugar
- 1 teaspoon vanilla extract
- 1 cup strawberries, sliced
- 1 cup blueberries
- Mint leaves for garnish (optional)
Instructions
- Preheat the oven to 350°F (175°C) and line a pizza pan with parchment paper.
- Press the sugar cookie dough evenly onto the prepared pan to form a pizza crust. Bake according to the package instructions, typically around 12-15 minutes, until golden. Allow it to cool completely.
- In a mixing bowl, beat together the softened cream cheese, powdered sugar, and vanilla extract until smooth and creamy.
- Spread the cream cheese mixture evenly over the cooled cookie crust.
- Arrange the sliced strawberries and blueberries on top, creating a patriotic design if desired. Garnish with mint leaves for an extra pop of color.
- Chill for at least 30 minutes before slicing to serve.
Triple Berry Cheesecake Bars
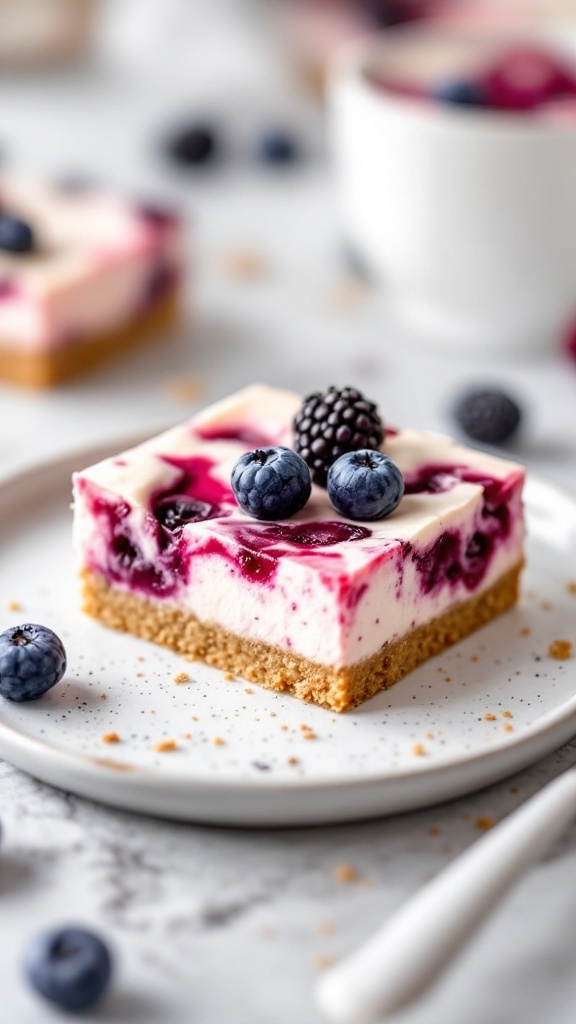
Triple Berry Cheesecake Bars are a delightful treat that combines creamy cheesecake with the fresh taste of berries. The sweet and tangy flavor of strawberries, blueberries, and raspberries creates a refreshing dessert perfect for any Memorial Day celebration. Plus, they’re simple to make, so you won’t spend all day in the kitchen!
The smooth cheesecake filling is layered on a buttery graham cracker crust, making each bite a delicious mix of textures. Topped with a vibrant assortment of berries, these bars are not only tasty but also visually appealing, ensuring they’ll be a hit at your gathering.
Ingredients
- 1 ½ cups graham cracker crumbs
- ½ cup unsalted butter, melted
- 1 cup cream cheese, softened
- ½ cup granulated sugar
- 1 teaspoon vanilla extract
- 2 large eggs
- 1 cup sour cream
- 1 cup strawberries, sliced
- 1 cup blueberries
- 1 cup raspberries
Instructions
- Preheat the oven to 325°F (165°C) and line an 8×8-inch baking dish with parchment paper.
- In a bowl, combine graham cracker crumbs and melted butter. Press the mixture into the bottom of the prepared baking dish to form the crust.
- In another bowl, beat the cream cheese and sugar until smooth. Mix in the vanilla extract and eggs, one at a time, followed by the sour cream.
- Pour the cheesecake filling over the crust and smooth it out. Gently fold in the berries, reserving some for topping.
- Bake for 30-35 minutes until the center is set. Let cool before refrigerating for at least 2 hours.
- Once chilled, remove from the dish, slice into bars, and serve with the reserved berries on top.
Star-Shaped Blueberry Hand Pies
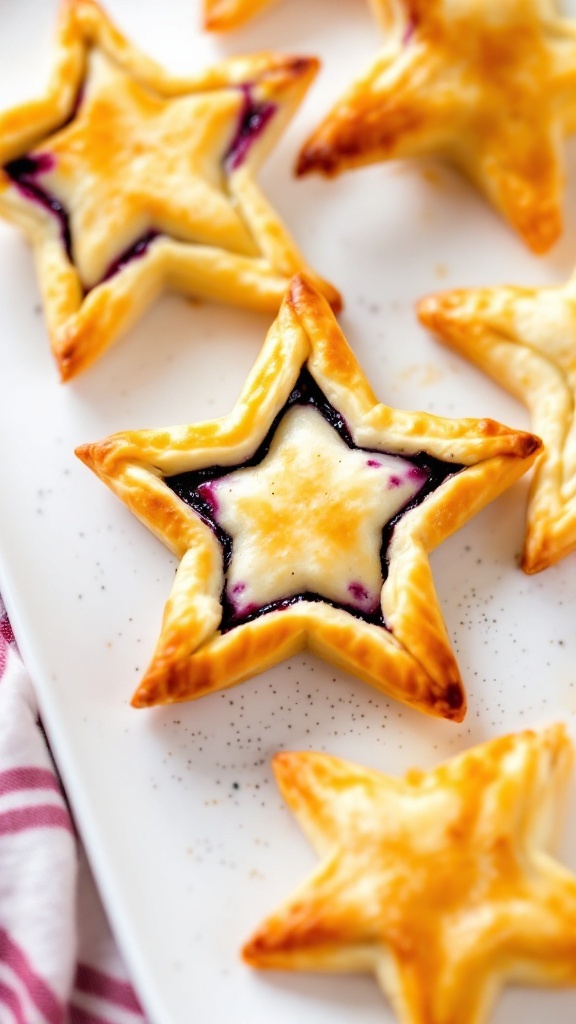
Star-shaped blueberry hand pies are a delightful treat that’s perfect for Memorial Day celebrations. These flaky pastries are filled with sweet, juicy blueberries, making every bite a burst of flavor. Not only do they look charming, but they are also simple to make, allowing you to enjoy quality time with family and friends while baking.
The combination of a buttery crust and a fruity filling creates a balanced dessert that everyone will love. You can easily customize these hand pies with your favorite jams or fruits, but blueberry is a classic choice that delivers a fresh, summery taste.
Ingredients
- 1 package of refrigerated pie crusts (usually contains 2 rolls)
- 2 cups fresh or frozen blueberries
- 1/4 cup granulated sugar
- 1 tablespoon cornstarch
- 1 tablespoon lemon juice
- 1 egg (for egg wash)
- 1 tablespoon milk (for egg wash)
- Optional: powdered sugar for dusting
Instructions
- Preheat the oven to 425°F (220°C).
- In a medium bowl, combine blueberries, sugar, cornstarch, and lemon juice. Stir gently to combine and set aside to let the mixture thicken.
- Roll out the pie crusts on a lightly floured surface. Use a star-shaped cookie cutter to cut out star shapes from the dough, creating an even number of stars.
- Place half of the stars on a baking sheet lined with parchment paper. Spoon a small amount of the blueberry mixture onto the center of each star.
- Top each filled star with another star cutout and press the edges to seal. You can use a fork to crimp the edges for a decorative touch.
- In a small bowl, whisk together the egg and milk. Brush the egg wash over each hand pie to give them a nice golden color while baking.
- Bake for 12-15 minutes, or until the hand pies are golden brown. Let them cool slightly before dusting with powdered sugar and serving.
Red, White, And Blue Layered Jello Cups
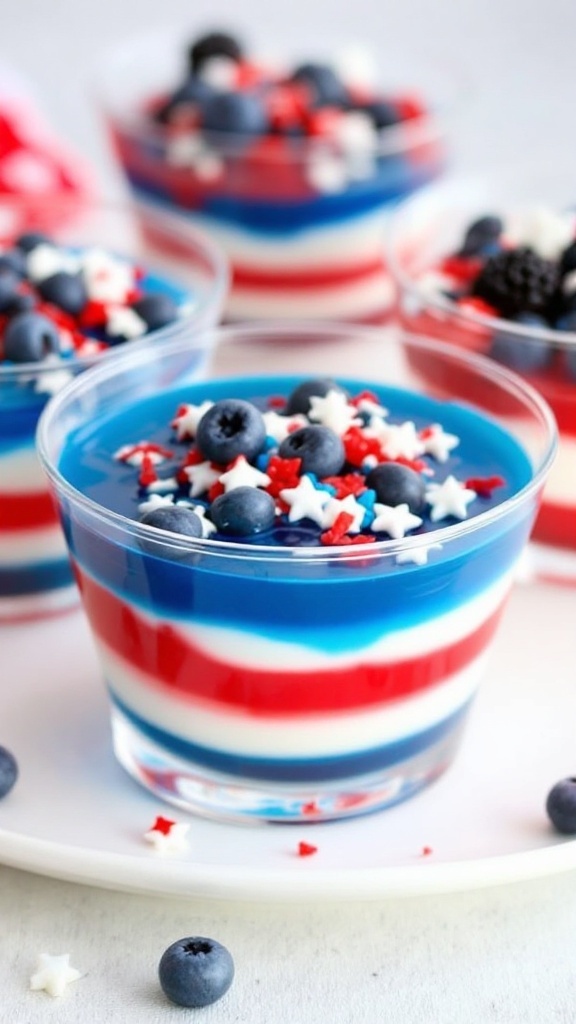
If you’re looking for a fun and festive way to celebrate Memorial Day, these Red, White, and Blue Layered Jello Cups are a delightful treat! They are not only visually appealing with their vibrant colors, but they also offer a refreshing taste that’s perfect for warm weather.
This recipe is super simple to make and will surely impress your guests. With layers of cherry, vanilla, and blue raspberry flavors, each spoonful brings a burst of sweetness. Plus, they’re a great make-ahead option that allows you to enjoy the holiday without any last-minute fuss.
Ingredients
- 1 box (3 oz) cherry-flavored gelatin
- 1 box (3 oz) blue raspberry-flavored gelatin
- 1 box (3 oz) vanilla pudding mix
- 4 cups boiling water
- 2 cups cold water
- 2 cups whipped cream (optional, for topping)
Instructions
- Prepare the Cherry Jello: In a medium bowl, dissolve the cherry gelatin in 1 cup of boiling water. Stir until fully dissolved, then add 1 cup of cold water. Pour the mixture evenly into clear cups and refrigerate until set, about 1-2 hours.
- Make the Vanilla Layer: In another bowl, whisk together the vanilla pudding mix with 2 cups of cold milk according to package instructions. Once the cherry layer is set, pour the vanilla pudding mixture over the cherry layer and refrigerate until firm, about 1-2 hours.
- Prepare the Blue Raspberry Jello: In a medium bowl, dissolve the blue raspberry gelatin in 1 cup of boiling water. Add 1 cup of cold water. Once the vanilla layer is set, carefully pour the blue raspberry mixture on top and refrigerate until fully set, about 1-2 hours.
- Serve: Once all layers are set, top with whipped cream if desired, and enjoy your festive Jello cups!
All-American Apple Pie With Vanilla Ice Cream
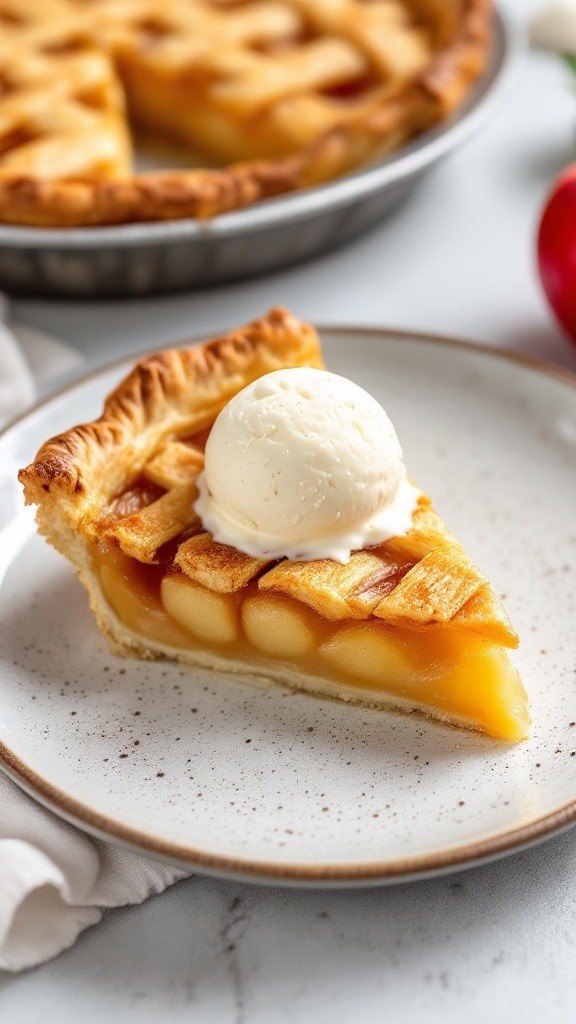
There’s something about a slice of apple pie that brings back memories of summer barbecues and family gatherings. This All-American apple pie is filled with sweet, cinnamon-spiced apples, all enveloped in a flaky, buttery crust. The contrasting warmth of the pie pairs beautifully with a scoop of vanilla ice cream, creating a delightful treat that’s perfect for any occasion.
Baking this pie is simpler than you might think. With fresh apples, a handful of pantry staples, and a little bit of love, you can whip up a dessert that will surely impress your friends and family.
Ingredients
- 2 pie crusts (store-bought or homemade)
- 6-8 cups of peeled and sliced apples (Granny Smith or Honeycrisp work well)
- 3/4 cup granulated sugar
- 2 tablespoons all-purpose flour
- 1 teaspoon ground cinnamon
- 1/4 teaspoon ground nutmeg
- 1 tablespoon lemon juice
- 1 tablespoon butter, cut into small pieces
Instructions
- Preheat your oven to 425°F (220°C).
- Prepare the filling by mixing the sliced apples, sugar, flour, cinnamon, nutmeg, and lemon juice in a large bowl. Let it sit for about 10 minutes to allow the flavors to meld.
- Roll out one pie crust and fit it into a 9-inch pie pan. Fill with the apple mixture and dot the top with small pieces of butter.
- Roll out the second pie crust and place it over the filling. Seal the edges by crimping them together. Make several small slits in the top crust to allow steam to escape.
- Bake in the preheated oven for 15 minutes. Then reduce the temperature to 350°F (175°C) and continue baking for an additional 30-35 minutes, or until the apples are tender and the crust is golden brown.
- Allow the pie to cool slightly before serving, ideally with a scoop of vanilla ice cream on top.
S’Mores Brownies
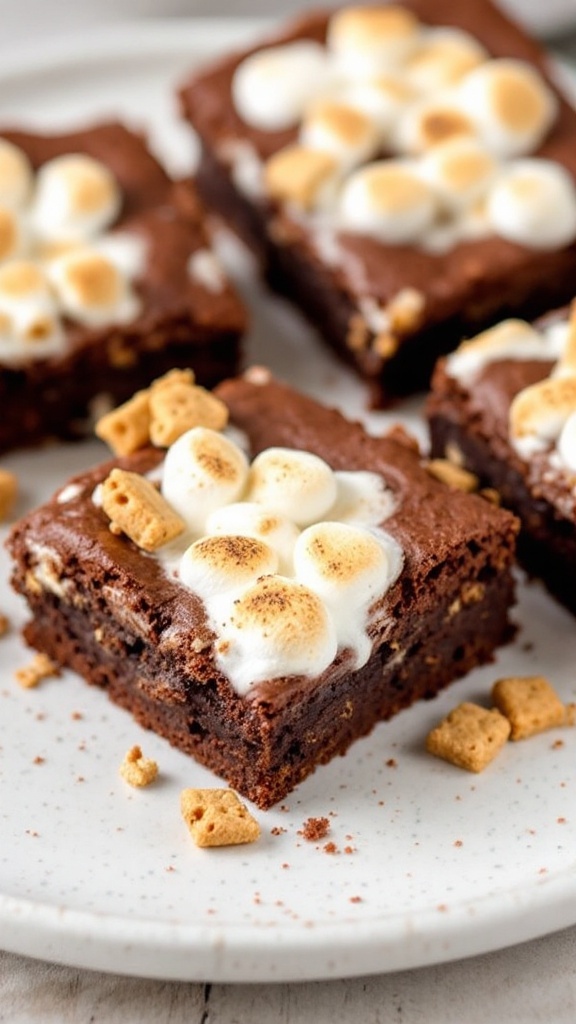
Nothing says summer like the nostalgic flavors of s’mores, and these S’Mores Brownies bring that classic campfire treat to your dessert table. They combine rich, fudgy brownies with the gooey sweetness of marshmallows and the crunch of graham crackers, creating a delightful mix of textures and flavors. Plus, they’re super easy to whip up, making them a perfect dessert for Memorial Day celebrations.
These brownies are not only a treat for the eyes but also a mouthwatering indulgence that everyone will love. The layers of chocolate, marshmallow, and graham cracker come together to create a perfect balance of sweetness and richness, making them a standout dessert. Whether you’re serving them at a picnic or enjoying them at home, these brownies are sure to impress.
Ingredients
- 1 cup unsalted butter
- 2 cups granulated sugar
- 4 large eggs
- 1 teaspoon vanilla extract
- 1 cup all-purpose flour
- 1 cup cocoa powder
- 1 teaspoon baking powder
- 1/2 teaspoon salt
- 1 cup semi-sweet chocolate chips
- 1 cup mini marshmallows
- 1 cup crushed graham crackers
Instructions
- Preheat your oven to 350°F (175°C) and grease a 9×13-inch baking dish.
- In a saucepan over medium heat, melt the butter and sugar together, stirring until smooth. Remove from heat and let cool slightly.
- Whisk in the eggs and vanilla extract until well combined.
- In a separate bowl, mix together the flour, cocoa powder, baking powder, and salt. Gradually add this dry mixture into the wet ingredients, stirring until just combined.
- Fold in the chocolate chips, then pour the batter into the prepared baking dish, spreading it evenly.
- Bake for about 25 minutes, then remove from the oven and sprinkle the mini marshmallows and crushed graham crackers on top.
- Return to the oven and bake for an additional 5-7 minutes, until the marshmallows are puffed and lightly toasted.
- Allow to cool before cutting into squares and serving.
Grilled Peach Sundaes With Bourbon Caramel
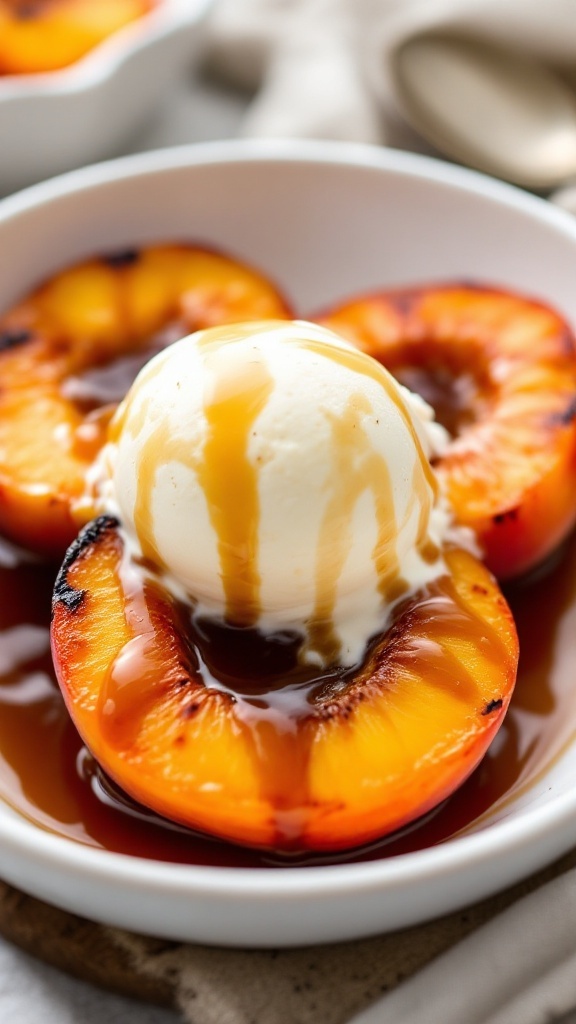
Grilled Peach Sundaes With Bourbon Caramel are a delightful twist on a classic dessert. The sweet, smoky flavors of the grilled peaches blend perfectly with creamy vanilla ice cream and a rich bourbon caramel sauce. This recipe is simple enough for a summer gathering and adds a touch of sophistication to your Memorial Day celebrations.
The caramel sauce elevates this dessert, giving it a warm, indulgent finish. Whether you’re serving it at a backyard BBQ or enjoying a quiet evening at home, these sundaes are sure to impress. Let’s dive into how to make this delicious treat!
Ingredients
- 4 ripe peaches, halved and pitted
- 2 tablespoons olive oil
- 4 cups vanilla ice cream
- 1/2 cup brown sugar
- 1/4 cup unsalted butter
- 1/4 cup bourbon
- 1 teaspoon vanilla extract
Instructions
- Preheat the Grill: Heat your grill to medium-high heat.
- Prepare Peaches: Brush the cut sides of the peaches with olive oil.
- Grill Peaches: Place peaches cut-side down on the grill. Grill for about 4-5 minutes until they are tender and have grill marks.
- Make Bourbon Caramel: In a saucepan over medium heat, combine brown sugar and butter. Stir until melted and bubbly, then stir in bourbon and vanilla extract. Cook for an additional 2 minutes, then remove from heat.
- Assemble Sundaes: In serving bowls, place grilled peaches, top with scoops of vanilla ice cream, and drizzle with warm bourbon caramel.
Strawberry Lemonade Bars
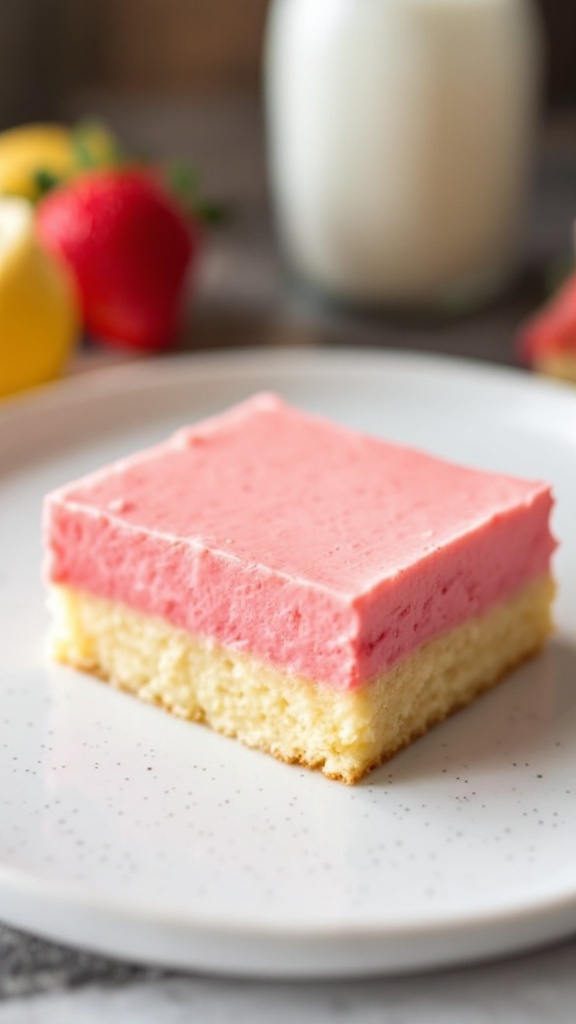
If you’re looking for a refreshing treat to brighten up your Memorial Day gathering, strawberry lemonade bars are a delightful choice. These bars combine the sweet and tart flavors of strawberries and lemons, creating a zesty dessert that’s perfect for warm weather. Plus, they’re simple to prepare, making them a great option for anyone looking to whip up something special without too much fuss.
The buttery crust is complemented by a creamy filling that balances the sweetness of strawberries with the brightness of lemon. Each bite offers a taste of summer, making them a hit at picnics and barbecues. With just a few ingredients and minimal effort, you can serve a dessert that feels both refreshing and indulgent.
Ingredients
- 1 cup all-purpose flour
- 1/4 cup powdered sugar
- 1/2 cup unsalted butter, softened
- 1 cup granulated sugar
- 2 large eggs
- 1/4 cup fresh lemon juice
- 1 tablespoon lemon zest
- 1/2 cup strawberry puree
- 1 teaspoon baking powder
- 1/4 teaspoon salt
Instructions
- Preheat your oven to 350°F (175°C) and line an 8×8-inch baking dish with parchment paper.
- In a medium bowl, mix together flour and powdered sugar. Add softened butter and blend until crumbly. Press the mixture into the bottom of the prepared baking dish to form the crust.
- Bake the crust for about 15 minutes, or until lightly golden.
- In another bowl, whisk together granulated sugar, eggs, lemon juice, lemon zest, baking powder, and salt. Stir in the strawberry puree until combined.
- Pour the filling over the baked crust and return to the oven. Bake for an additional 20-25 minutes, or until the filling is set.
- Once cooled, cut into squares and enjoy your delightful strawberry lemonade bars!
Memorial Day Mason Jar Parfaits
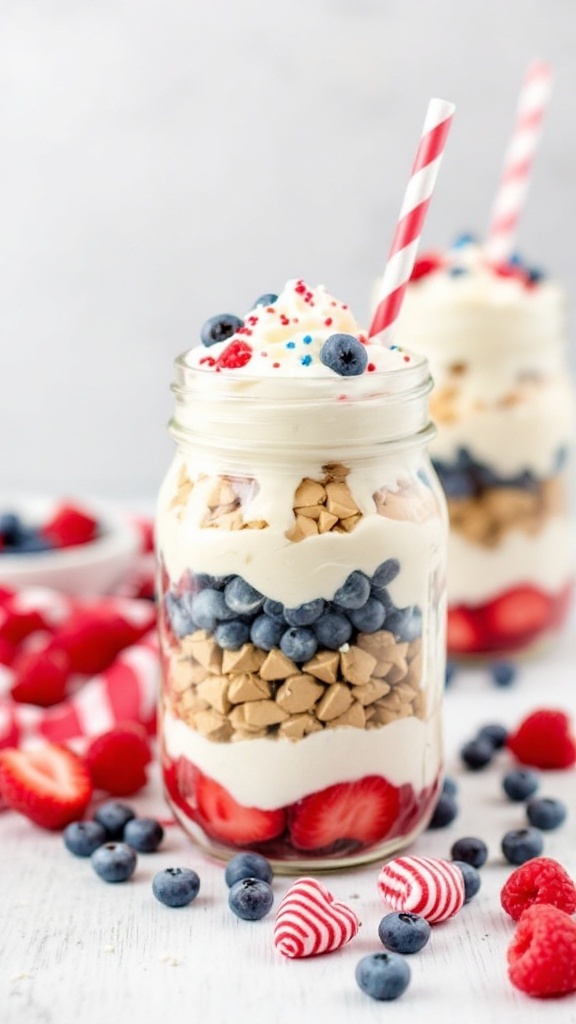
Memorial Day Mason Jar Parfaits are a delightful and refreshing dessert option that perfectly captures the spirit of summer. With layers of creamy yogurt, fresh fruits, and crunchy granola, they offer a balance of sweetness and texture that everyone can enjoy. Plus, they are a breeze to prepare, making them an ideal treat for your Memorial Day gatherings.
The beauty of these parfaits lies in their versatility. You can customize them with your favorite fruits or even mix in different flavors of yogurt. Assemble them in individual jars for a fun presentation that encourages sharing and enjoyment. Whether you’re celebrating with family or friends, these parfaits are sure to be a hit!
Ingredients
- 2 cups yogurt (vanilla or your favorite flavor)
- 1 cup granola
- 1 cup strawberries, sliced
- 1 cup blueberries
- 1 cup raspberries
- Fresh mint leaves for garnish
Instructions
- Prepare the Jars: Start by selecting your mason jars. Make sure they are clean and dry.
- Layer Ingredients: Begin with a layer of yogurt at the bottom of each jar. Add a layer of granola followed by a layer of mixed berries.
- Repeat Layers: Continue layering yogurt, granola, and berries until the jars are filled, finishing with a layer of berries on top.
- Garnish: Top the parfaits with fresh mint leaves for a pop of color and added freshness.
- Chill and Serve: Place the jars in the refrigerator for about 30 minutes before serving to allow the flavors to meld.
Red Velvet Cupcakes With Cream Cheese Frosting
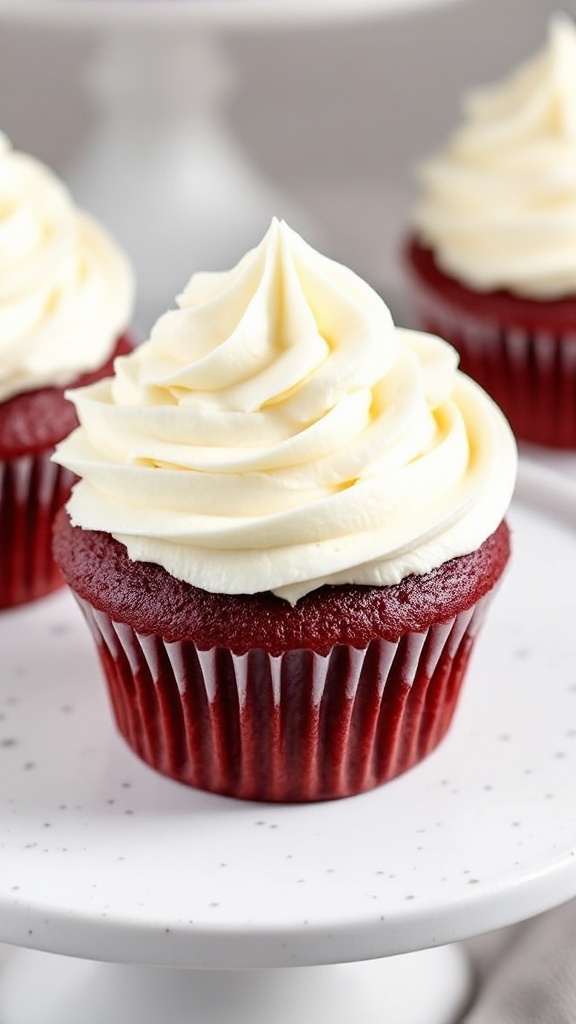
Red velvet cupcakes are a delightful treat with a soft, moist texture and a hint of cocoa flavor. Topped with creamy, tangy cream cheese frosting, these cupcakes are perfect for any festive occasion, including Memorial Day. Plus, they are simple to whip up, making them a great option even for those who may not consider themselves expert bakers.
With their vibrant red color and luscious frosting, these cupcakes not only taste good but also look fantastic on any dessert table. They are sure to impress your family and friends while bringing a touch of sweetness to your celebrations. Let’s dive into how you can make these delicious red velvet cupcakes!
Ingredients
- 1 ½ cups all-purpose flour
- 1 cup granulated sugar
- 1 teaspoon baking soda
- 1 teaspoon cocoa powder
- ½ teaspoon salt
- 1 cup vegetable oil
- 1 cup buttermilk, room temperature
- 2 large eggs, room temperature
- 2 tablespoons red food coloring
- 1 teaspoon vanilla extract
- 1 teaspoon white vinegar
- 1 cup cream cheese, softened
- 4 cups powdered sugar
- 1 teaspoon vanilla extract (for frosting)
- 2 tablespoons unsalted butter, softened
Instructions
- Preheat the Oven: Preheat your oven to 350°F (175°C) and line a cupcake pan with paper liners.
- Mix Dry Ingredients: In a bowl, whisk together the flour, sugar, baking soda, cocoa powder, and salt until well combined.
- Combine Wet Ingredients: In another bowl, mix the oil, buttermilk, eggs, food coloring, vanilla extract, and vinegar until smooth.
- Combine Mixtures: Gradually add the dry ingredients to the wet mixture, stirring until just combined. Be careful not to overmix.
- Fill the Pan: Divide the batter evenly among the cupcake liners, filling each about two-thirds full.
- Bake: Bake for 18-20 minutes or until a toothpick inserted in the center comes out clean. Let them cool in the pan for a few minutes, then transfer to a wire rack to cool completely.
- Prepare the Frosting: In a large bowl, beat together the cream cheese, powdered sugar, vanilla extract, and softened butter until creamy and smooth.
- Frost the Cupcakes: Once the cupcakes are completely cooled, generously pipe or spread the cream cheese frosting on top.
Watermelon Slice Cookies
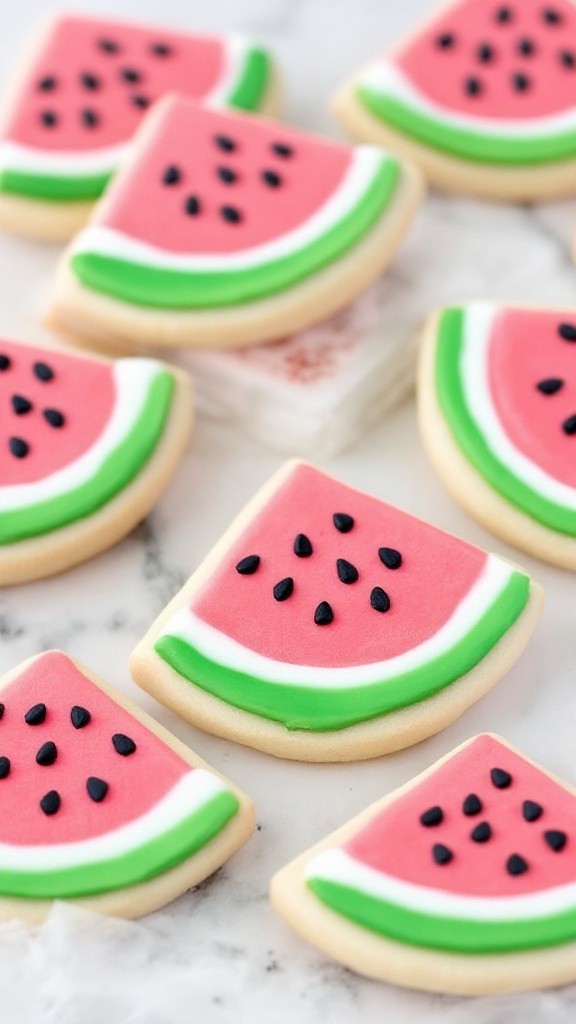
Watermelon slice cookies are a delightful treat that combines the fun of baking with the refreshing taste of summer. These cookies, with their vibrant colors and playful design, are perfect for any outdoor gathering, especially on Memorial Day. They offer a sweet, buttery flavor that pairs well with the light icing, creating a delicious bite that both kids and adults will enjoy.
Making these cookies is simpler than it looks. With just a few steps, you can whip up a batch that will impress your friends and family. They are great for sharing or enjoying on your own as a colorful snack. Let’s dive into the ingredients and instructions so you can get baking!
Ingredients
- 2 ¾ cups all-purpose flour
- 1 teaspoon baking powder
- ½ teaspoon salt
- 1 cup unsalted butter, softened
- 1 cup granulated sugar
- 1 large egg
- 1 teaspoon vanilla extract
- Red, green, and white icing
- Black seeds (chocolate chips or black sprinkles)
Instructions
- Preheat the oven to 350°F (175°C).
- In a medium bowl, whisk together flour, baking powder, and salt. Set aside.
- In a large bowl, cream together the softened butter and sugar until light and fluffy. Beat in the egg and vanilla extract.
- Gradually add the dry ingredients to the wet ingredients, mixing until just combined.
- Divide the dough into three portions. Color one portion red, one green, and leave the third portion plain for the cookie base.
- Roll out the plain dough and cut into circular shapes for the cookie base. Place on a baking sheet lined with parchment paper.
- Roll out the red dough and cut into smaller circles to create the watermelon flesh. Place on top of the plain cookie base.
- Roll out the green dough and cut into thin strips to create the watermelon rind. Place around the edge of the red circle.
- Use the black seeds to create the look of watermelon seeds on top of the red icing.
- Bake for 10-12 minutes, or until the edges are lightly golden. Allow to cool before serving.
Blueberry Cobbler With Cornmeal Biscuit Topping
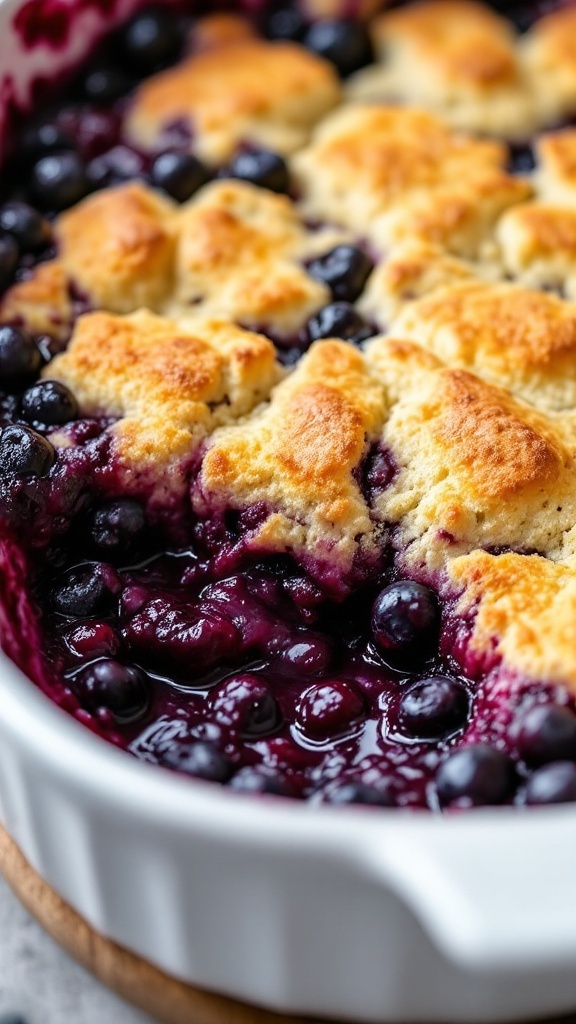
Blueberry cobbler with cornmeal biscuit topping is a delightful dessert that perfectly captures the essence of summer. The juicy, sweet blueberries mingle with a hint of tartness, creating a comforting filling that is beautifully balanced by the slightly crumbly, golden cornmeal biscuit topping. It’s simple to make, which means you can focus on enjoying your time with family and friends.
This recipe is not just about flavors; it’s also about texture. The rich, buttery biscuit topping contrasts wonderfully with the soft, warm blueberries underneath. Serve it warm with a scoop of vanilla ice cream for an extra treat. Let’s dive into the recipe!
Ingredients
- 4 cups fresh blueberries
- 1/2 cup granulated sugar
- 1 tablespoon lemon juice
- 1 tablespoon cornstarch
- 1 cup all-purpose flour
- 1/2 cup cornmeal
- 1/4 cup brown sugar
- 2 teaspoons baking powder
- 1/2 teaspoon salt
- 1/4 cup unsalted butter, chilled and cubed
- 1/2 cup milk
- 1 teaspoon vanilla extract
Instructions
- Preheat your oven to 375°F (190°C). In a mixing bowl, combine the blueberries, granulated sugar, lemon juice, and cornstarch. Pour this mixture into a greased baking dish.
- In another bowl, mix the flour, cornmeal, brown sugar, baking powder, and salt. Add the cubed butter and mix until crumbly. Stir in the milk and vanilla extract until just combined.
- Drop spoonfuls of the biscuit mixture over the blueberry filling, covering it as best as you can.
- Bake in the preheated oven for 25-30 minutes, or until the topping is golden and the blueberries are bubbly.
- Let it cool slightly before serving, and enjoy it warm with ice cream or whipped cream!
Patriotic Rice Krispie Treat Stars
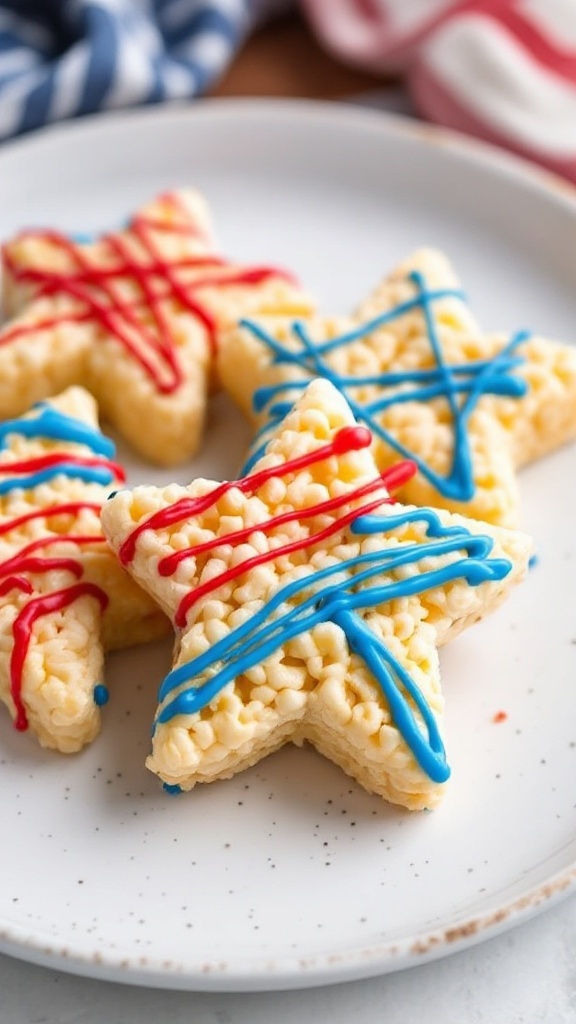
These Patriotic Rice Krispie Treat Stars are a delightful and festive way to celebrate Memorial Day. They’re sweet, chewy, and offer a fun twist on a classic treat that everyone loves. The playful star shape and vibrant red, white, and blue colors make them not only tasty but visually appealing as well.
Making these treats is simple and requires just a few ingredients, making it a perfect activity for kids and adults alike. With a little melted marshmallow goodness and some creative decorating, you’ll have a delicious dessert that’s sure to impress your guests during your Memorial Day gathering!
Ingredients
- 4 cups Rice Krispies
- 3 tablespoons unsalted butter
- 1 package (10 oz) mini marshmallows
- 1 teaspoon vanilla extract
- Red and blue candy melts
- Cooking spray or parchment paper
Instructions
- Prepare the Pan: Lightly grease a star-shaped cookie cutter or line a baking dish with parchment paper.
- Melt the Butter and Marshmallows: In a large saucepan, melt butter over low heat. Add mini marshmallows and stir until completely melted and smooth. Remove from heat and stir in the vanilla extract.
- Mix in the Rice Krispies: Add Rice Krispies to the melted mixture and stir until well coated.
- Shape the Treats: Press the mixture firmly into the prepared star shapes or the lined baking dish. Allow to cool for about 30 minutes.
- Decorate: Once cooled, melt the red and blue candy melts according to package instructions. Drizzle them over the star-shaped treats for a patriotic touch.
- Serve and Enjoy: Cut the treats into stars if using a baking dish and serve at your Memorial Day celebration!
Classic Banana Pudding
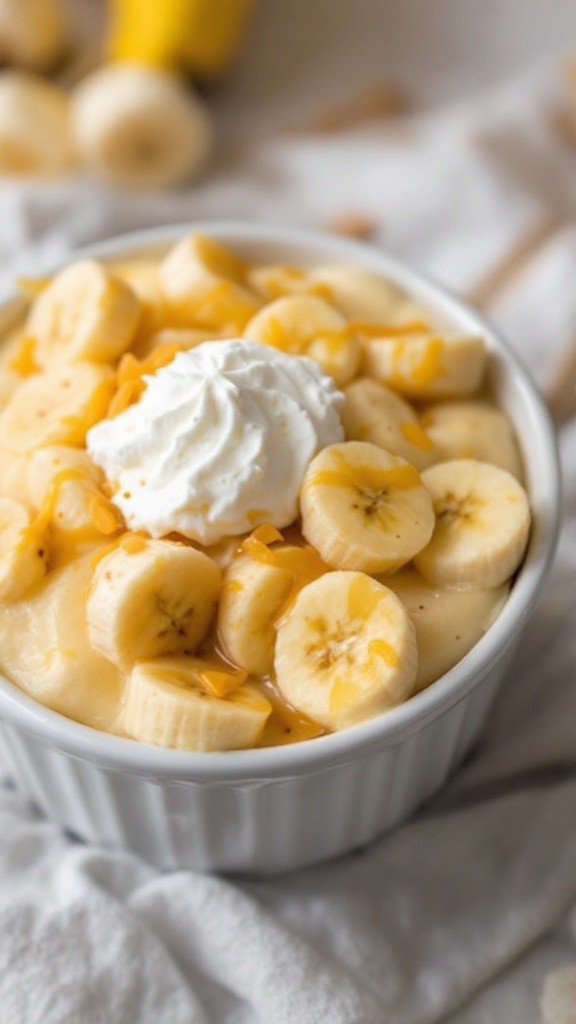
Classic banana pudding is a delightful dessert that brings back memories of summer picnics and family gatherings. With layers of creamy pudding, fresh bananas, and crunchy vanilla wafers, this treat is both satisfying and easy to whip up. Its sweet, comforting flavor makes it a favorite among both kids and adults.
This recipe is simple enough for anyone to try, even if you’re new to baking. Just a few ingredients come together to create a delicious dessert that looks as good as it tastes. So if you’re looking to add a classic touch to your Memorial Day spread, this banana pudding will surely please your crowd!
Ingredients
- 1 cup granulated sugar
- 1/3 cup all-purpose flour
- 1/4 teaspoon salt
- 2 3/4 cups milk
- 3 large egg yolks
- 1 teaspoon vanilla extract
- 2 ripe bananas, sliced
- 1 box vanilla wafers
- Whipped cream for topping (optional)
Instructions
- Combine the sugar, flour, and salt in a medium saucepan over medium heat. Gradually whisk in the milk until smooth.
- In a separate bowl, beat the egg yolks, then gradually add some of the warm milk mixture to temper the eggs. Stir this back into the saucepan.
- Cook the mixture, stirring constantly, until it thickens and bubbles, about 5-7 minutes. Remove from heat and stir in the vanilla extract.
- In a trifle dish or a large bowl, layer the vanilla wafers, sliced bananas, and the pudding mixture. Repeat the layers until all ingredients are used, finishing with pudding on top.
- Chill in the refrigerator for at least 2 hours before serving. Top with whipped cream if desired.
Star-Spangled Sugar Cookies
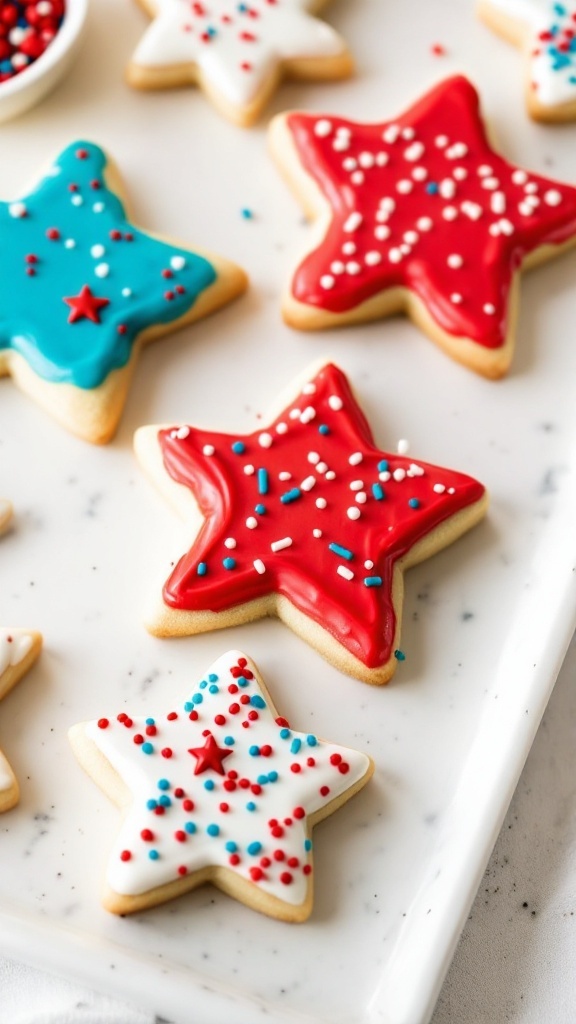
Star-Spangled Sugar Cookies are a fun and festive way to celebrate Memorial Day. These sweet treats are not only delicious but also visually appealing with their vibrant red, white, and blue colors. Made with a buttery sugar cookie dough, they have a soft and chewy texture, making them a hit for both kids and adults alike.
This recipe is simple to follow, even for baking beginners. With just a few ingredients, you can whip up a batch of these cookies in no time, perfect for sharing at barbecues or picnics. Add a touch of creativity with star-shaped cookie cutters and colorful icing to elevate the celebration!
Ingredients
- 2 3/4 cups all-purpose flour
- 1 teaspoon baking soda
- 1/2 teaspoon baking powder
- 1 cup unsalted butter, softened
- 1 1/2 cups white sugar
- 1 egg
- 1 teaspoon vanilla extract
- 1/2 teaspoon almond extract
- 3-4 cups royal icing (for decorating)
- Red and blue food coloring
Instructions
- Preheat the oven to 375°F (190°C). In a small bowl, stir together flour, baking soda, and baking powder; set aside.
- In a large bowl, cream together the butter and sugar until smooth. Beat in the egg, vanilla extract, and almond extract.
- Gradually blend in the dry ingredients. Roll rounded teaspoonfuls of dough into balls, and place onto ungreased cookie sheets. Flatten each ball with the bottom of a glass.
- Bake 8 to 10 minutes in the preheated oven, or until golden. Let cool on wire racks.
- After the cookies have cooled, decorate them with royal icing. Divide the icing into bowls and color with food coloring. Use piping bags or a knife to create fun star patterns.
Red, White, And Blue Poke Cake
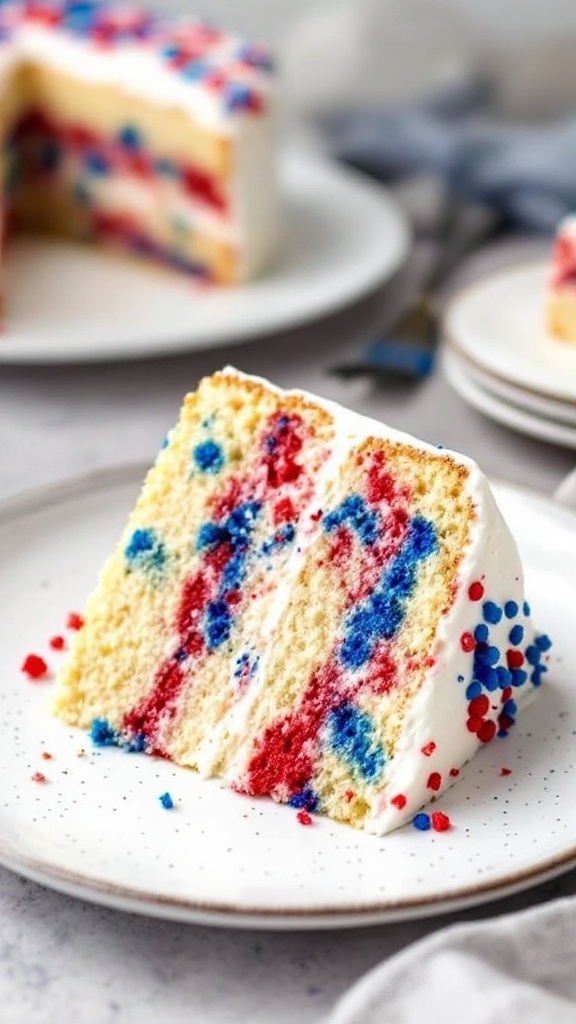
This Red, White, and Blue Poke Cake is a festive dessert that’s perfect for Memorial Day celebrations. It’s light, fluffy, and offers a delightful burst of flavors that will please everyone at your gathering. With its vibrant colors and sweet cream topping, this poke cake is not only visually appealing but also simple to make, making it an ideal choice for a summer get-together.
The cake is infused with strawberry and blue raspberry jello, creating a fun and patriotic look. As guests cut into the cake, they’ll be greeted with a beautiful mix of red, white, and blue. Take a bite, and you’ll enjoy the sweet and fruity flavors paired with a creamy topping. It’s a dessert that truly embodies the spirit of the holiday!
Ingredients
- 1 box of white cake mix
- 3 large eggs
- 1 cup water
- 1 package (3 oz) strawberry jello
- 1 package (3 oz) blue raspberry jello
- 1 cup boiling water
- 1 cup cold water
- 1 container (8 oz) whipped topping
- 1/2 cup milk
Instructions
- Prepare the Cake: Preheat your oven according to the cake mix instructions. In a mixing bowl, combine the white cake mix, eggs, and water, then mix until well blended. Pour the batter into a greased 9×13 inch baking pan.
- Bake the Cake: Bake the cake according to the package instructions or until a toothpick inserted in the center comes out clean. Once done, allow it to cool completely in the pan.
- Poke the Cake: Once the cake is cool, use the handle of a wooden spoon or a straw to poke holes all over the top of the cake.
- Make the Jello: In separate bowls, dissolve the strawberry jello in 1 cup of boiling water and the blue raspberry jello in another cup of boiling water. Stir each until fully dissolved. Add 1/2 cup of cold water to each bowl.
- Pour the Jello: Slowly pour the strawberry jello into half of the holes on the cake and the blue raspberry jello into the other half. Refrigerate the cake for at least 2 hours to allow the jello to set.
- Top with Whipped Cream: Before serving, mix the whipped topping with milk to create a fluffy frosting. Spread it evenly over the cooled cake. Cut, serve, and enjoy your festive dessert!
Fresh Cherry Pie
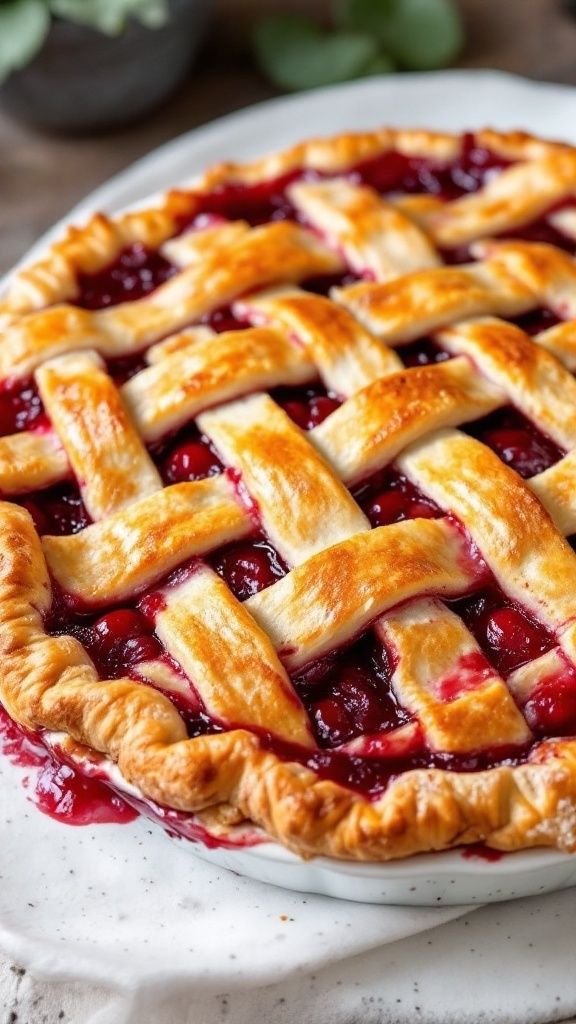
Fresh cherry pie is a delightful dessert that’s both sweet and tart, making it a perfect choice for any gathering. The juicy cherries, combined with a flaky crust, create a comforting treat that’s sure to please everyone. Plus, it’s surprisingly simple to make, even for beginners in the kitchen!
This pie captures the essence of summer with its bright flavors and vibrant color. With each bite, you’ll savor the natural sweetness of the cherries balanced by a hint of tanginess. It’s an excellent way to celebrate Memorial Day and share a piece of homemade goodness with family and friends.
Ingredients
- 4 cups fresh cherries, pitted
- 1 cup granulated sugar
- 2 tablespoons cornstarch
- 1 tablespoon lemon juice
- 1 teaspoon vanilla extract
- 1/4 teaspoon almond extract (optional)
- 1 tablespoon butter, cut into small pieces
- 1 double pie crust (store-bought or homemade)
Instructions
- Preheat the oven to 425°F (220°C).
- In a large bowl, combine the pitted cherries, sugar, cornstarch, lemon juice, vanilla extract, and almond extract. Toss well to coat the cherries and let the mixture sit for about 10 minutes.
- Roll out one pie crust and fit it into a 9-inch pie dish. Pour the cherry mixture into the crust, spreading it evenly. Dot the filling with small pieces of butter.
- Roll out the second pie crust and cut it into strips to create a lattice top. Lay the strips over the cherry filling, weaving them as desired. Seal the edges by crimping them together.
- Bake in the preheated oven for 25-30 minutes, or until the crust is golden brown and the filling is bubbly. Let the pie cool for at least an hour before serving.
Strawberry Pretzel Salad
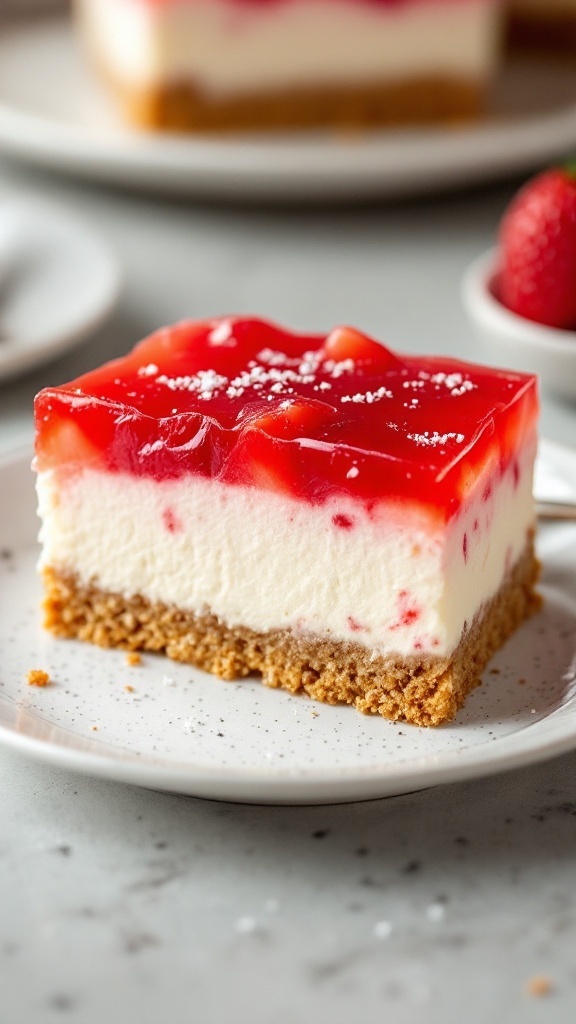
Strawberry Pretzel Salad is a delightful mix of salty and sweet, making it a popular choice for Memorial Day gatherings. The crunchy pretzel crust pairs beautifully with the creamy filling and tangy strawberry topping, creating a dessert that everyone will love. Not only is it visually appealing, but it’s also simple to make, requiring just a few ingredients and minimal effort.
This dish is perfect for warm weather events, as it can be made ahead of time and chilled until ready to serve. With its layers of flavor and texture, Strawberry Pretzel Salad brings a little something special to your table.
Ingredients
- 2 cups crushed pretzels
- 1/2 cup unsalted butter, melted
- 1/4 cup granulated sugar
- 8 oz cream cheese, softened
- 1 cup powdered sugar
- 1 cup whipped topping
- 2 cups fresh strawberries, sliced
- 1 (6 oz) package strawberry gelatin
- 2 cups boiling water
Instructions
- Prepare the Crust: In a bowl, mix crushed pretzels, melted butter, and granulated sugar until well combined. Press the mixture firmly into the bottom of a 9×13 inch baking dish. Bake in a preheated oven at 350°F (175°C) for about 10 minutes, then let cool.
- Make the Cream Cheese Layer: In a separate bowl, beat together the cream cheese and powdered sugar until smooth. Fold in the whipped topping until fully combined. Spread this mixture evenly over the cooled pretzel crust.
- Prepare the Strawberry Layer: In another bowl, dissolve the strawberry gelatin in boiling water. Let it cool slightly, then stir in the sliced strawberries. Pour this mixture over the cream cheese layer.
- Chill the Salad: Refrigerate the dish for at least 4 hours, or until set. Cut into squares and serve chilled.