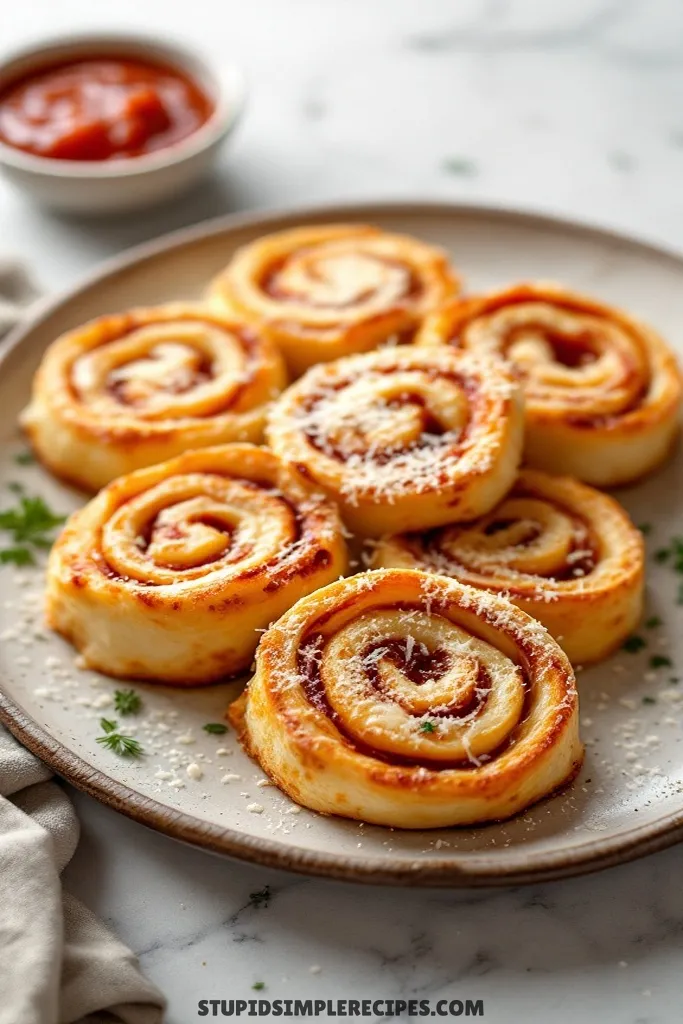
Homemade Pepperoni Pizza Rolls
These pepperoni pizza rolls combine everything great about pizza in a form that’s easier to share and reheat. I started making them for my kids’ after-school snacks, but they’ve become my go-to party food too. The dough gets rolled up with cheese and pepperoni, then sliced into spirals that bake up crispy on the outside and gooey in the middle.
What I love is you can prep them ahead and bake right before serving, or make a big batch and freeze some for later. They’re perfect for game days, potlucks, or any time you need crowd-pleasing finger food that won’t leave grease stains on the couch. Plus, they’re way better than the frozen ones from the store.
How to make Homemade Pepperoni Pizza Rolls
Ingredients You’ll Need For This Recipe
- 1 package refrigerated pizza dough (or 1 recipe of homemade pizza dough)
- 1 cup pizza sauce
- 2 cups shredded mozzarella cheese
- 1 cup diced pepperoni
- 2 tablespoons butter, melted
- 1 teaspoon Italian seasoning
- 1/2 teaspoon garlic powder
- 1/4 cup grated Parmesan cheese
Homemade Pepperoni Pizza Rolls
Hey there! Let me walk you through making these irresistible pizza rolls. I make these all the time and have figured out all the little tricks to get them just right.
1. Start by preheating your oven to 375°F. Line a large baking sheet with parchment paper – trust me, this prevents any cheese from sticking and makes cleanup so much easier.
2. On a lightly floured surface, roll out your pizza dough into a large rectangle, roughly 15×10 inches. You want it thin but not so thin that it tears – about 1/4 inch thick is perfect. If the dough keeps springing back, let it rest for 5 minutes and try again.
3. Spread the pizza sauce evenly over the dough, leaving about a 1-inch border along one long edge – this will help seal your roll. Don’t go too heavy with the sauce or it’ll make rolling tricky and leak out the sides.
4. Sprinkle the mozzarella cheese evenly over the sauce, then distribute the diced pepperoni. Press them down slightly so they stick to the cheese and sauce – this makes rolling much easier.
5. Starting from the long edge (opposite from your clean border), tightly roll up the dough like a jelly roll. Pull back slightly with each roll to keep it nice and tight. When you get to the end, pinch the seam firmly to seal it, and place the roll seam-side down.
6. Using a sharp serrated knife (I find a bread knife works best), cut the roll into 12 even pieces. The trick is to use a gentle sawing motion rather than pressing straight down, which can squish your rolls.
7. Place the rolls on your prepared baking sheet, leaving about 2 inches between each one – they’ll expand while baking. Mix the melted butter with Italian seasoning and garlic powder, then brush this mixture generously over each roll.
8. Sprinkle the Parmesan cheese over the tops. The cheese will create a delicious golden crust while baking.
9. Bake for 20-25 minutes, or until the rolls are golden brown and the cheese is bubbly. You’ll know they’re done when you can see the cheese bubbling and the bottom edges are a deep golden color – lift one roll slightly with a spatula to check.
10. Let them cool for about 5 minutes before serving. The filling will be extremely hot right out of the oven, and giving them a few minutes helps the cheese set up so it doesn’t all run out when you bite in.
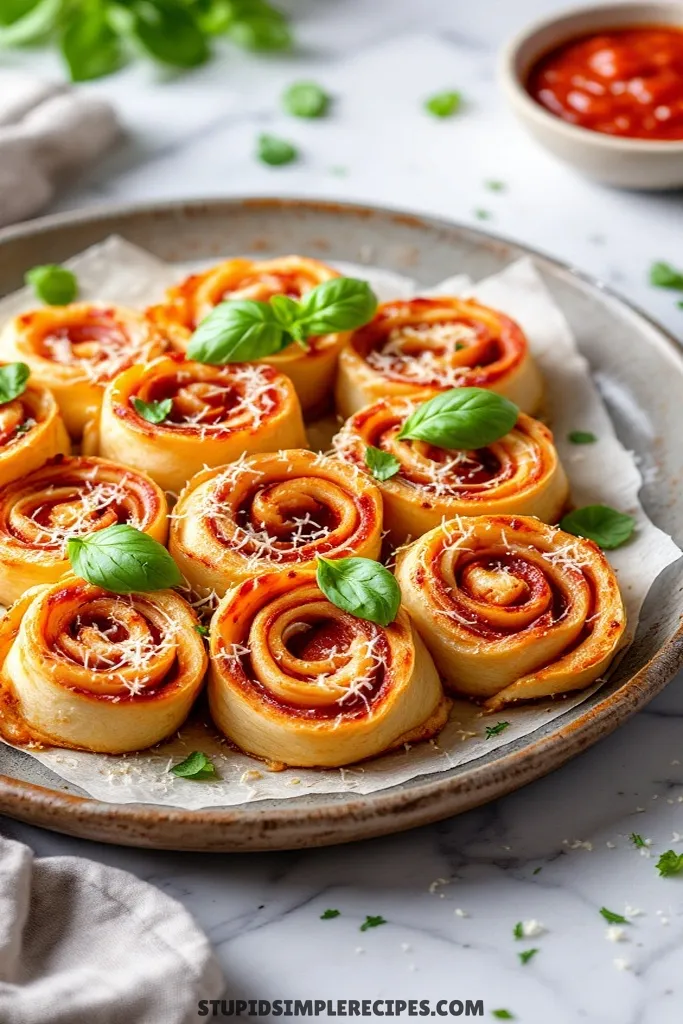
Serve warm and enjoy! These are best fresh from the oven when the cheese is still gooey and the outside is perfectly crispy.
🔍 Recipe Notes & Tips
- Store-bought pizza dough works great – just let it come to room temp (30-45 mins)
- Pat pepperoni with paper towels to remove excess grease
- No pizza sauce? Use marinara in a pinch
- Roll dough on parchment for easy transfer
- For extra cheesy rolls, sprinkle some inside AND on top
- Cutting tip: Mark roll in half, then quarters, then thirds for even pieces
🍽️ Serving Suggestions
- Classic pairing: Cold beer or Italian red wine
- Family-friendly drinks: Italian sodas or lemonade
- Dipping sauces: Extra warm marinara or ranch
- Side salad with Italian dressing cuts the richness
- Serve with pepperoncini or pickled veggies
🎯 Make it Work for
- Game day: Make a double batch, serve room temp
- Kids’ party: Cut smaller rolls (16 instead of 12)
- Potluck: Transport uncooked, bake on-site
- Appetizer: Mini versions using half the dough
- Lunch boxes: Wrap individually when cool
📦 Storage & Leftovers
- Counter: 2 hours max
- Fridge: 3-4 days in airtight container
- Freezer: Up to 2 months (freeze unbaked)
- Reheat: 350°F for 5-7 mins or microwave for 20-30 secs
- Best eaten within 24 hours for optimal texture
Homemade Pepperoni Pizza Rolls
Ingredients
- 1 package refrigerated pizza dough or 1 recipe homemade pizza dough
- 1 cup pizza sauce
- 2 cups shredded mozzarella cheese
- 1 cup diced pepperoni
- 2 tablespoons butter melted
- 1 teaspoon Italian seasoning
- 1/2 teaspoon garlic powder
- 1/4 cup grated Parmesan cheese
Instructions
- Preheat the oven to 375°F and line a large baking sheet with parchment paper to prevent cheese from sticking.
- Roll out the pizza dough on a lightly floured surface into a 15×10 inch rectangle, about 1/4 inch thick. Let the dough rest for 5 minutes if it keeps springing back.
- Spread pizza sauce evenly over the dough, leaving a 1-inch border along one long edge to help seal the roll.
- Sprinkle mozzarella cheese over the sauce and evenly distribute diced pepperoni, pressing them down slightly to stick.
- Starting from the long edge, tightly roll up the dough like a jelly roll, pulling back slightly with each roll. Pinch the seam to seal it and place the roll seam-side down.
- Using a sharp serrated knife, cut the roll into 12 even pieces with a gentle sawing motion.
- Place the rolls on the prepared baking sheet, leaving 2 inches between each. Brush melted butter mixed with Italian seasoning and garlic powder over each roll.
- Sprinkle Parmesan cheese on top for a golden crust while baking.
- Bake for 20-25 minutes, or until the rolls are golden brown, the cheese is bubbly, and the bottom edges are deep golden.
- Let the rolls cool for 5 minutes before serving to allow the cheese to set and avoid hot filling spilling out.